Recording with Teleprompter Pro
Guide for recording with OBS and Teleprompter Pro
Adding Scripts to the Teleprompter
Step 1. Create your source material
This can be done in any text editor or word processor such as Microsoft Word. Remember that formatting will not transfer over to the Teleprompter Pro Script.
Step 2. Transfer the text to a new Script in Teleprompter Pro
Open the Teleprompter Pro app.
![]()
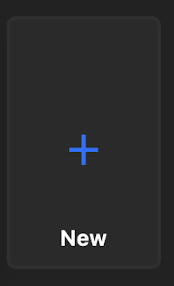
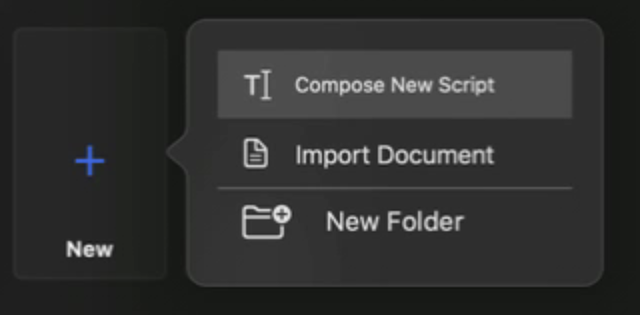
In the Teleprompter Pro app, click “+ New” tile, and select "Compose New Script" from the list.
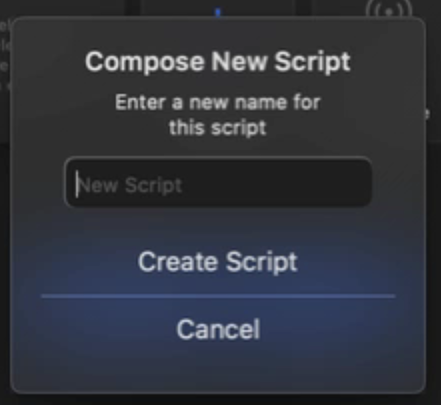
Type in a title for your script and click "Create Script." You should be presented with a blank canvas to place your text.
Open your source material file on the Zoom iMac, e.g. Microsoft Word.
Select the text for your script and copy it. Then back in the Teleprompter Pro app, paste the text into the app.
Step 3. Make any edits or final adjustments to make the script easier to read.
You may need to make any other final adjustments such as new lines to separate paragraphs or sections. When you are finished, click "Done." To return to the list of Scripts, click the "My Scripts" button in the top left of the app.
These scripts should synchronize onto your Teleprompter iPad.
Starting the Teleprompter for Control
Step 1. Prep the Teleprompter iPad
Wake the iPad by pressing the home button and get past the wake screen. If the Teleprompter app is not already open, go to the home screen and launch the Teleprompter app. It should be located on the far left side of the dock along the bottom of the screen. Most of the time the app won’t need to be launched, it will already be open.
Open the script you'd like to record. Remember that a script opened on the Zoom iMac will need to be closed/"Done" so that it can be synced to the iPad.
Note: If on the iPad the Teleprompter app was already open, you’ll have to tap “My Scripts” in the top left corner of the iPad screen before you can see all scripts (in order to open the one you want.)
Step 2. Control the iPad from the Zoom iMac
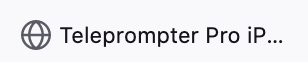
On the Zoom iMac, open Firefox and locate the “Teleprompter Pro” selection in the Bookmarks Toolbar, as shown here:
Alternatively, you can click the globe icon in the Dock which should open the bookmark in Firefox.

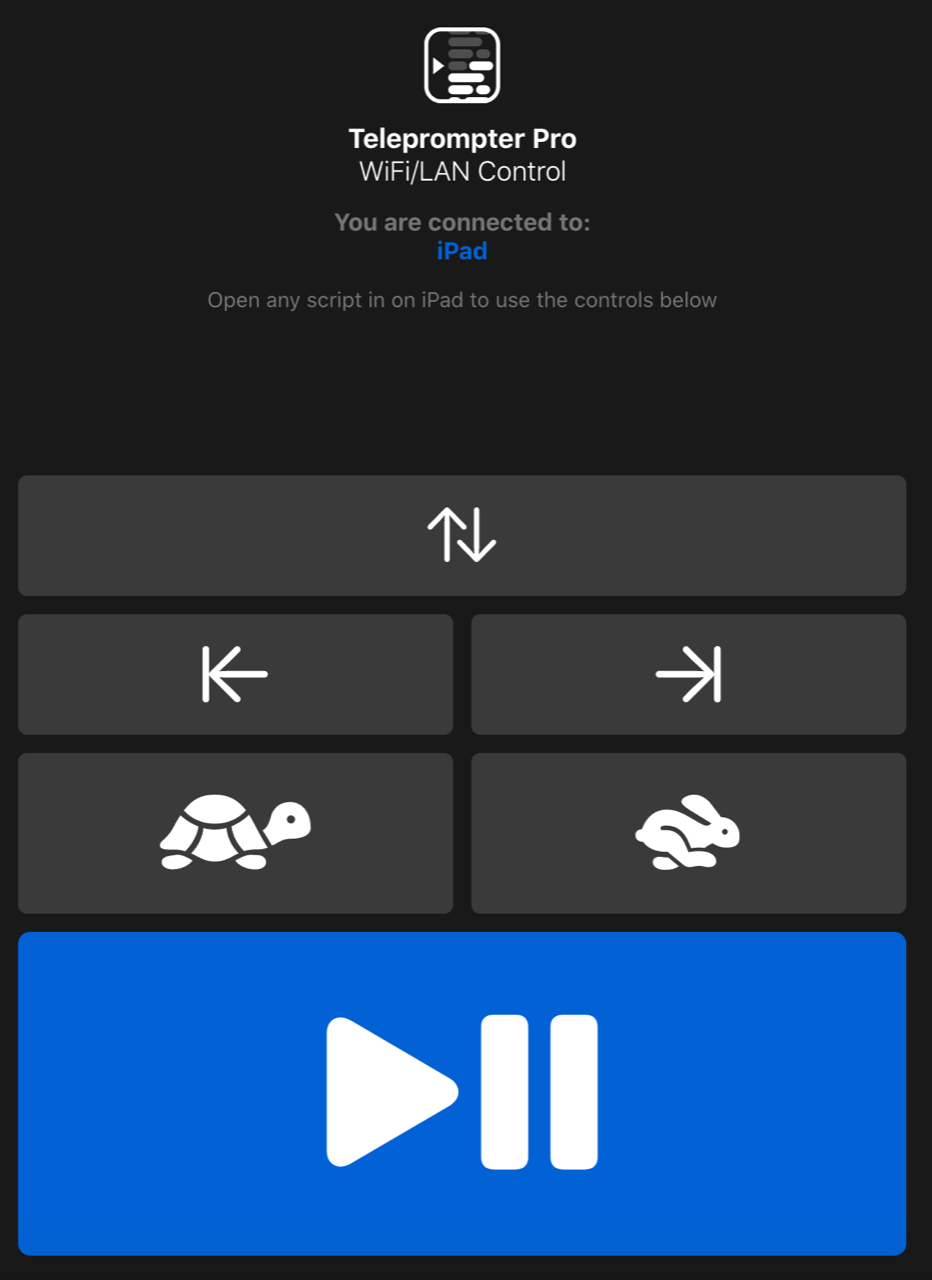
If successful you’ll see a window like this open:
Recording a Take in OBS
Step 1. Open OBS from the Dock
From the Dock, launch the OBS app. The icon looks like the following:
![]()
Step 2. Start a Recording by pressing the "Start Recording" button
Press the "Start Recording" button on the right side of the app.
 Do not click the "Start Streaming" button!
The "Start Recording" button will turn blue and now read "Stop Recording." There is also an indicator at the bottom of the app to show you are recording along with the time elapsed.

Switch to Firefox to start the teleprompter. Read your script through the teleprompter glass. Use the controls in the Firefox window to control the Teleprompter text.
Step 3. Finish the Recording
When you're finished, switch to OBS and click the blue "Stop Recording" and a new .MP4 file should be created and placed into a folder within Dropbox. The folder is named "Micro Modules" but if the folder name is changed, the .MP4 video files may not be placed into that folder until a setting in OBS has been corrected to match it.
If you’d like to record another video, simply click the "Start Recording" in the OBS app again. Don't forget to stop the recording when finished!