iOS - iPhone & iPad - test with sections
###Step 1: Visit the webpage {#custom-id}
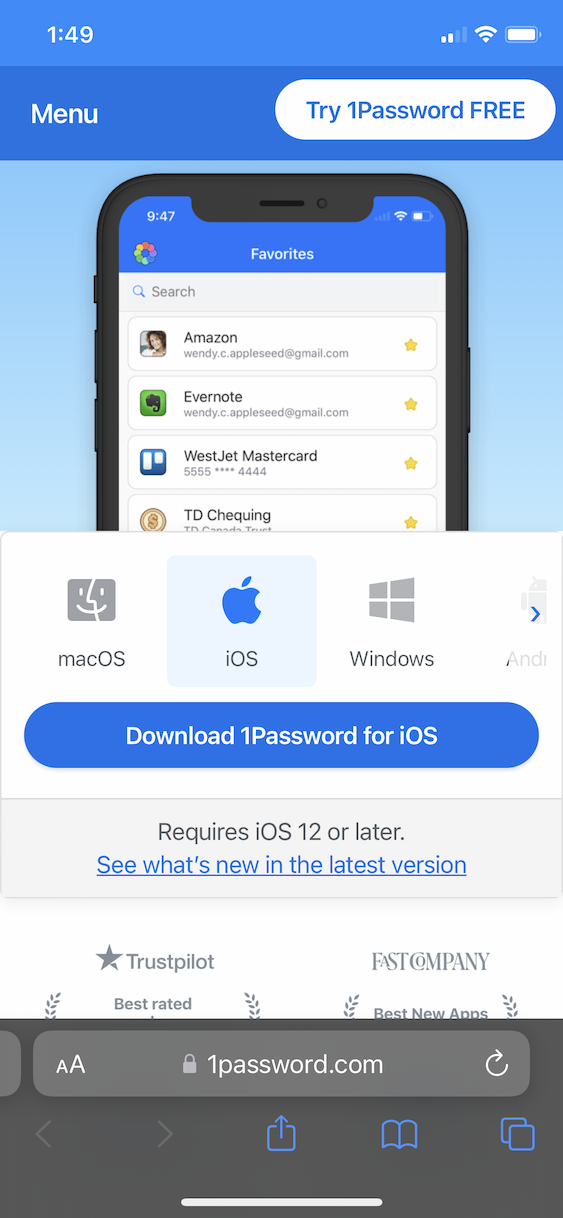
Enter this link on your device: https://1password.com/downloads/ios/
1
2
3
4
5
6
1
2
3
4
5
6
##Step 2: *Click*
Tap on the blue "Download 1Password for iOS" button
###Step 3: Download
Tap on the Install button and wait while the app loads onto your phone.
####Step 4: Open App & Add Account
You'll see this screen:
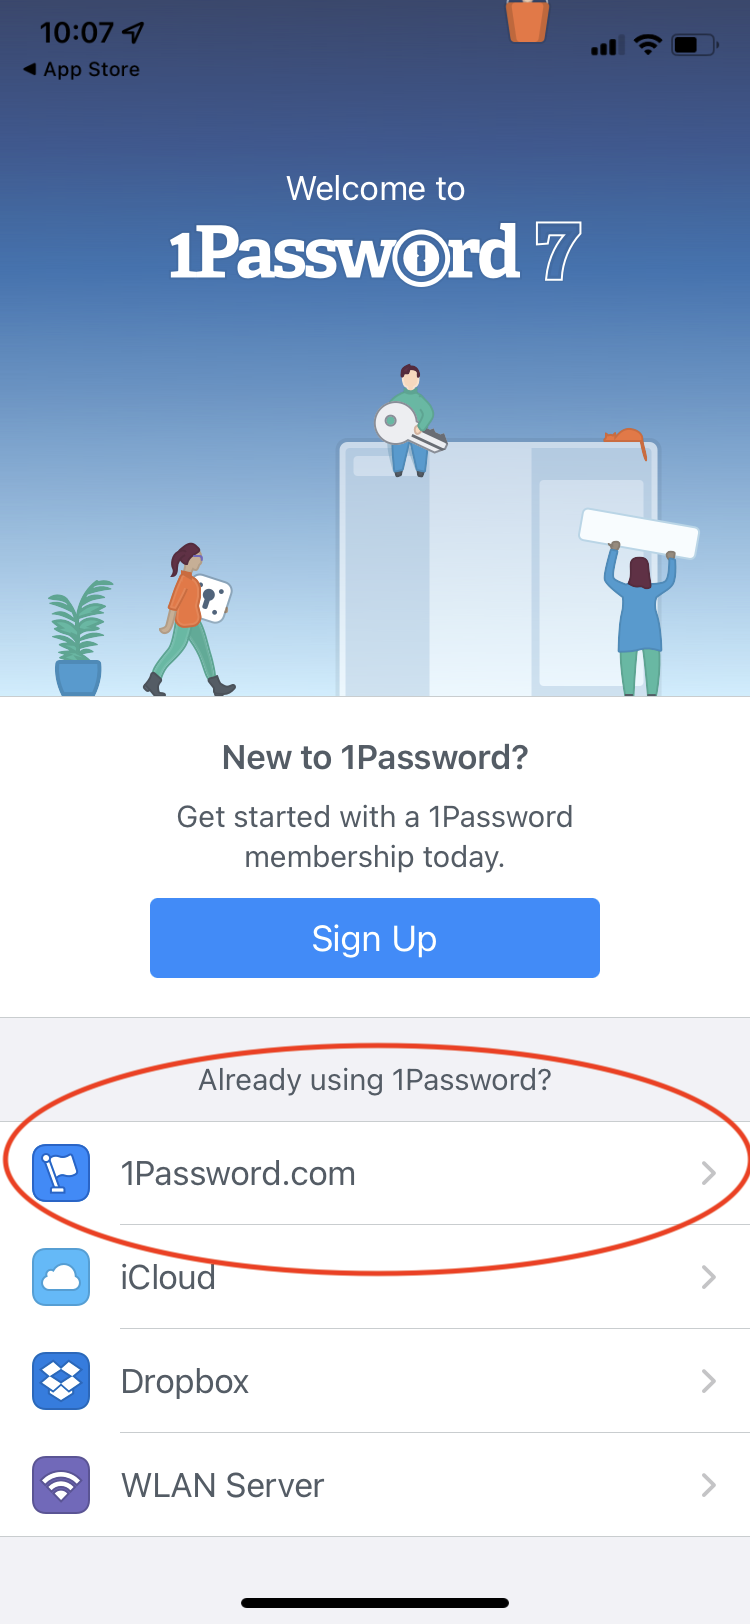
Under the Already using 1Password? question please click on 1Password.com .
Next screen:
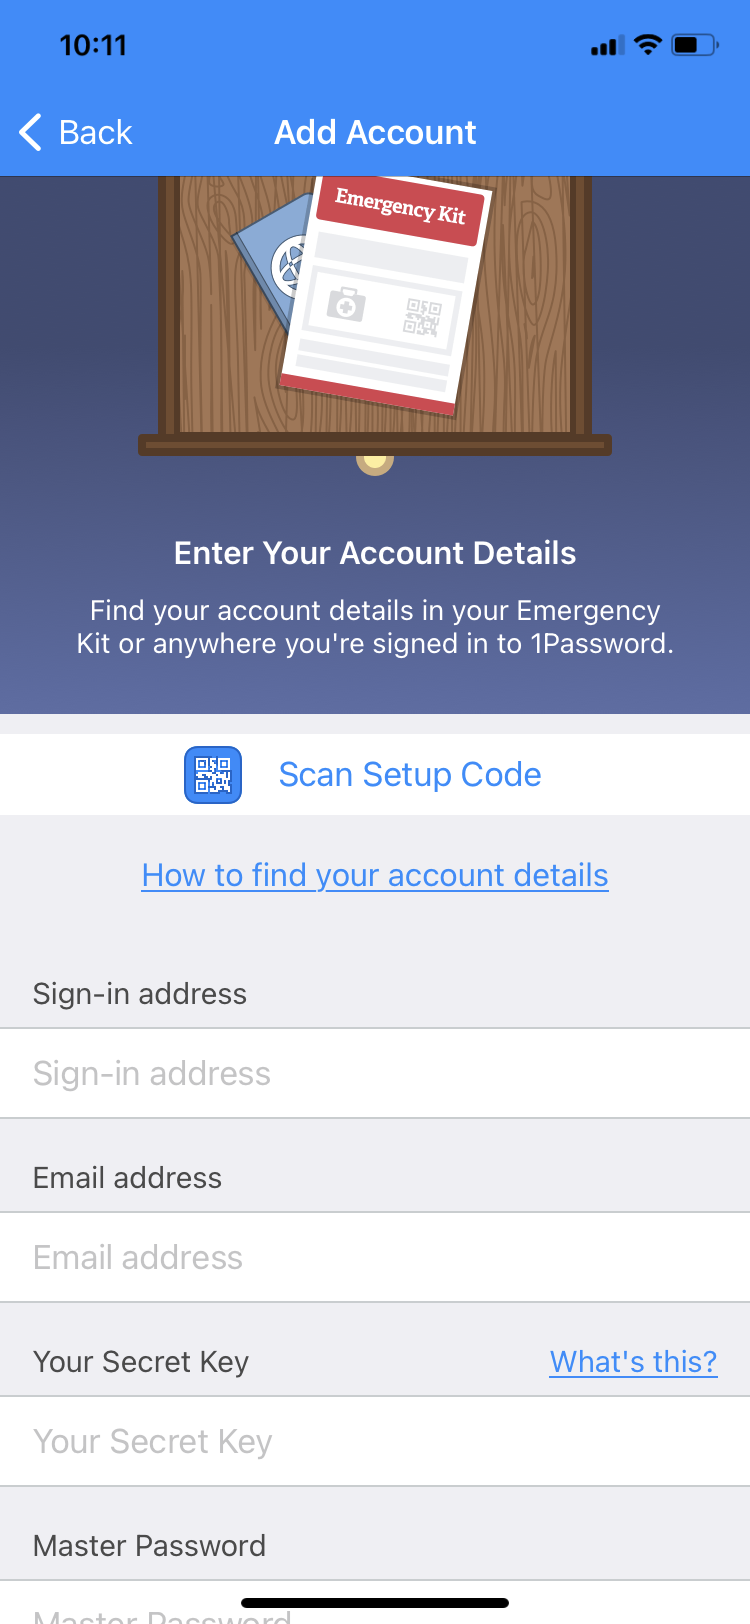
Two ways to do this:
1) Manually. Use all the URL, Secret Key, Username, and Password to fill in as needed on your phone. TG does not recommend the full manual approach, but it is an option. Either way, after initial setup only the password will ever be needed.
2) Scan the setup code.
How do I get the setup code?!? Follow these steps:
• Prep by loading the website on your desktop machine, should be similar to companydomain.1password.com. If you locate your 1Password entry in your named vault, clicking Open & Fill should work, then head to your name in the top right -> My Profile.
• Click Show on the Setup Code. (Looks very similar to a QR code.)
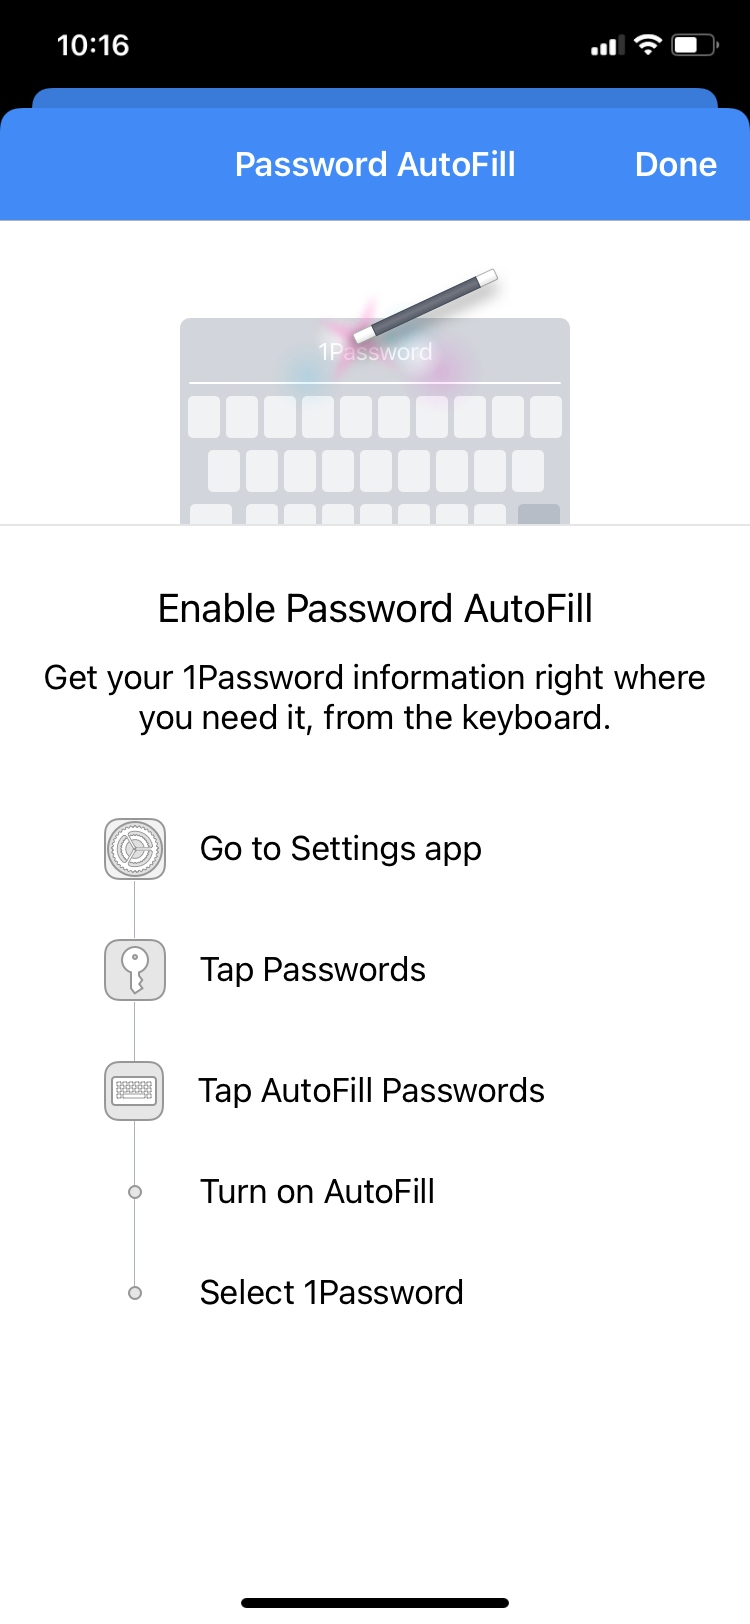
• Back on your phone, either as part of the guided assistant (tap Scan Setup Code as shown above)
Or if you're doing it later, by going to Settings ➝ Add Existing Account ➝ Scan Setup Code.
• Now use the camera to capture the setup code on your screen.
The app will request access to the camera, please allow access if you want this easier method to work.
• Type in your password and finish adding the account.
Note: Do not select Move Data if that option pops up.
Continuing setup assistant you'll see this screen:

Please choose Not Now - we don't want the 1Password password saved anywhere else. Having access via your phone and your computer, mostly via biometric authentication, should be enough to provide any password at any time. Continue with the other directions shown here:
It is recommended to turn off other password filling mechanisms, but this is not right for every situation. If you have a lot of passwords in another system, migration is usually needed to make the transition seamlessly, so it may make sense to delay disabling existing password autofillers until you migrate to 1Password Families for personal data, even though it makes daily use one step more difficult.
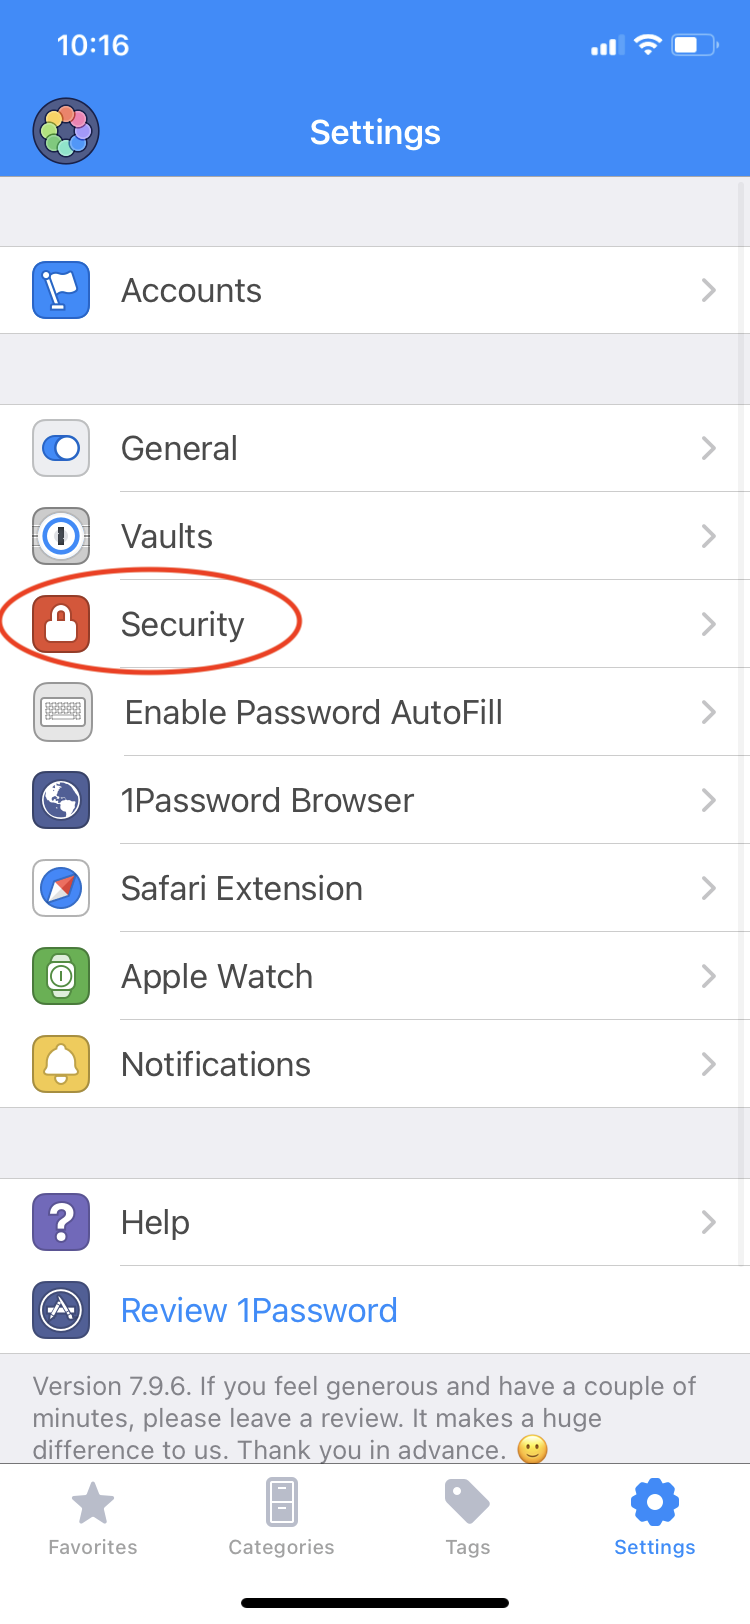
Step 5: Configuration (required!)
- Settings icon in the lower right ➝ Security:
- Turn off
Lock on Exit- it is super annoying when you're trying to edit things or copy and paste on the rare unsupported site, even if it is more secure. (This setting not required.) - Set Auto-Lock to 2 minutes or less.
- Turn on FaceID or TouchID
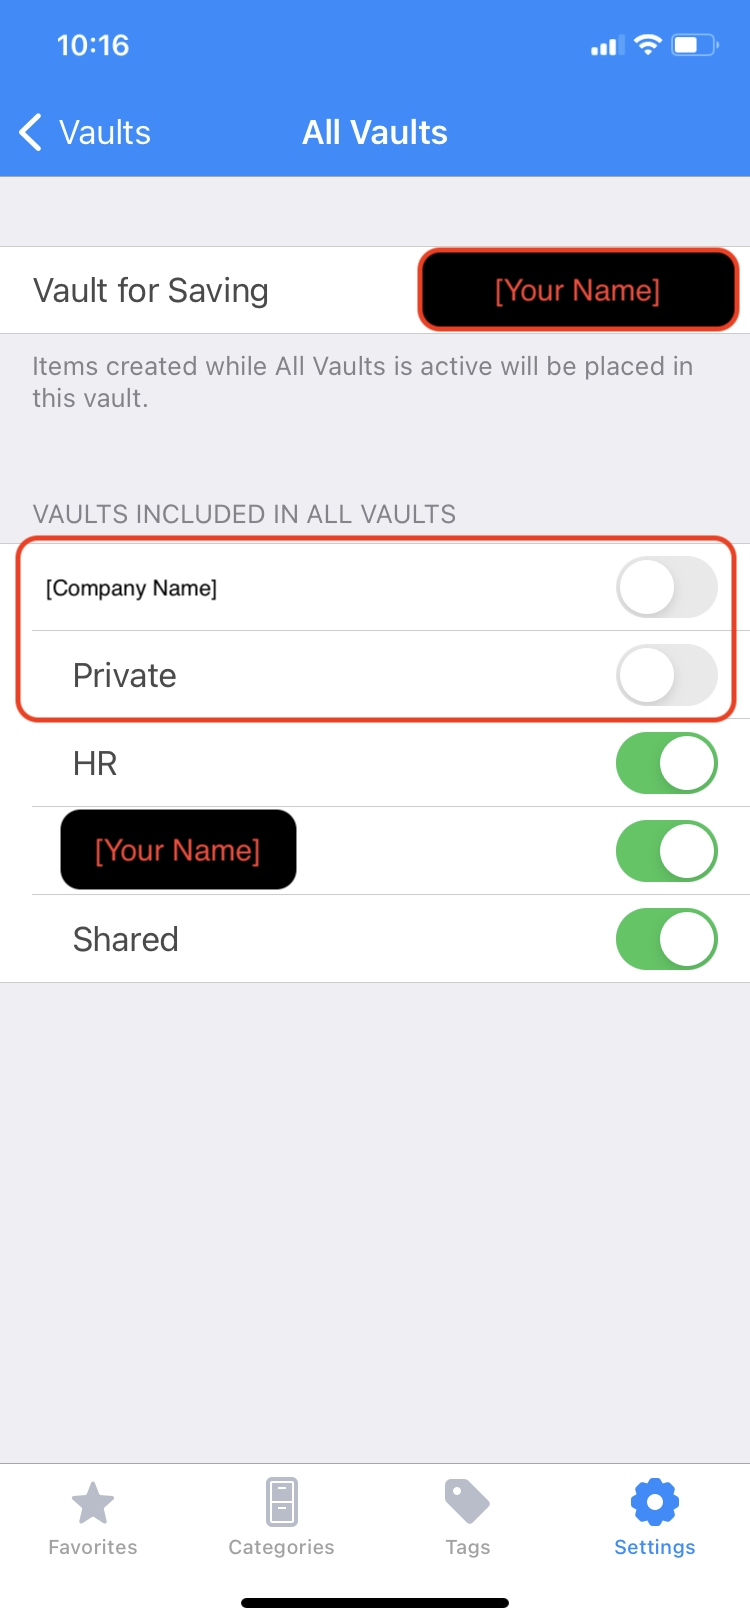
- Settings ➝ Vaults
• At the top of this page, tap Vault for Saving and change it to your named vault.
• Tap All Vaults and uncheck Private.
• Should look like this but customized for you: