Apple (iPhone/iPad/Apple Watch)
Step 1: Visit the webpage (App Store)
Enter this link on your device:
https://apps.apple.com/us/app/1password-password-manager/id1511601750
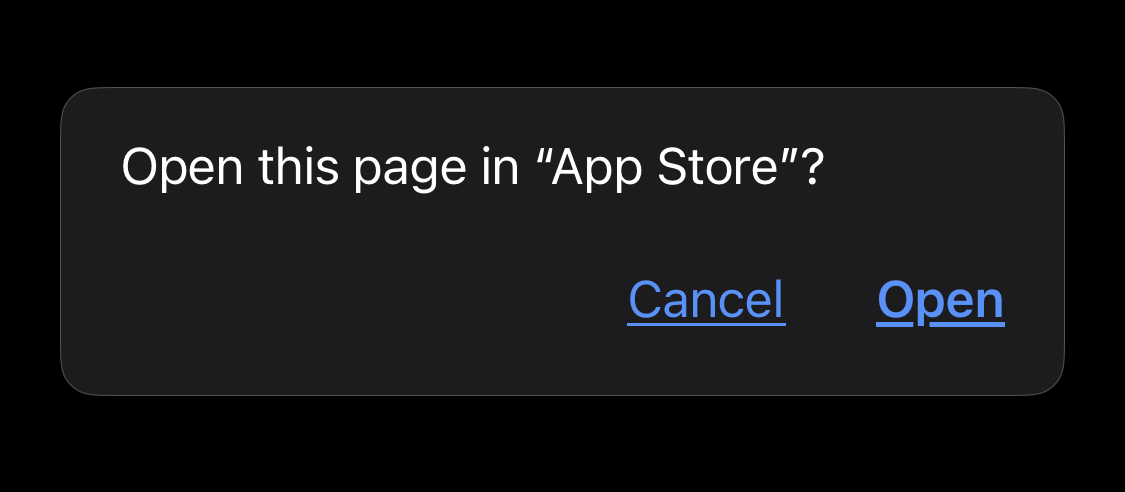
You may be prompted to Open this page in the "App Store" and that is OK. Just hit Open. If there is no prompt, you should be redirected automatically to the App Store.
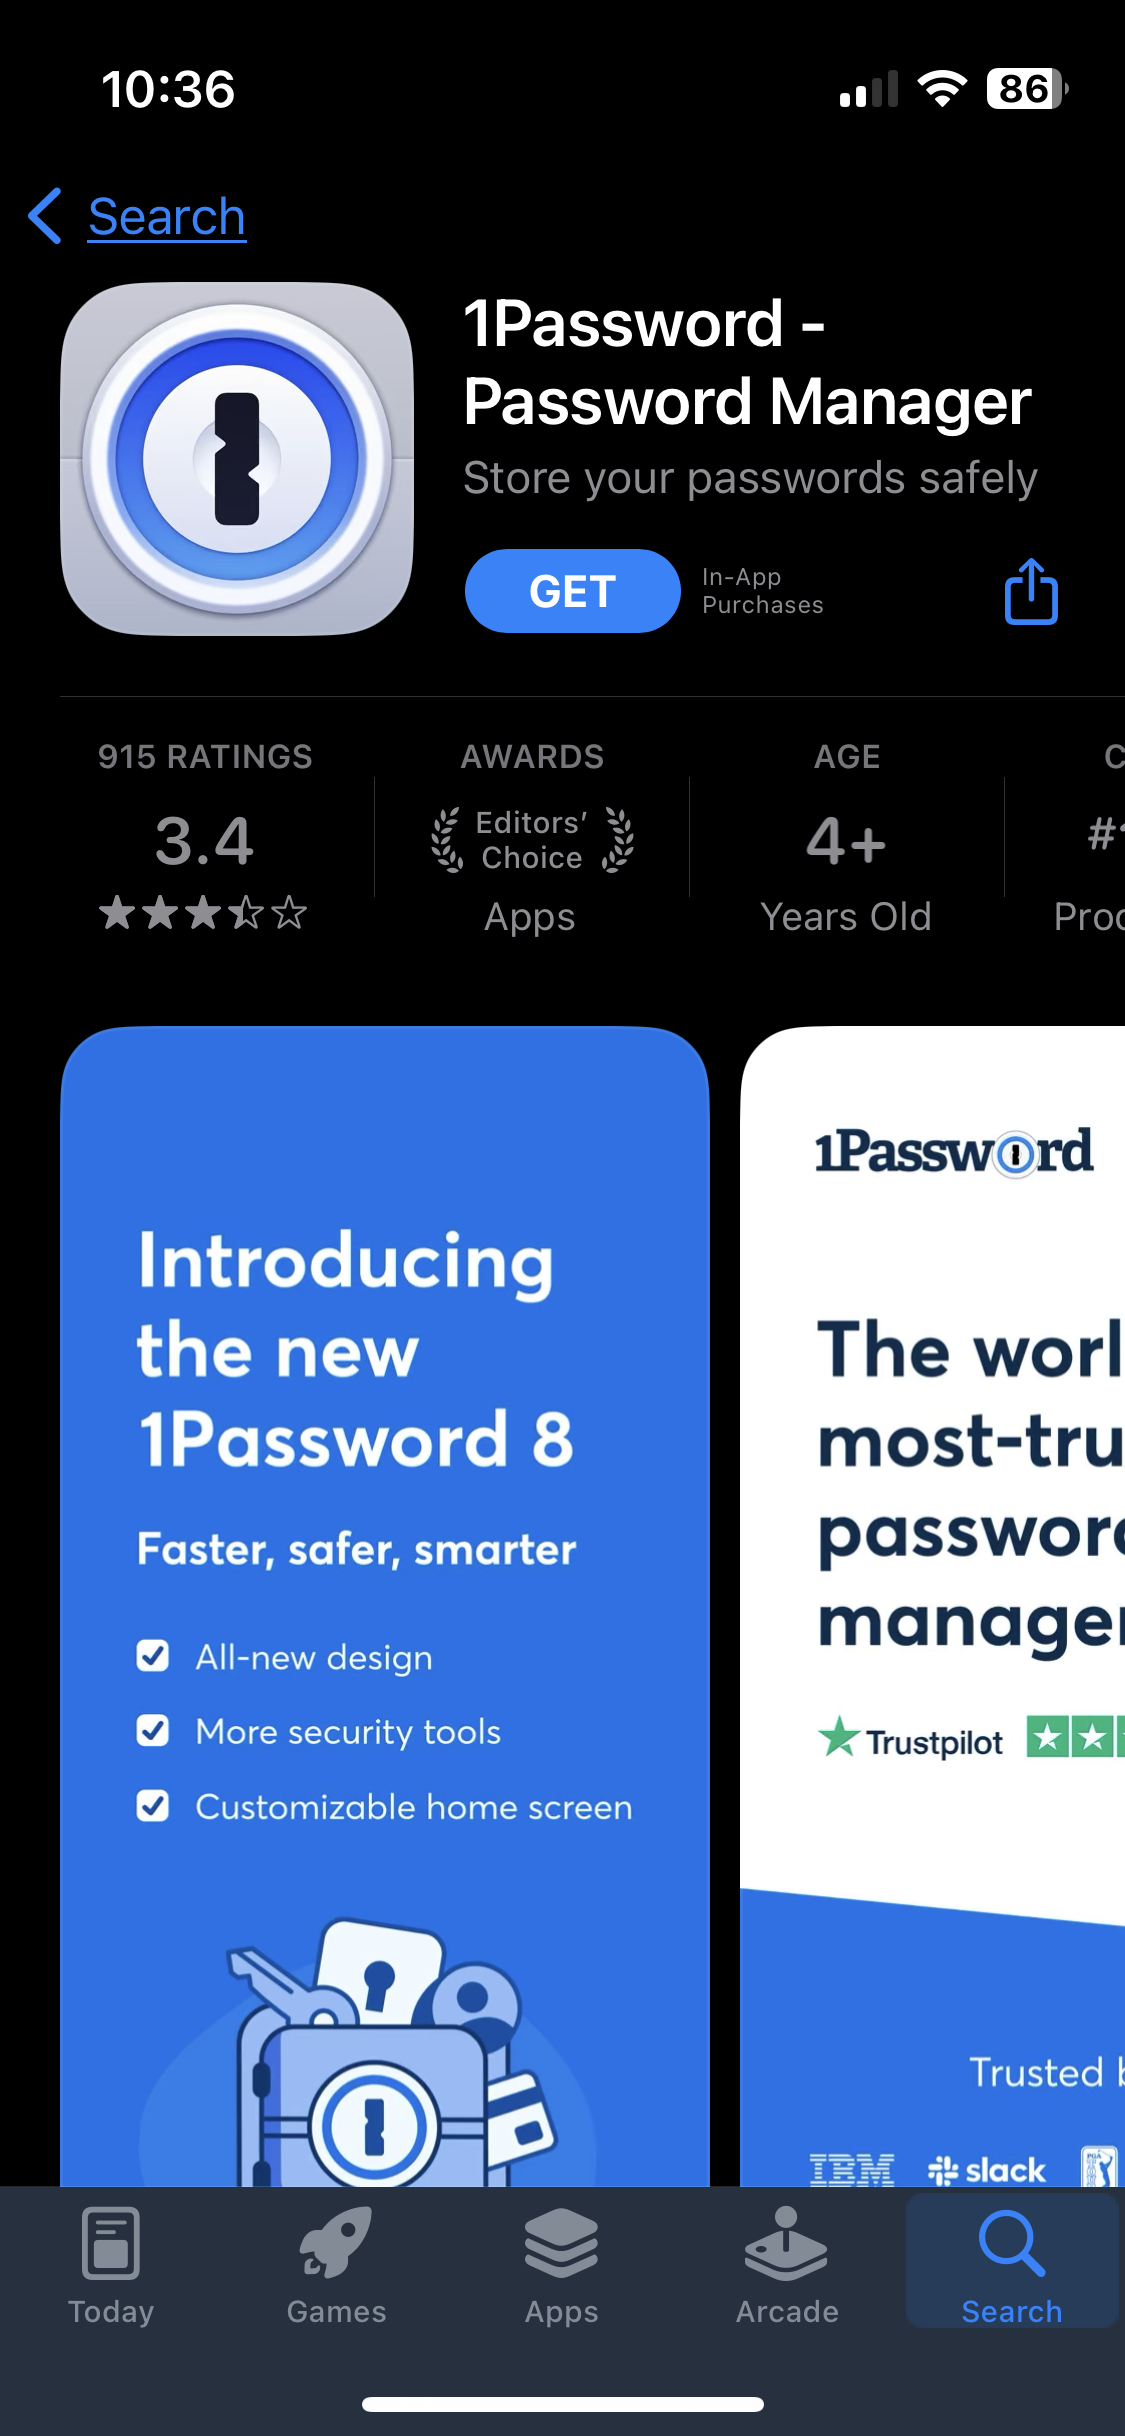
Step 2: Get the App
Tap on the blue "GET" button. The download should begin.
(Note: Depending on your personal settings, you may also be prompted for your Apple ID password.)
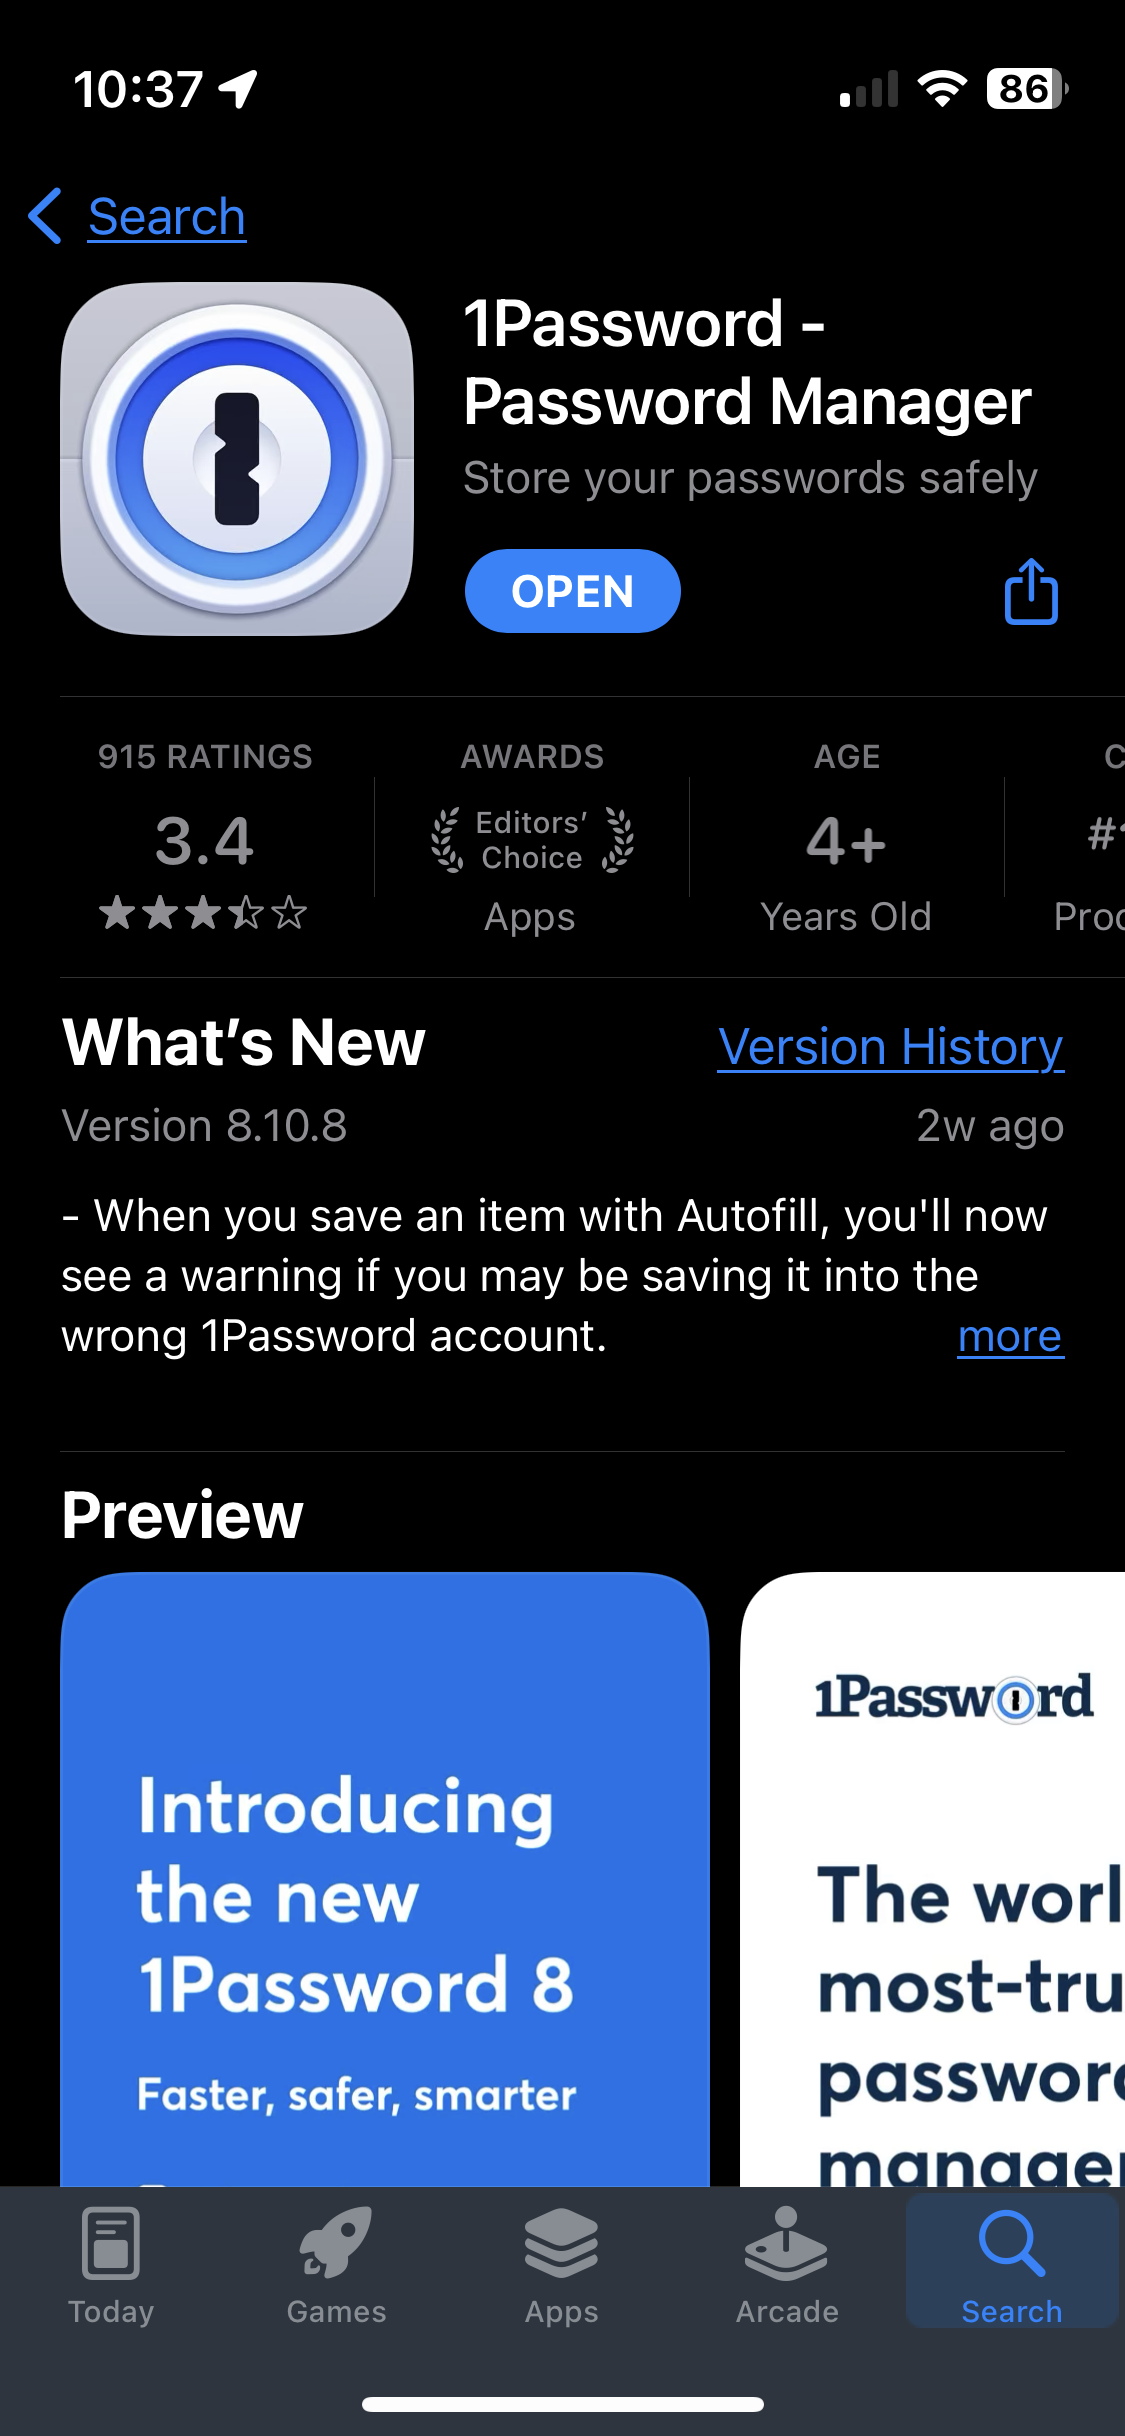
Step 3: Open App
Once the app is installed, you can tap the "OPEN" button if you're still in the App Store or you can find the app on your Home Screen.
Step 4: Add Account
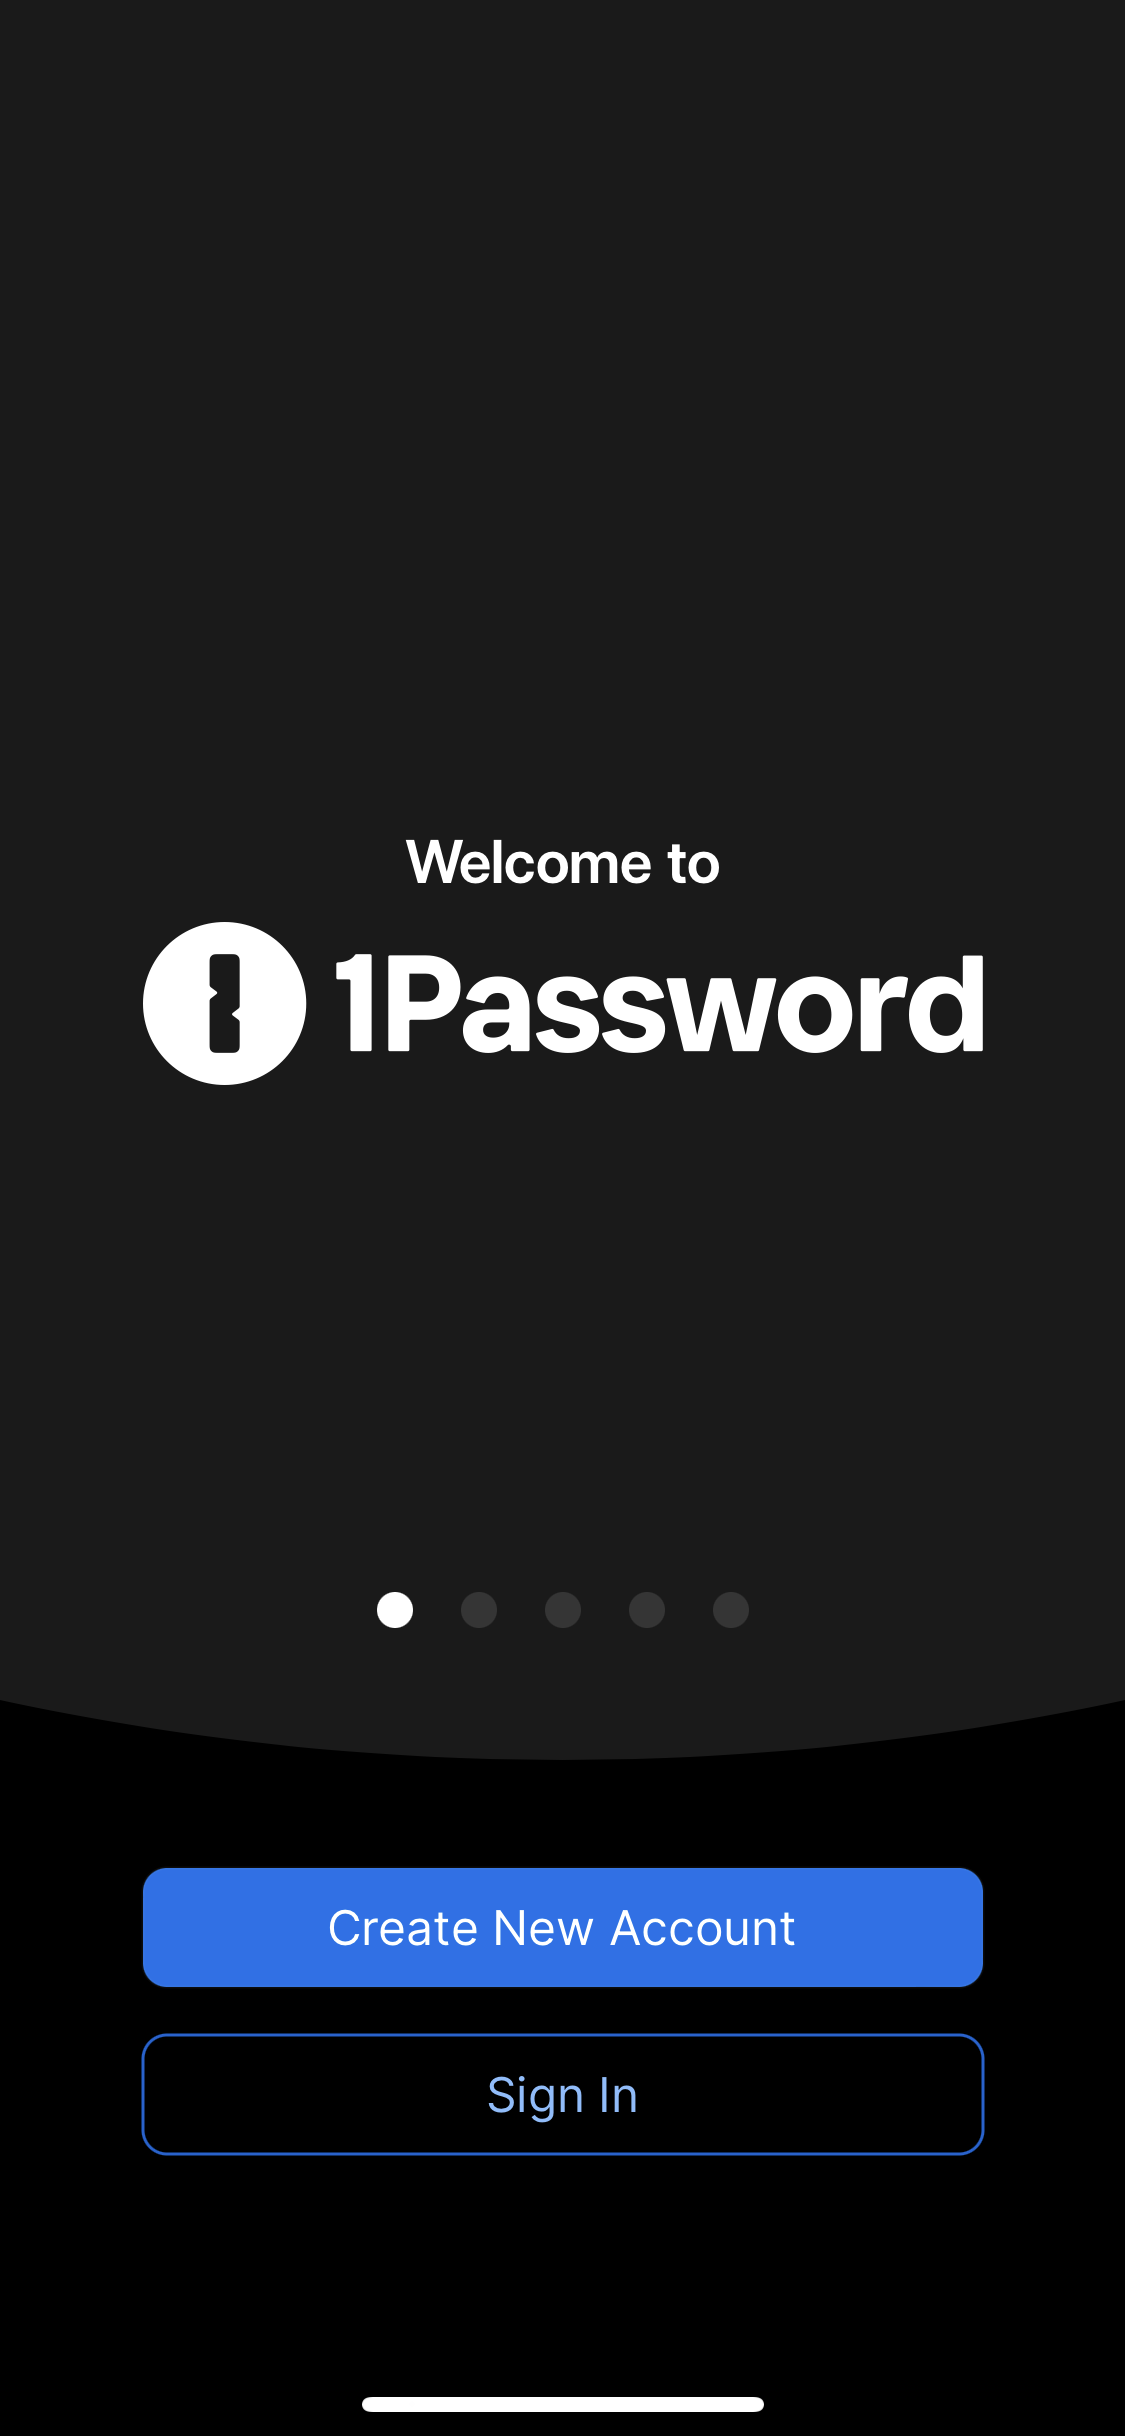
Once in the app, you'll see the welcome screen. Hit Sign In to continue.
(Note: If you're adding an account after one has already been added to the app, you may need to go to Settings ➝ Accounts ➝ Add an Account to add a second account.)
There are two methods we use for adding the account:
-
🪄Scan Setup Code (recommended) -
🖐️Enter account details manually
We will cover both here, but for convenience we recommend using the Setup Code.
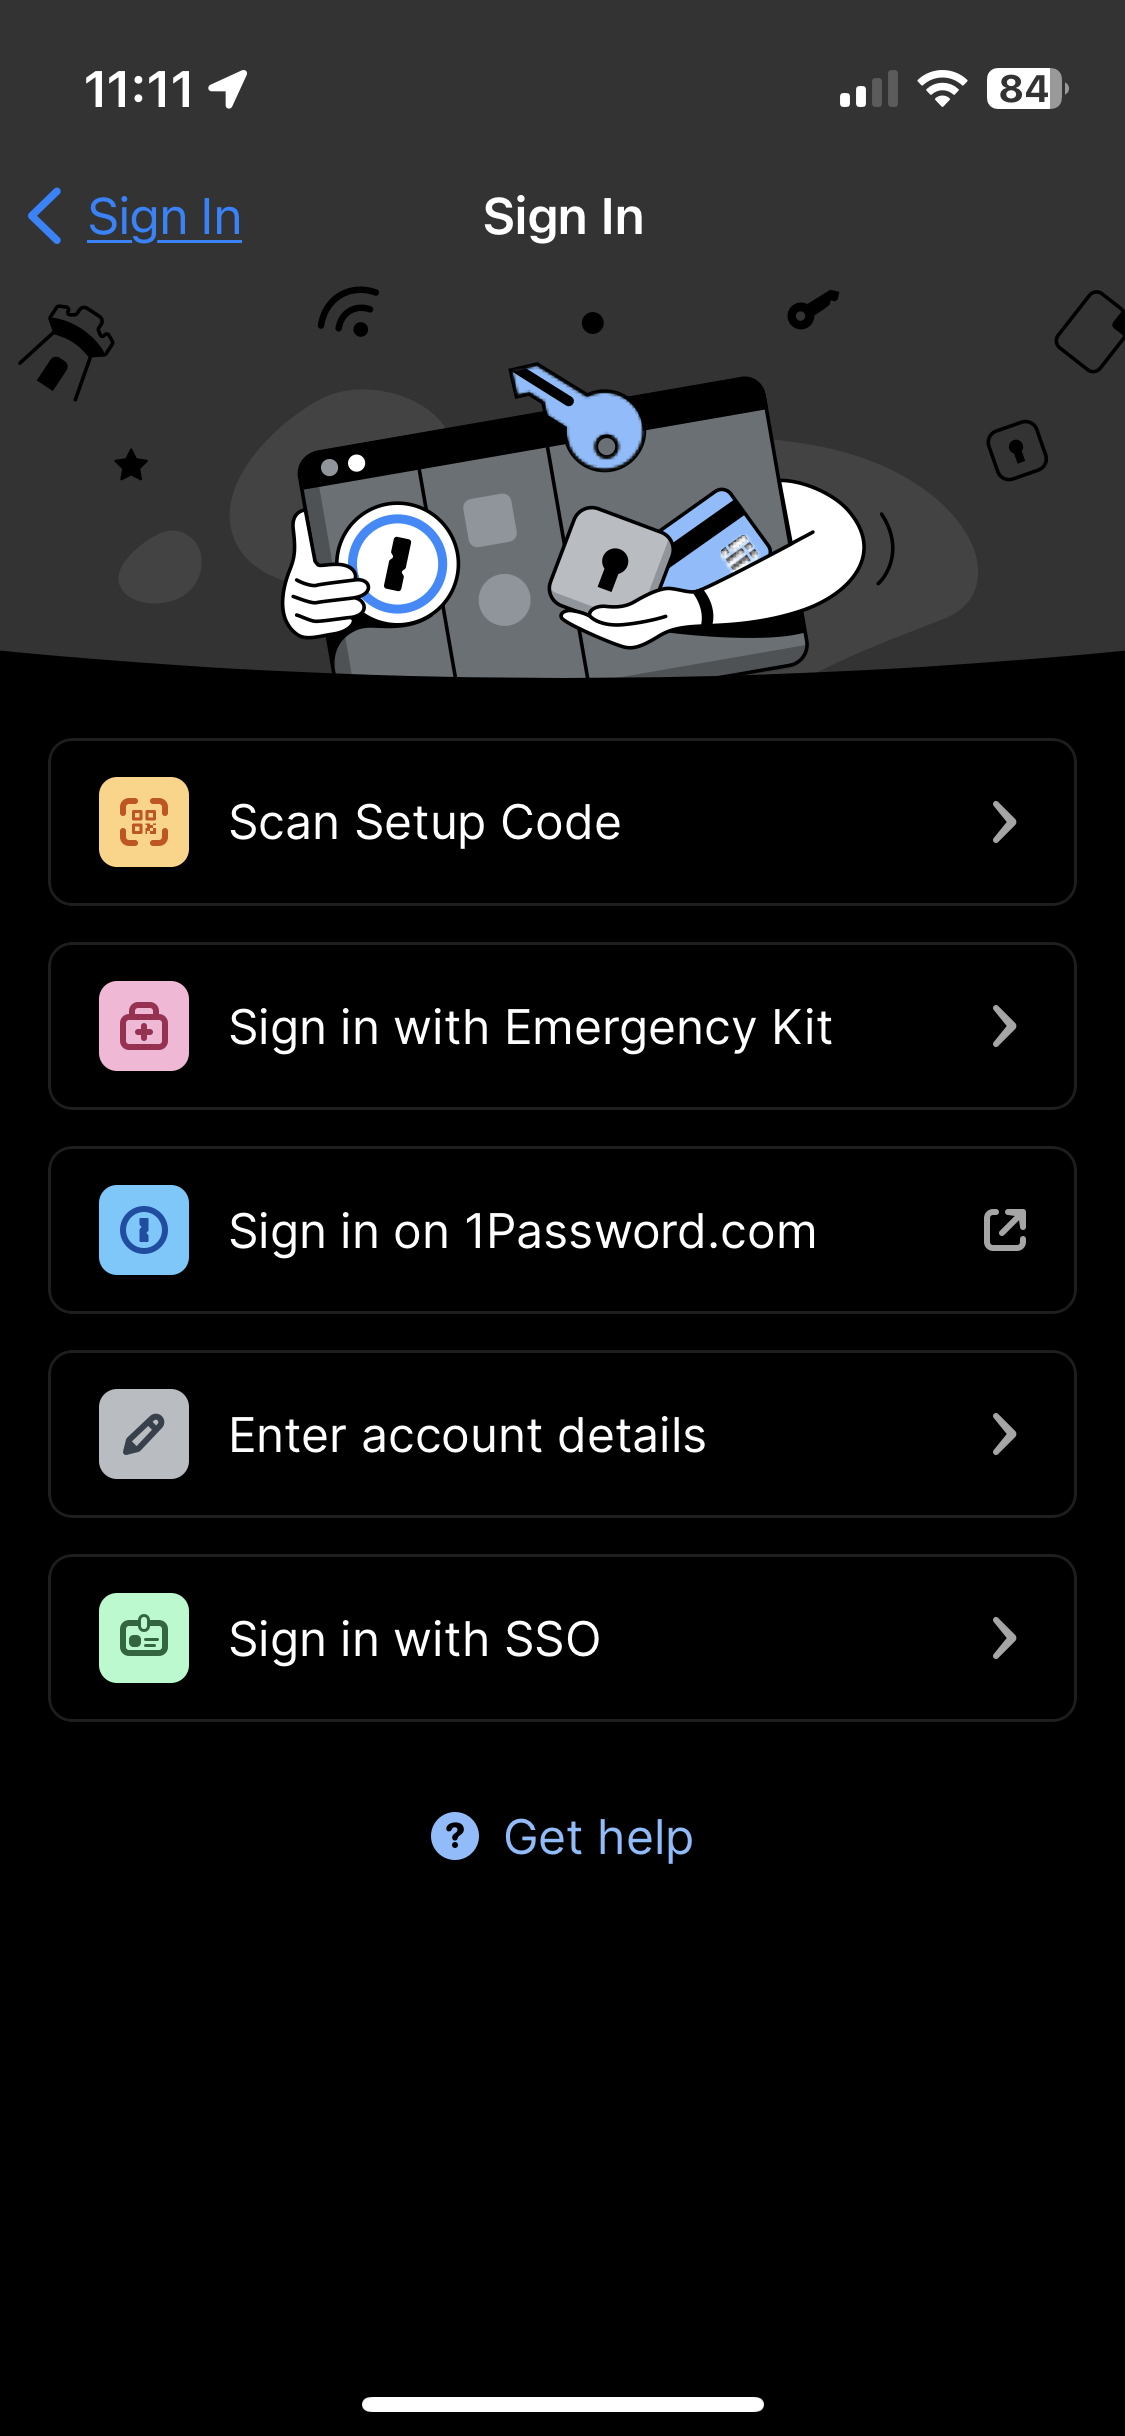
Method 1: Scan Setup Code 🪄
Getting your Setup Code
"How do I get the setup code?!?" Don't worry. It's easy.
There are two ways to get a setup code:
-
🖥️1Password desktop app (recommended) -
🌐1Password website through a browser
We will cover both here, but we recommend using the 1Password desktop app.
🖥️
- Option 1 -1Password desktop app: "Set Up Another Device..."
(Note: This is the first method to get your Setup Code. If you cannot complete this, try the other method. If you already have your code, skip to the Scanning your Setup Code section.
📷)You should have already gone through the setup process for the 1Password app on your desktop/laptop computer or someone may have already done it for you. But if you haven't (or you don't even have the desktop app) you'll need to complete that setup in order to continue here. Talk to IT if you need help.
On your desktop computer...
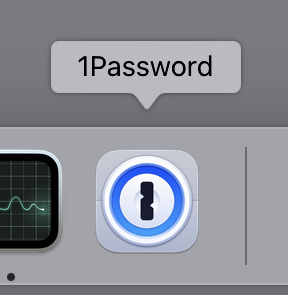
Activate the 1Password app by clicking on its window or the app icon in the Dock.
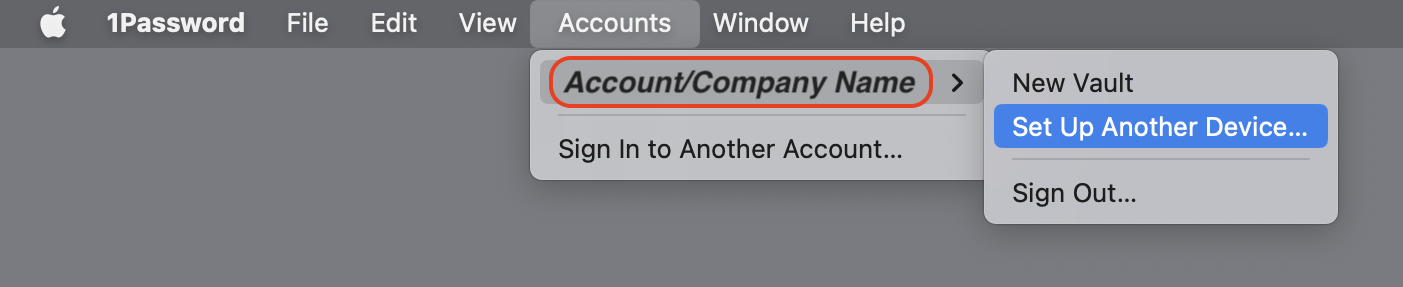
Head up to the Accounts ➝
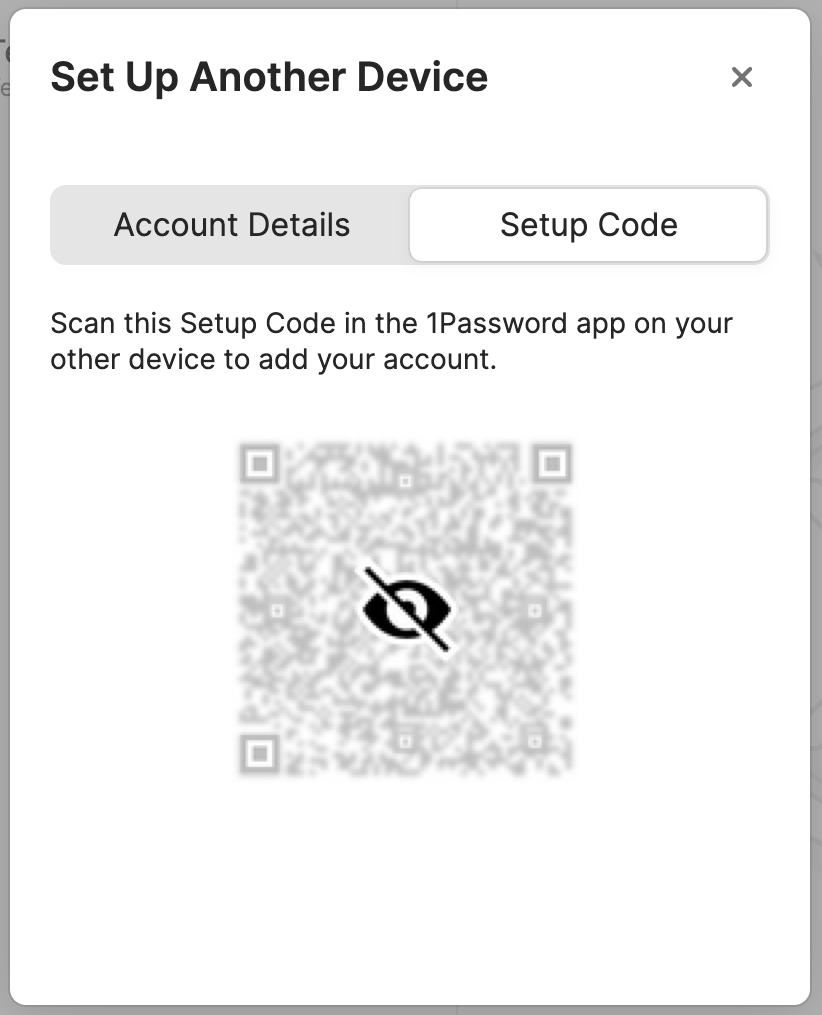
Account/Company Name➝ Set Up Another Device... menu option and click it.
Then in the 1Password app window, a popup should have appeared.
Click on the Setup Code tab and aYour QRcode willshould berevealedvisibiletoinyou.that popup.
Do not print, screen capture, or otherwise reproduce your QR code. Only use the 1Password app on your iPhone to scan this QR code.
To continue, follow the Scanning your Setup Code section.
▼

🌐
- Option 2 -Login to 1Password website
(Note: This is the second method to get your Setup Code. If you cannot complete this, try the other method. If you already have your code, skip to the Scanning your Setup Code section.
📷)Retrieve your 1Password account info. Go to the web address labeled "sign-in address" in a web browser on your desktop computer, adding "/apps" to the end of the address:
https:// EXAMPLE .1password.com/apps
If your web browser has not already been set up with the login credentials, you may need the Secret Key for initial setup. Talk to IT for help if you're unable to log in.
Find the Setup Code
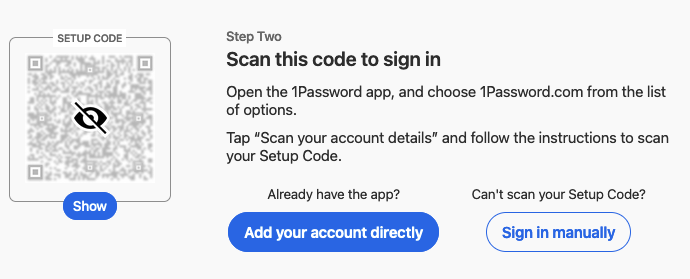
Once you have logged in, you should see a webpage that has the following:
To reveal your setup code, click the Show button under the grey QR code. Your Setup Code should look just like a normal QR code.
Do not print, screen capture, or otherwise reproduce your QR code. Only use the 1Password app on your iPhone to scan this QR code.
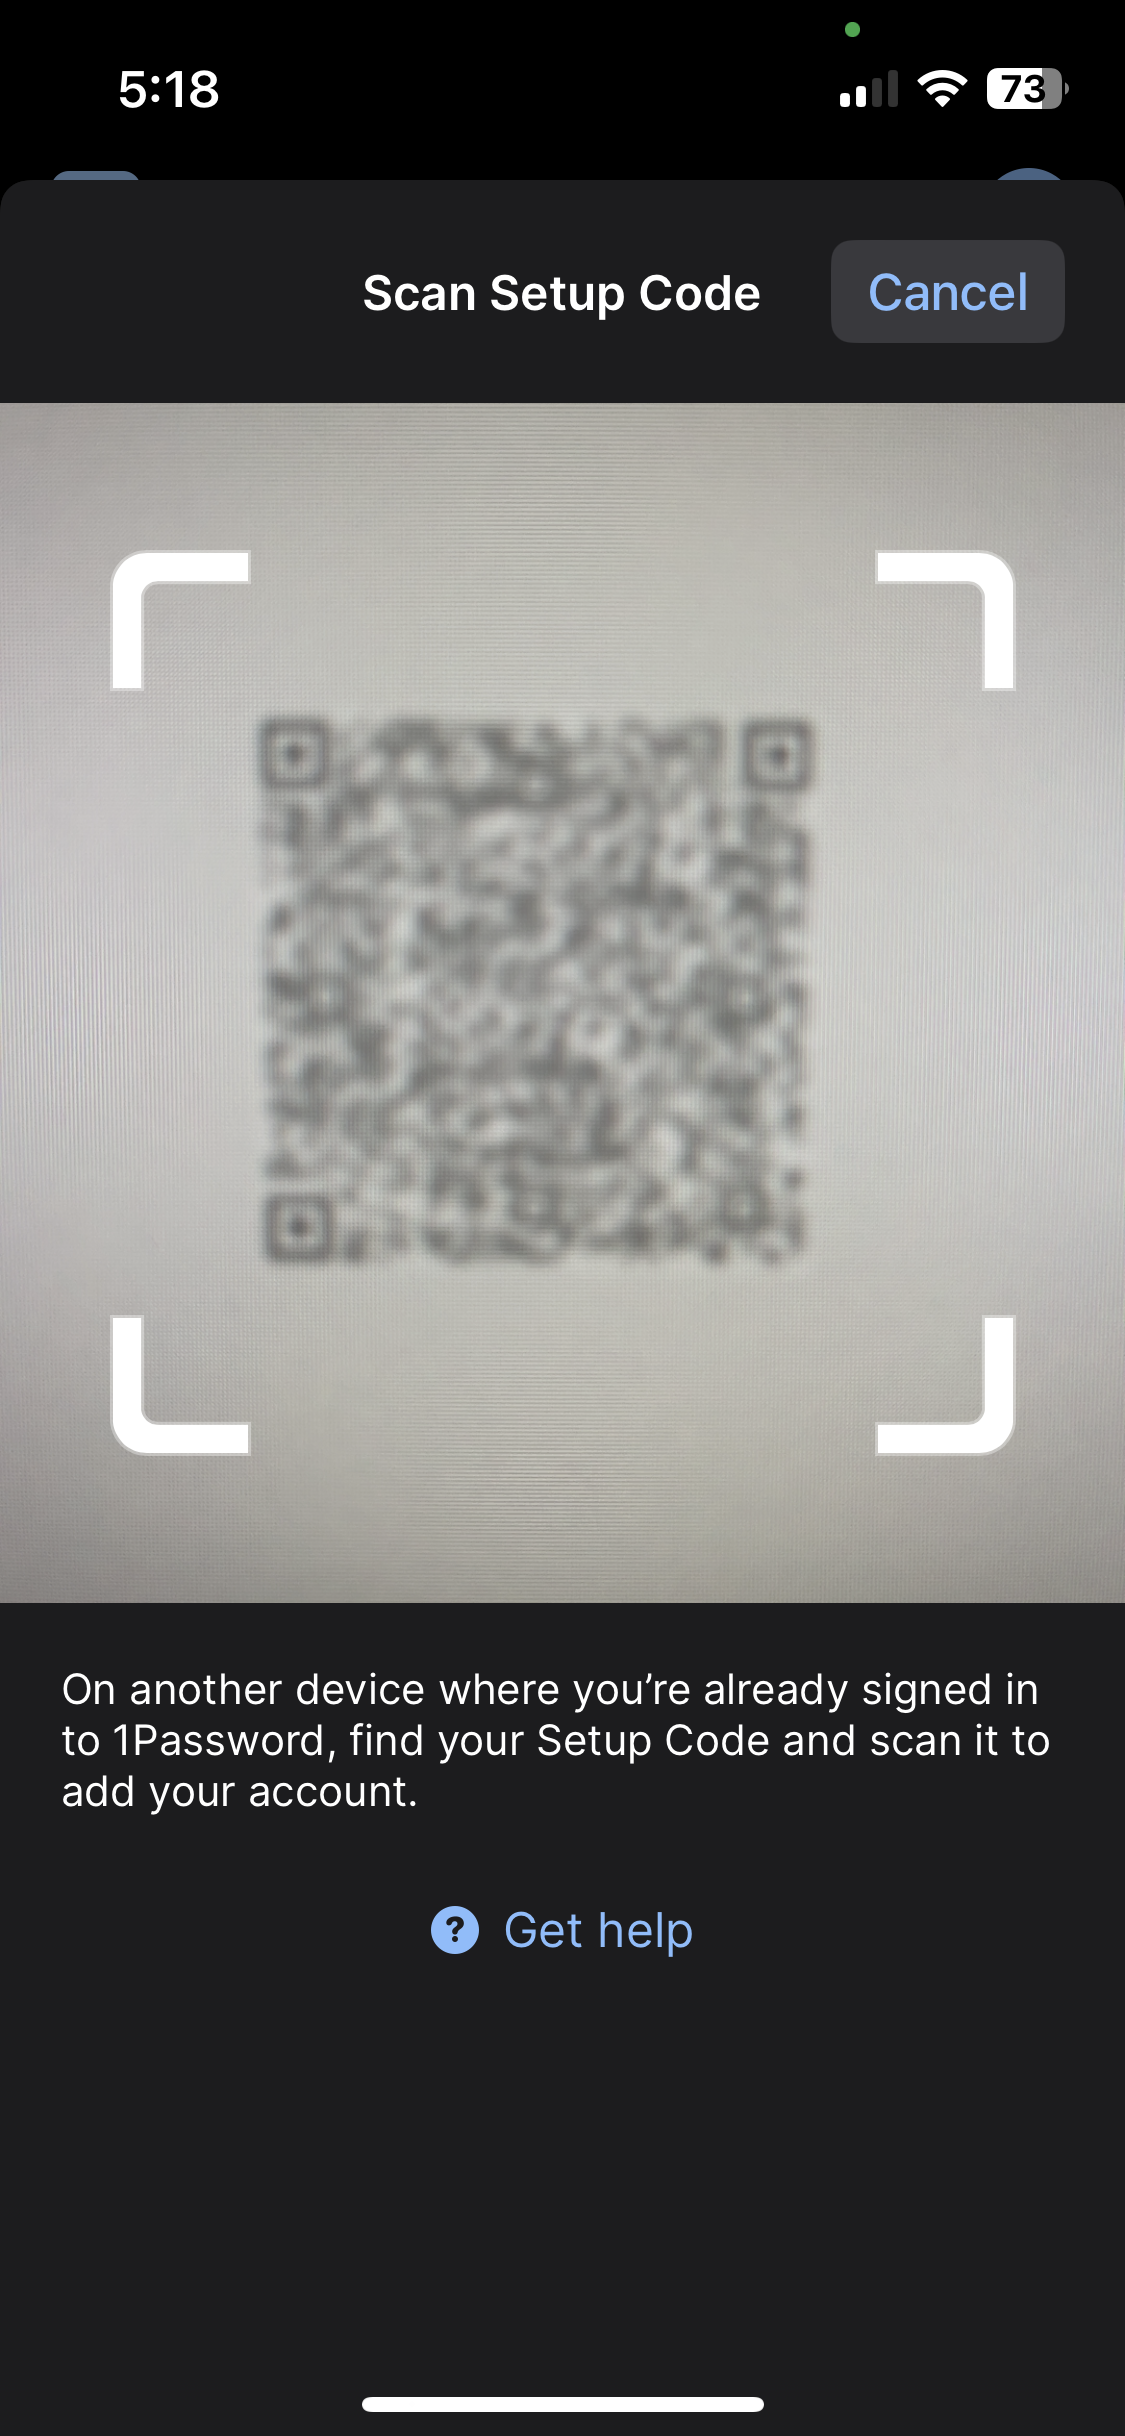
Scanning your Setup Code 📷
Now that you have your setup code, we can continue the process of scanning it.
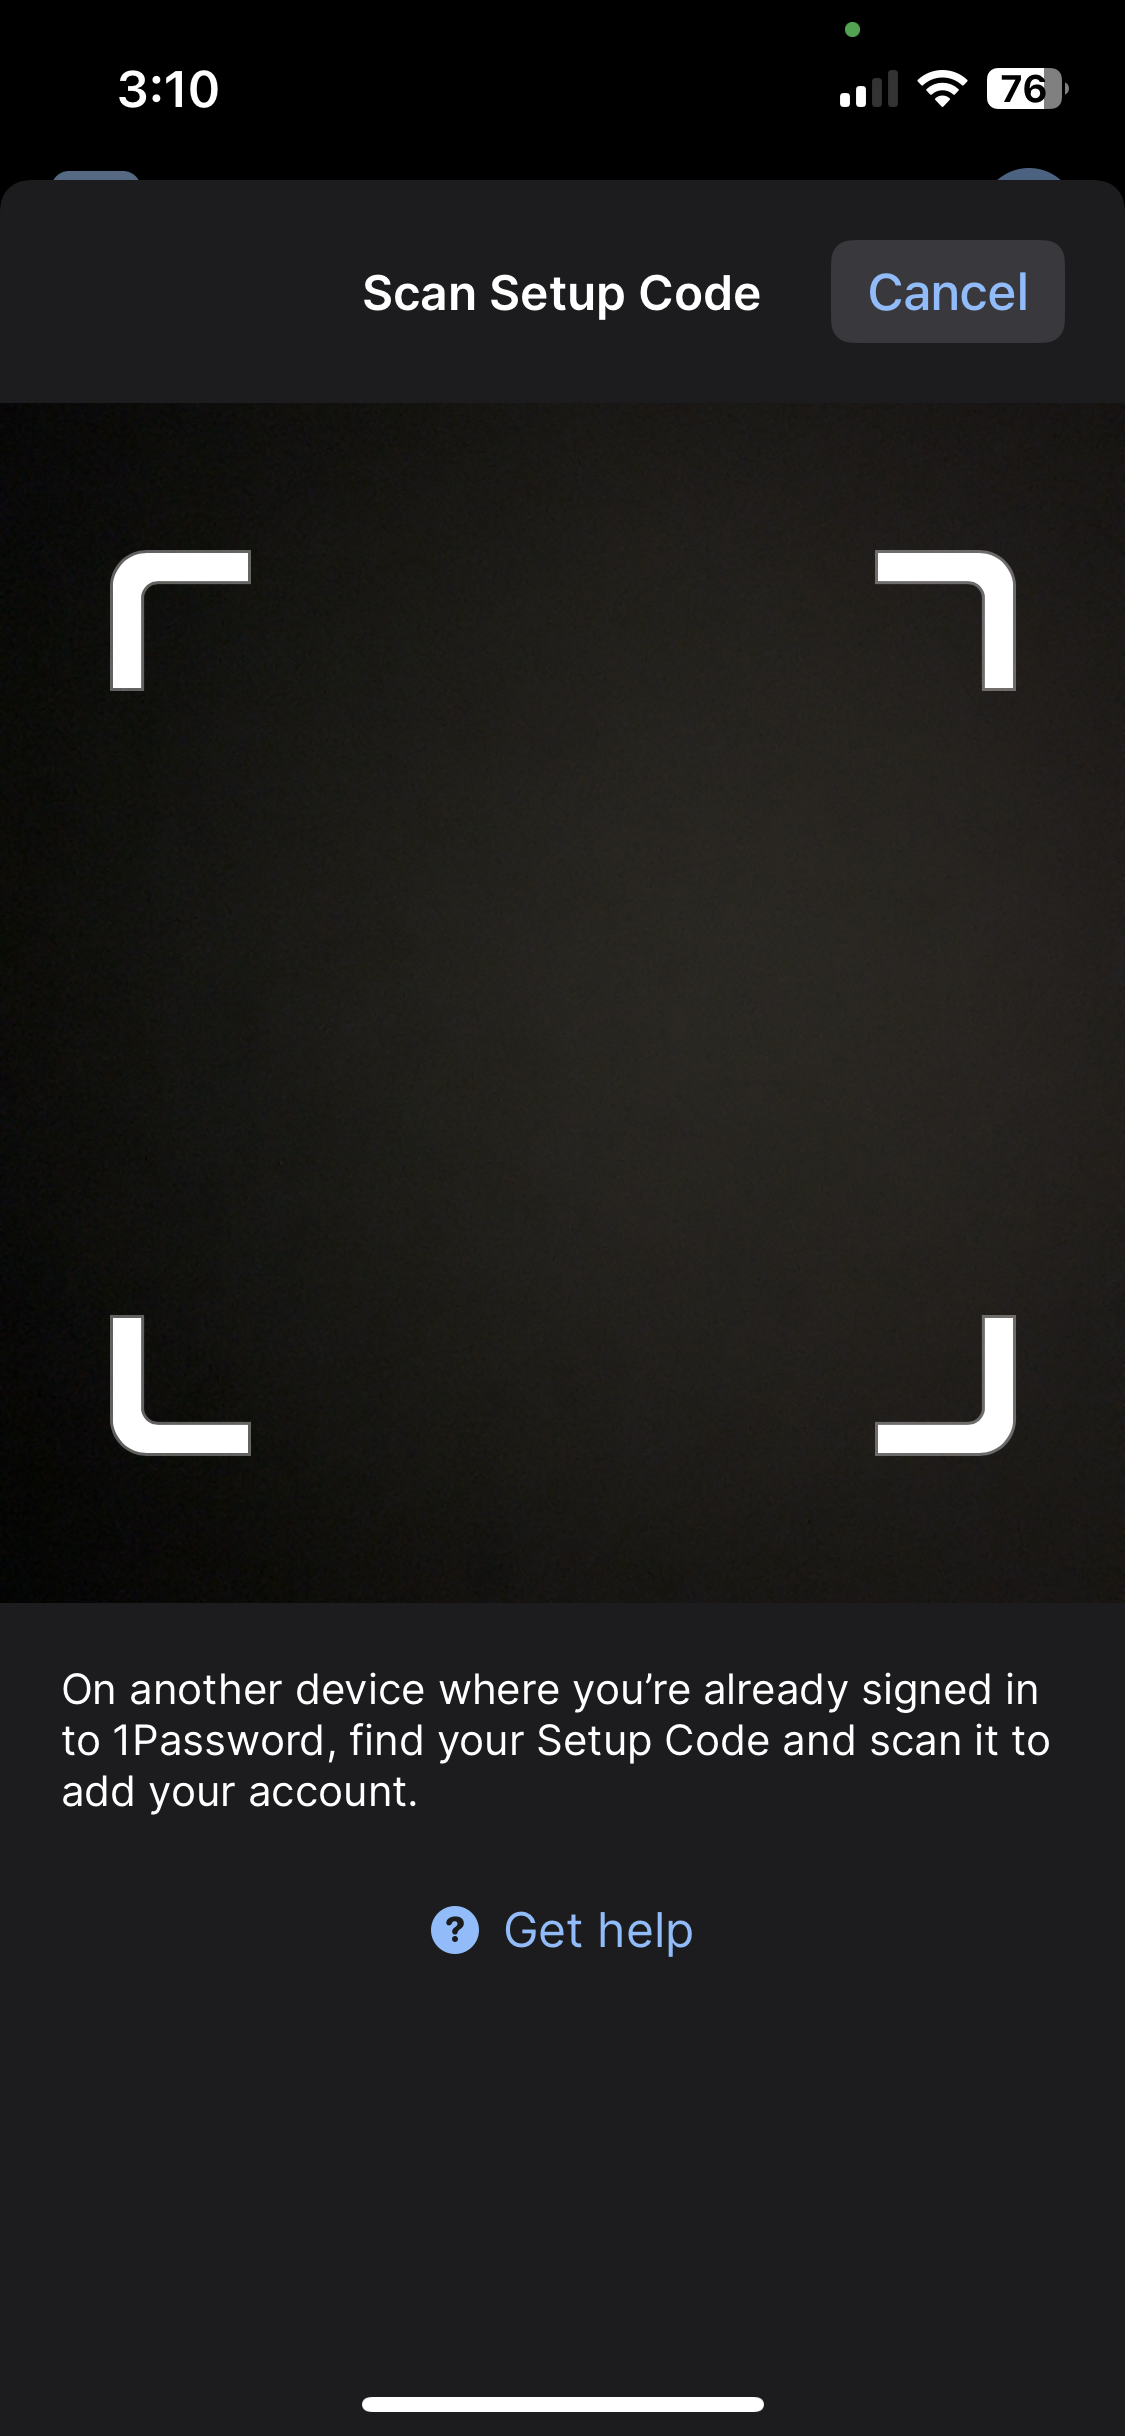
Back on your phone, in the 1Password app, hit Scan Setup Code and you should see the following screen with your camera showing in the app. The app will request access to the camera, please allow access if you want this method to work. Otherwise you will have to enter the account details manually. 🖐️
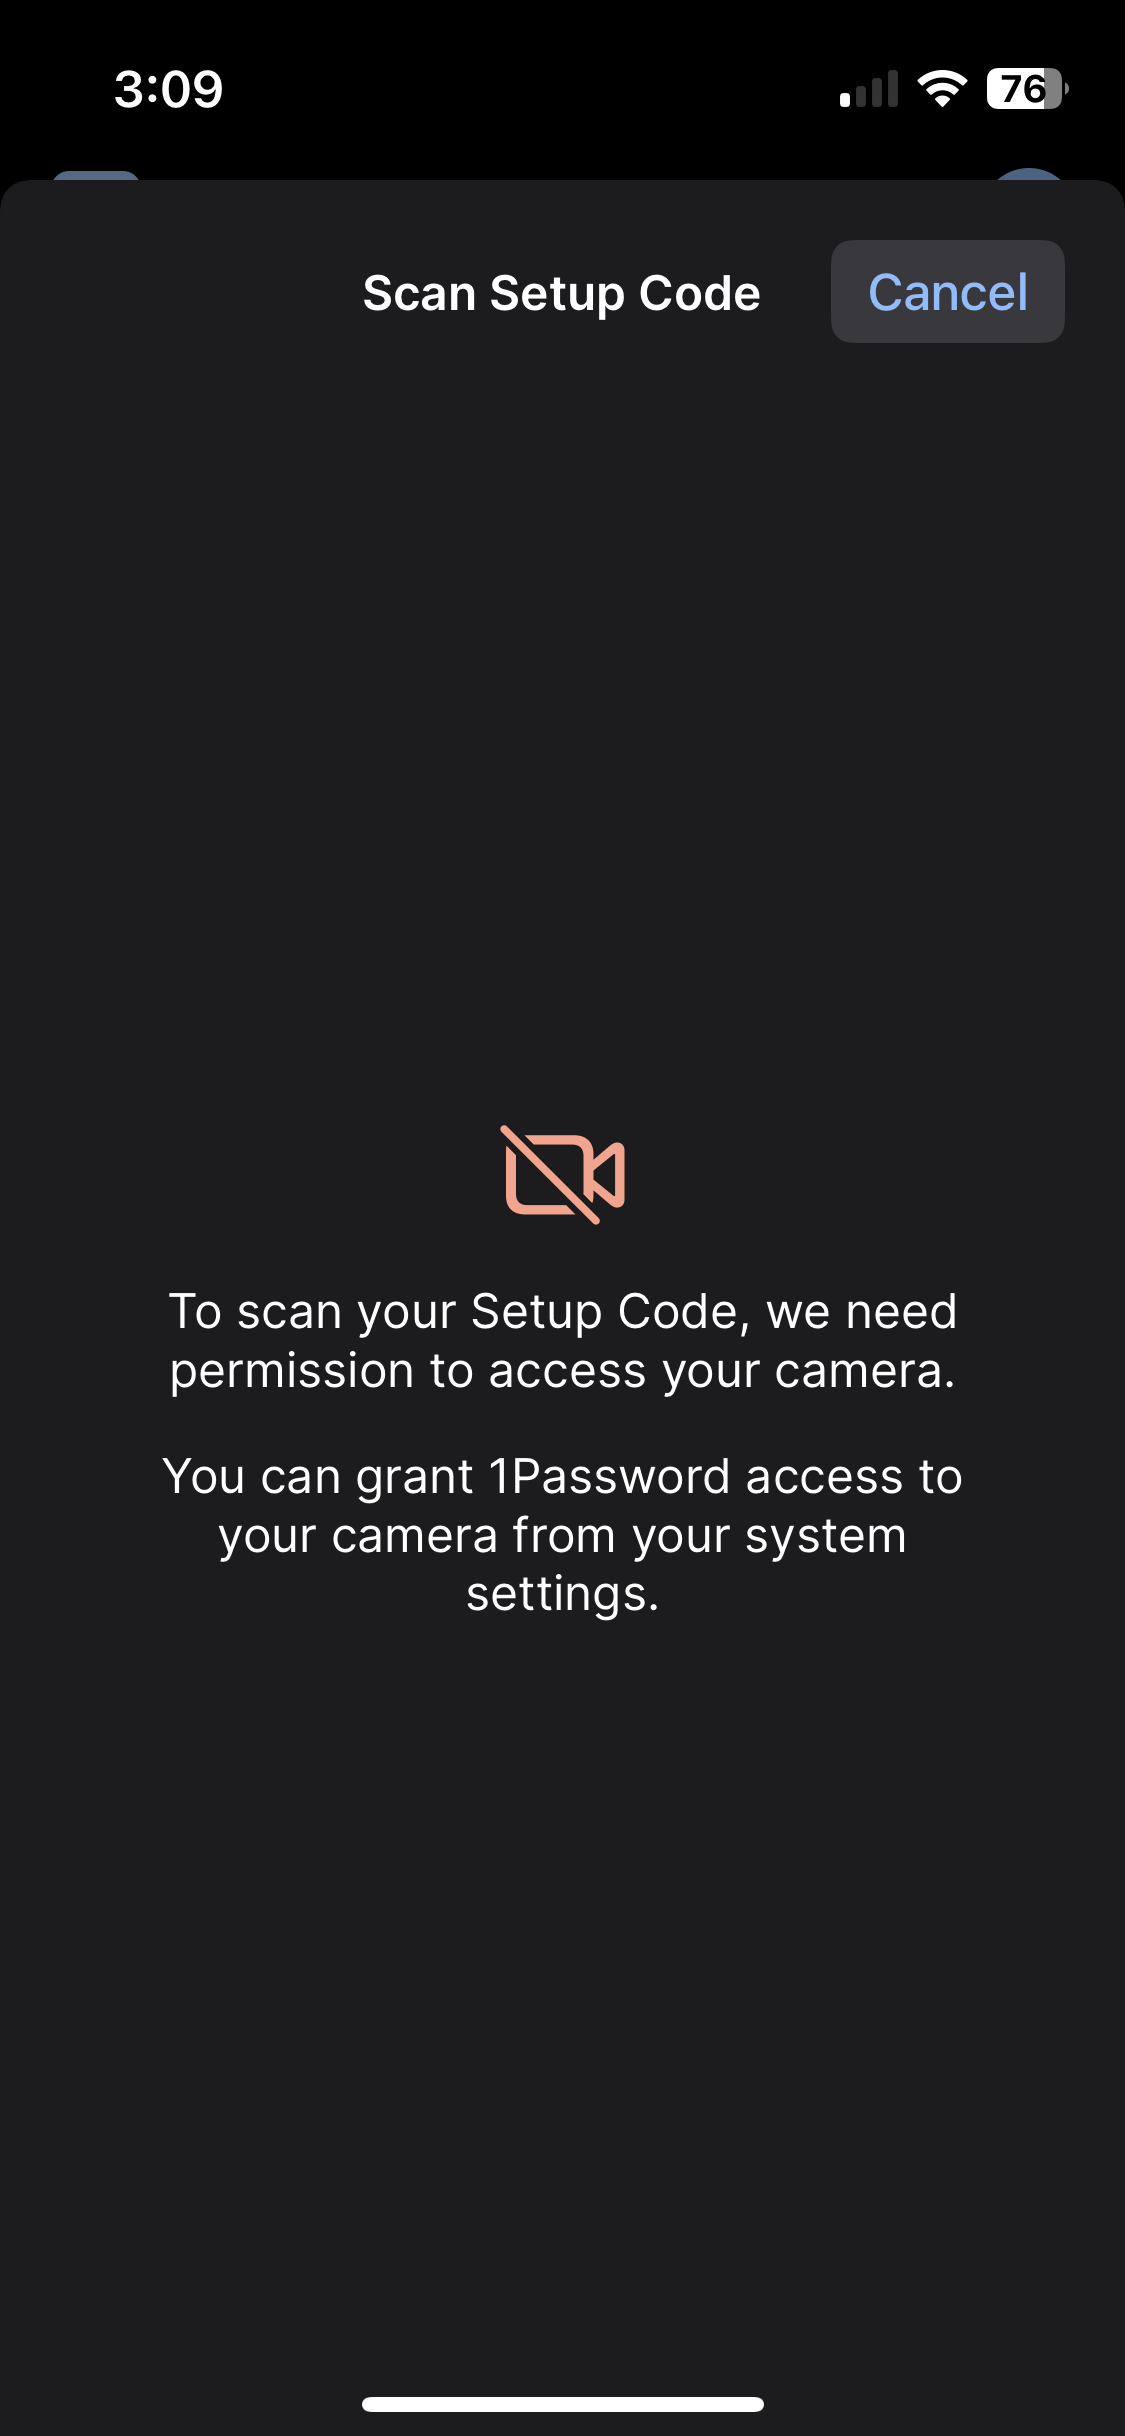
⛔️ Note:
If access to the camera is not allowed, you will be presented with the following screen.
To grant access, You will need to head to your iPhone's
⚙️ Settings➝✋ Privacy & Security➝📷 Cameraand then activate the switch next to the1Passwordapp.
Now use the camera to capture the setup code on your screen. Point your phone as though you are taking a picture of the QR code.
(Note: the QR code below is not real and will not work. It is only an example for demonstration.)
You will then be prompted to type in your password and finish adding the account.
Note: Do not select Move Data if that option pops up.
Method 2: Enter account details manually 🖐️
Note: We do not recommend the full manual approach, but it is an option. We recommend using the Scan Setup Code method. If you have already scanned your setup code, skip this portion of this step and proceed to the next heading.
On the Sign In screen, hit Enter account details.
Next you will need:
- The Sign-in Address
- The Email Address for your company account
- Your Secret Key
- Your master Password
If you don't know your secret key or password, contact IT and they can help.
When everything is entered correctly, hit Sign In to continue.
(Note: If you need to see what's in the Secret Key or Password fields to verify the text, hit the eye symbol on the right side of the entry.)
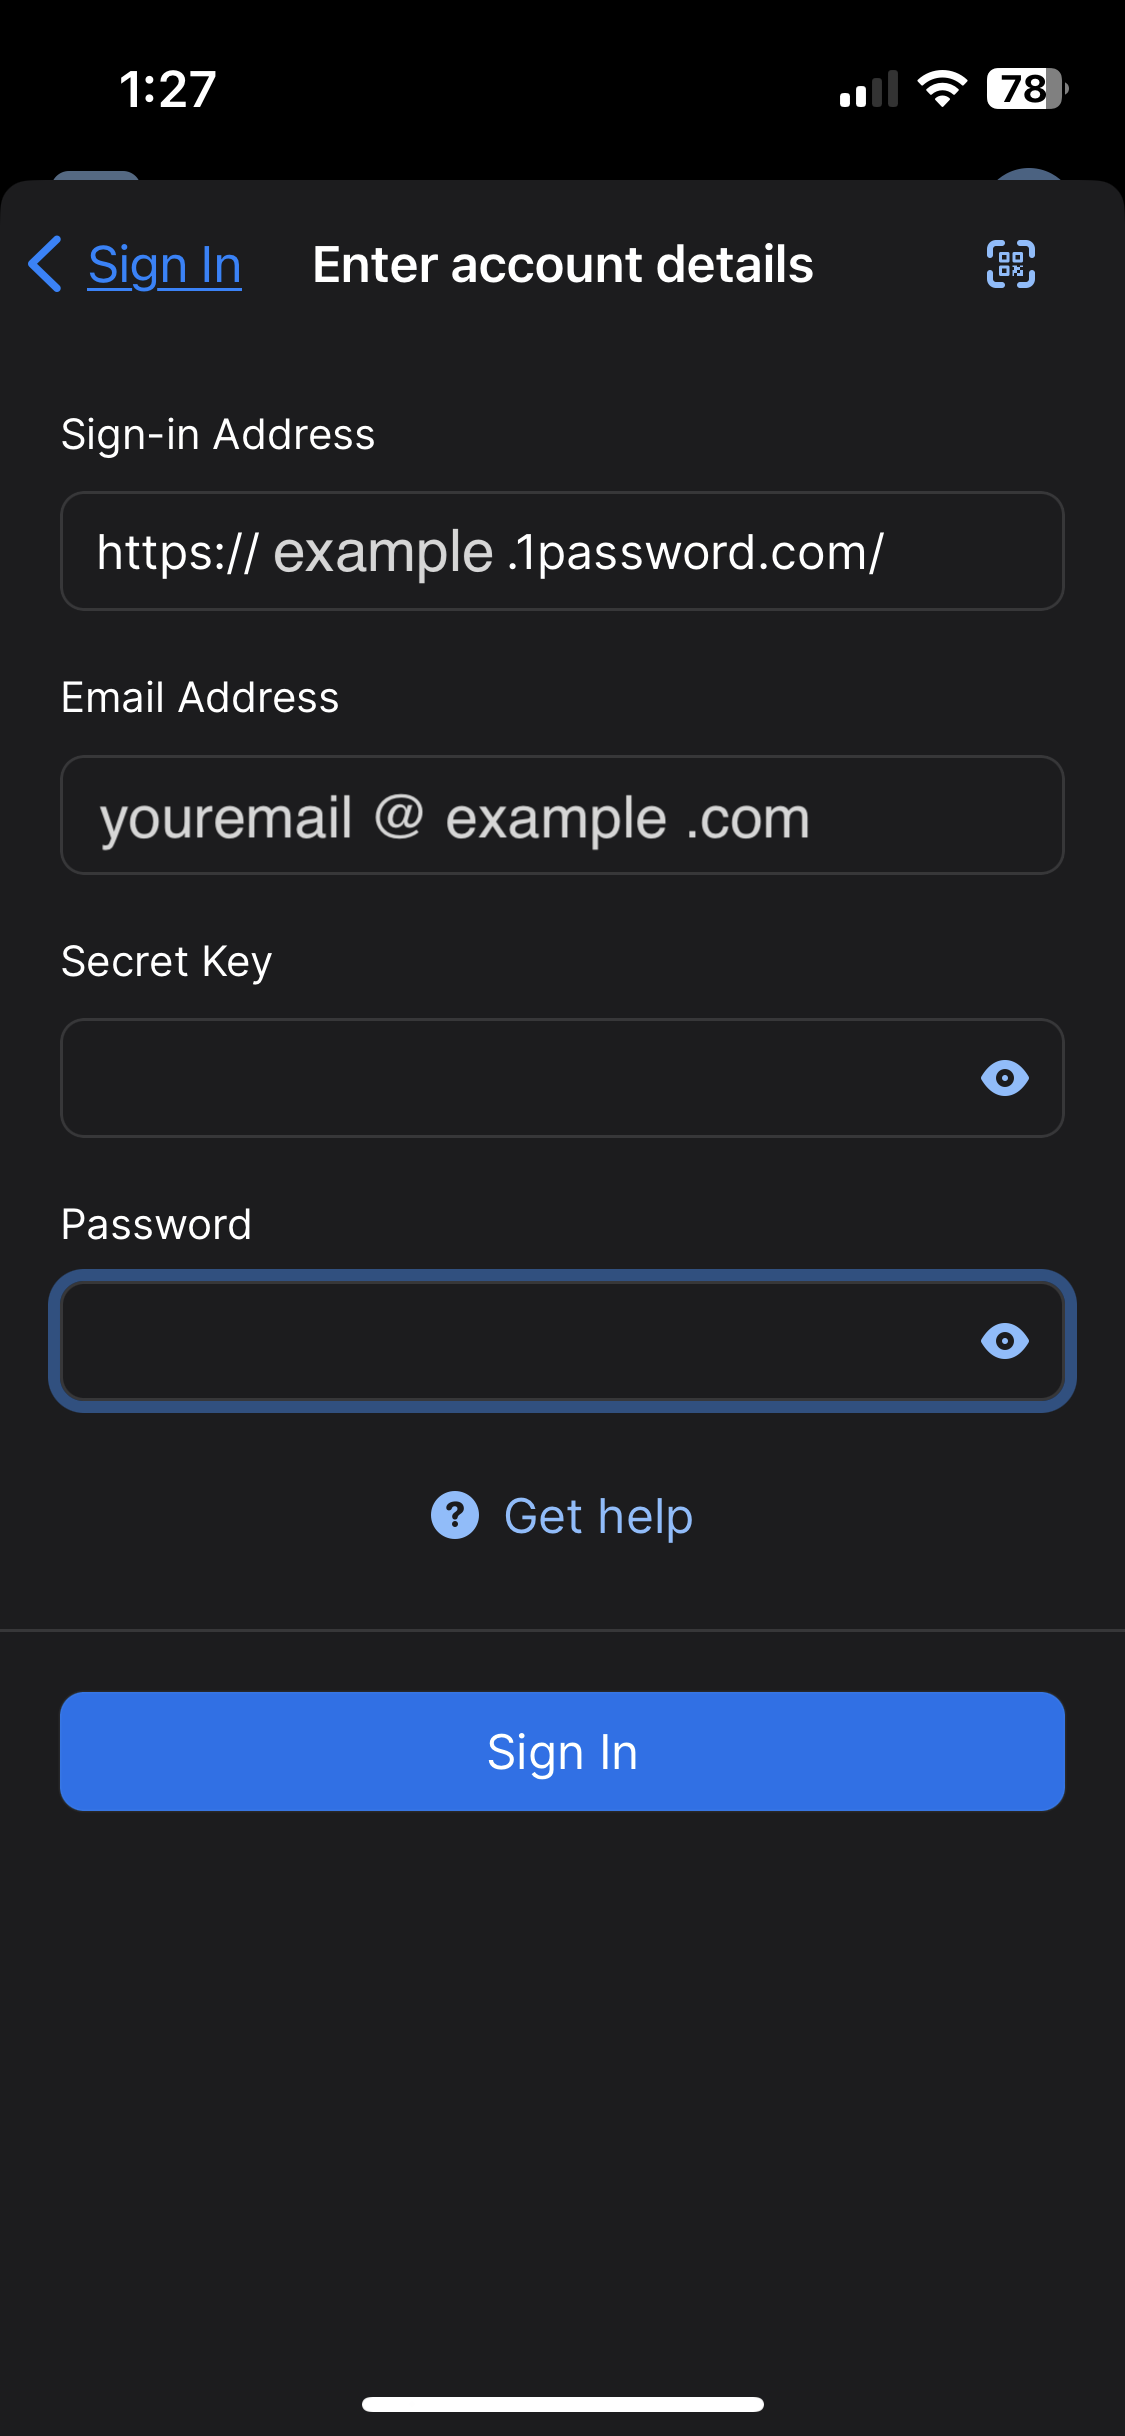
Remember: Please do not write down (or print) either the Password or the Secret Key. The password is your "one" password, your master password, and your memorization of it is critical. The Secret Key is kept safe by the IT staff if you need it in the future.
(Note: If you successfully sign in using the manual method, you do not need to use Scan Setup Code. Skip the Scan Setup Code method and go to Step 5.)
Step 5: Face ID and Settings
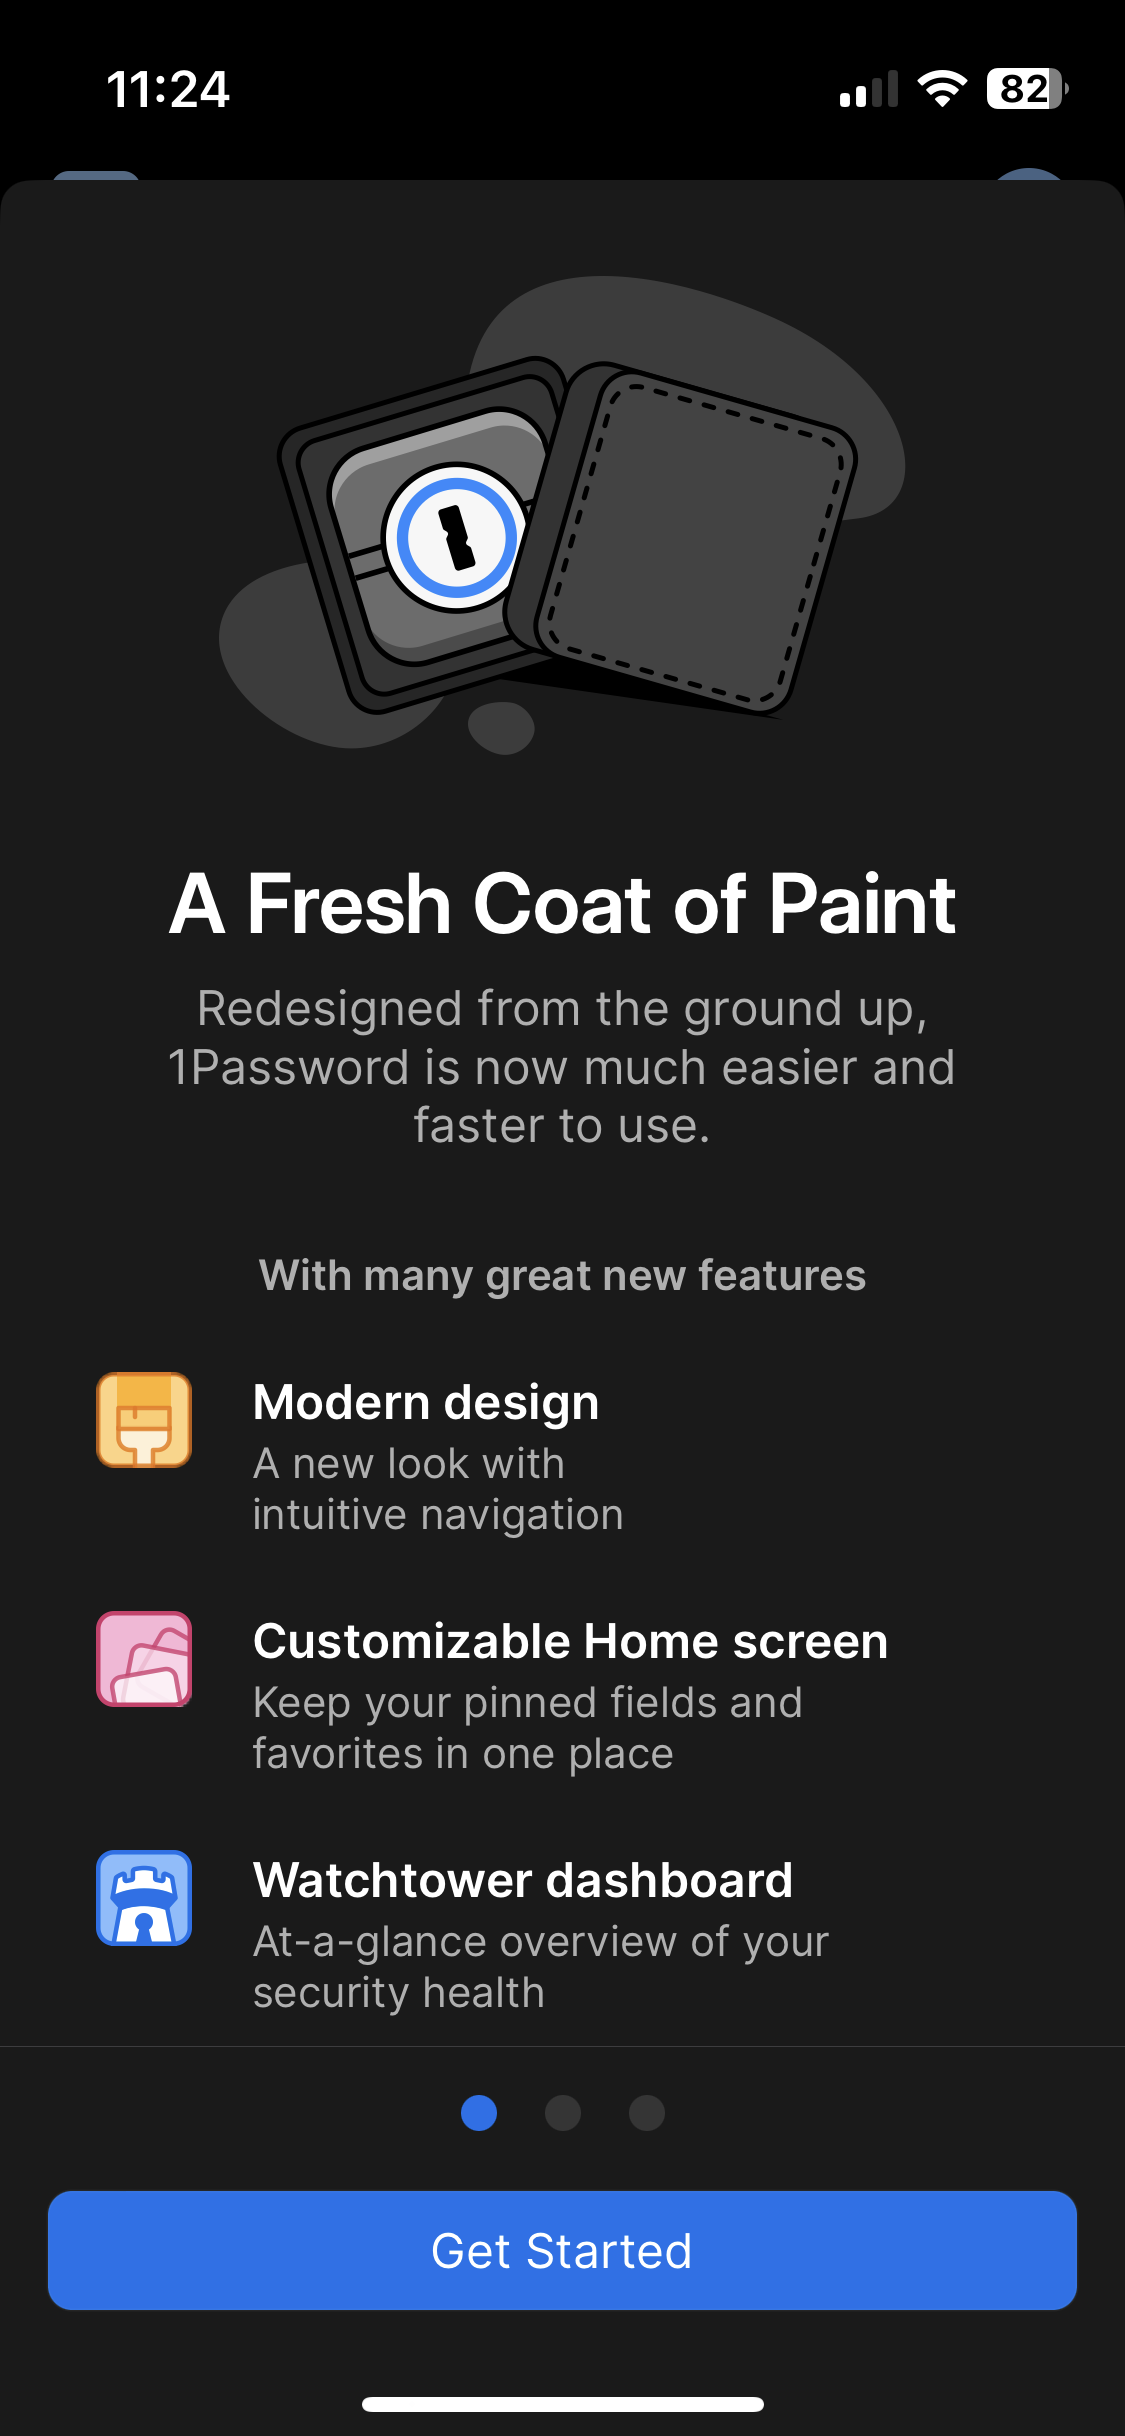
If the sign in process was successful you should be greeted with the following screen.
Hit Get Started to continue and move on to the next step.
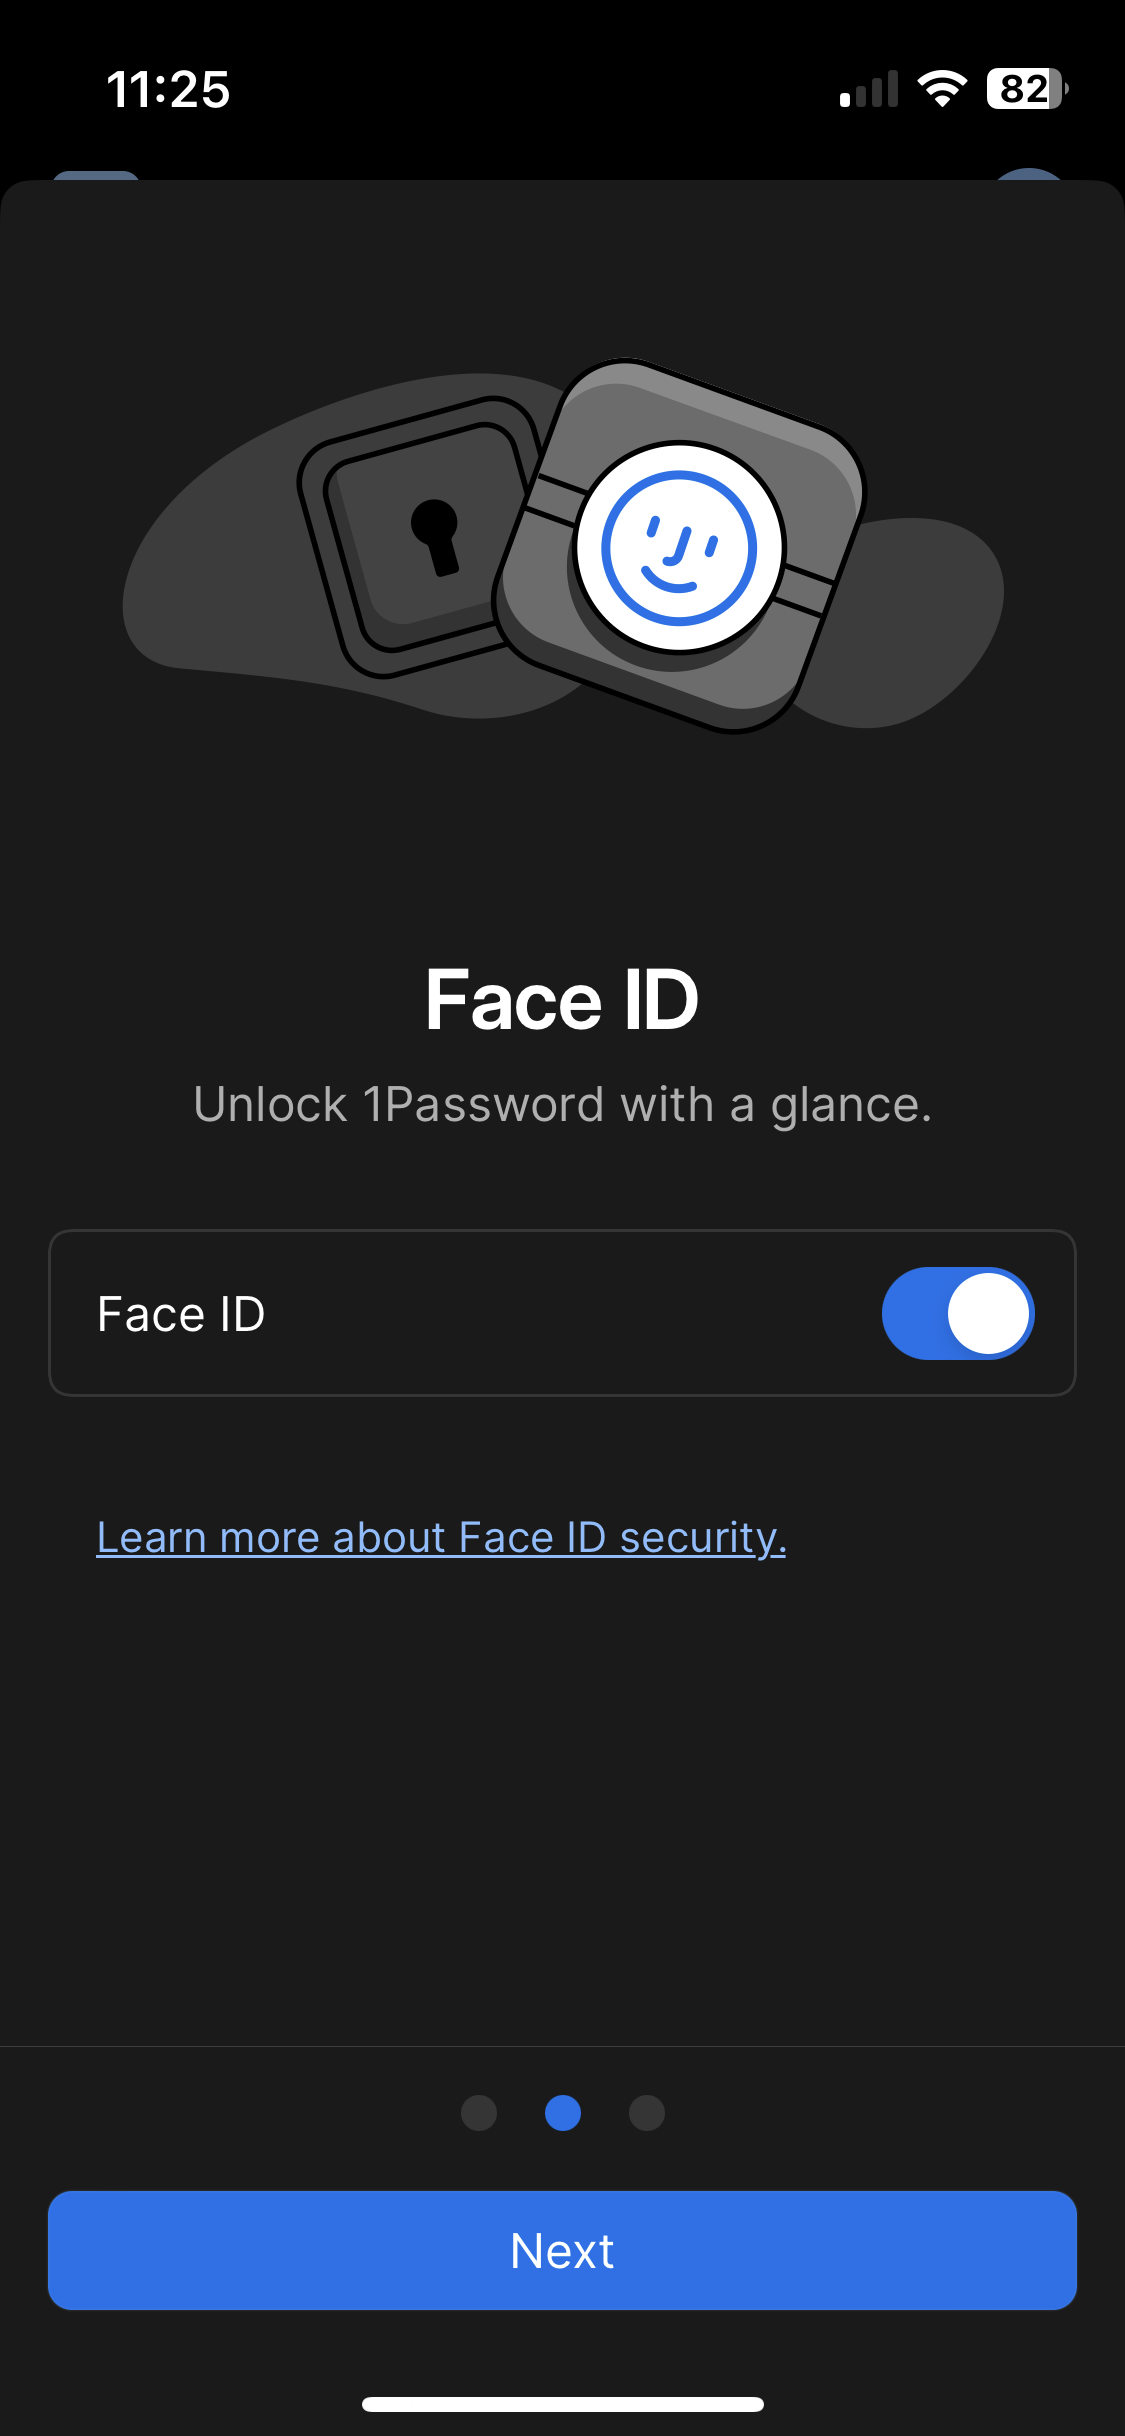
Face ID
This next part is important! Unless you're really good at and like memorizing and entering passwords! 😉
Make sure you turn on Face ID so 1Password will unlock for you quickly and easily. You may be prompted to grant permission to use Face ID. Make sure to allow 1Password to use Face ID. Hit Next to continue.
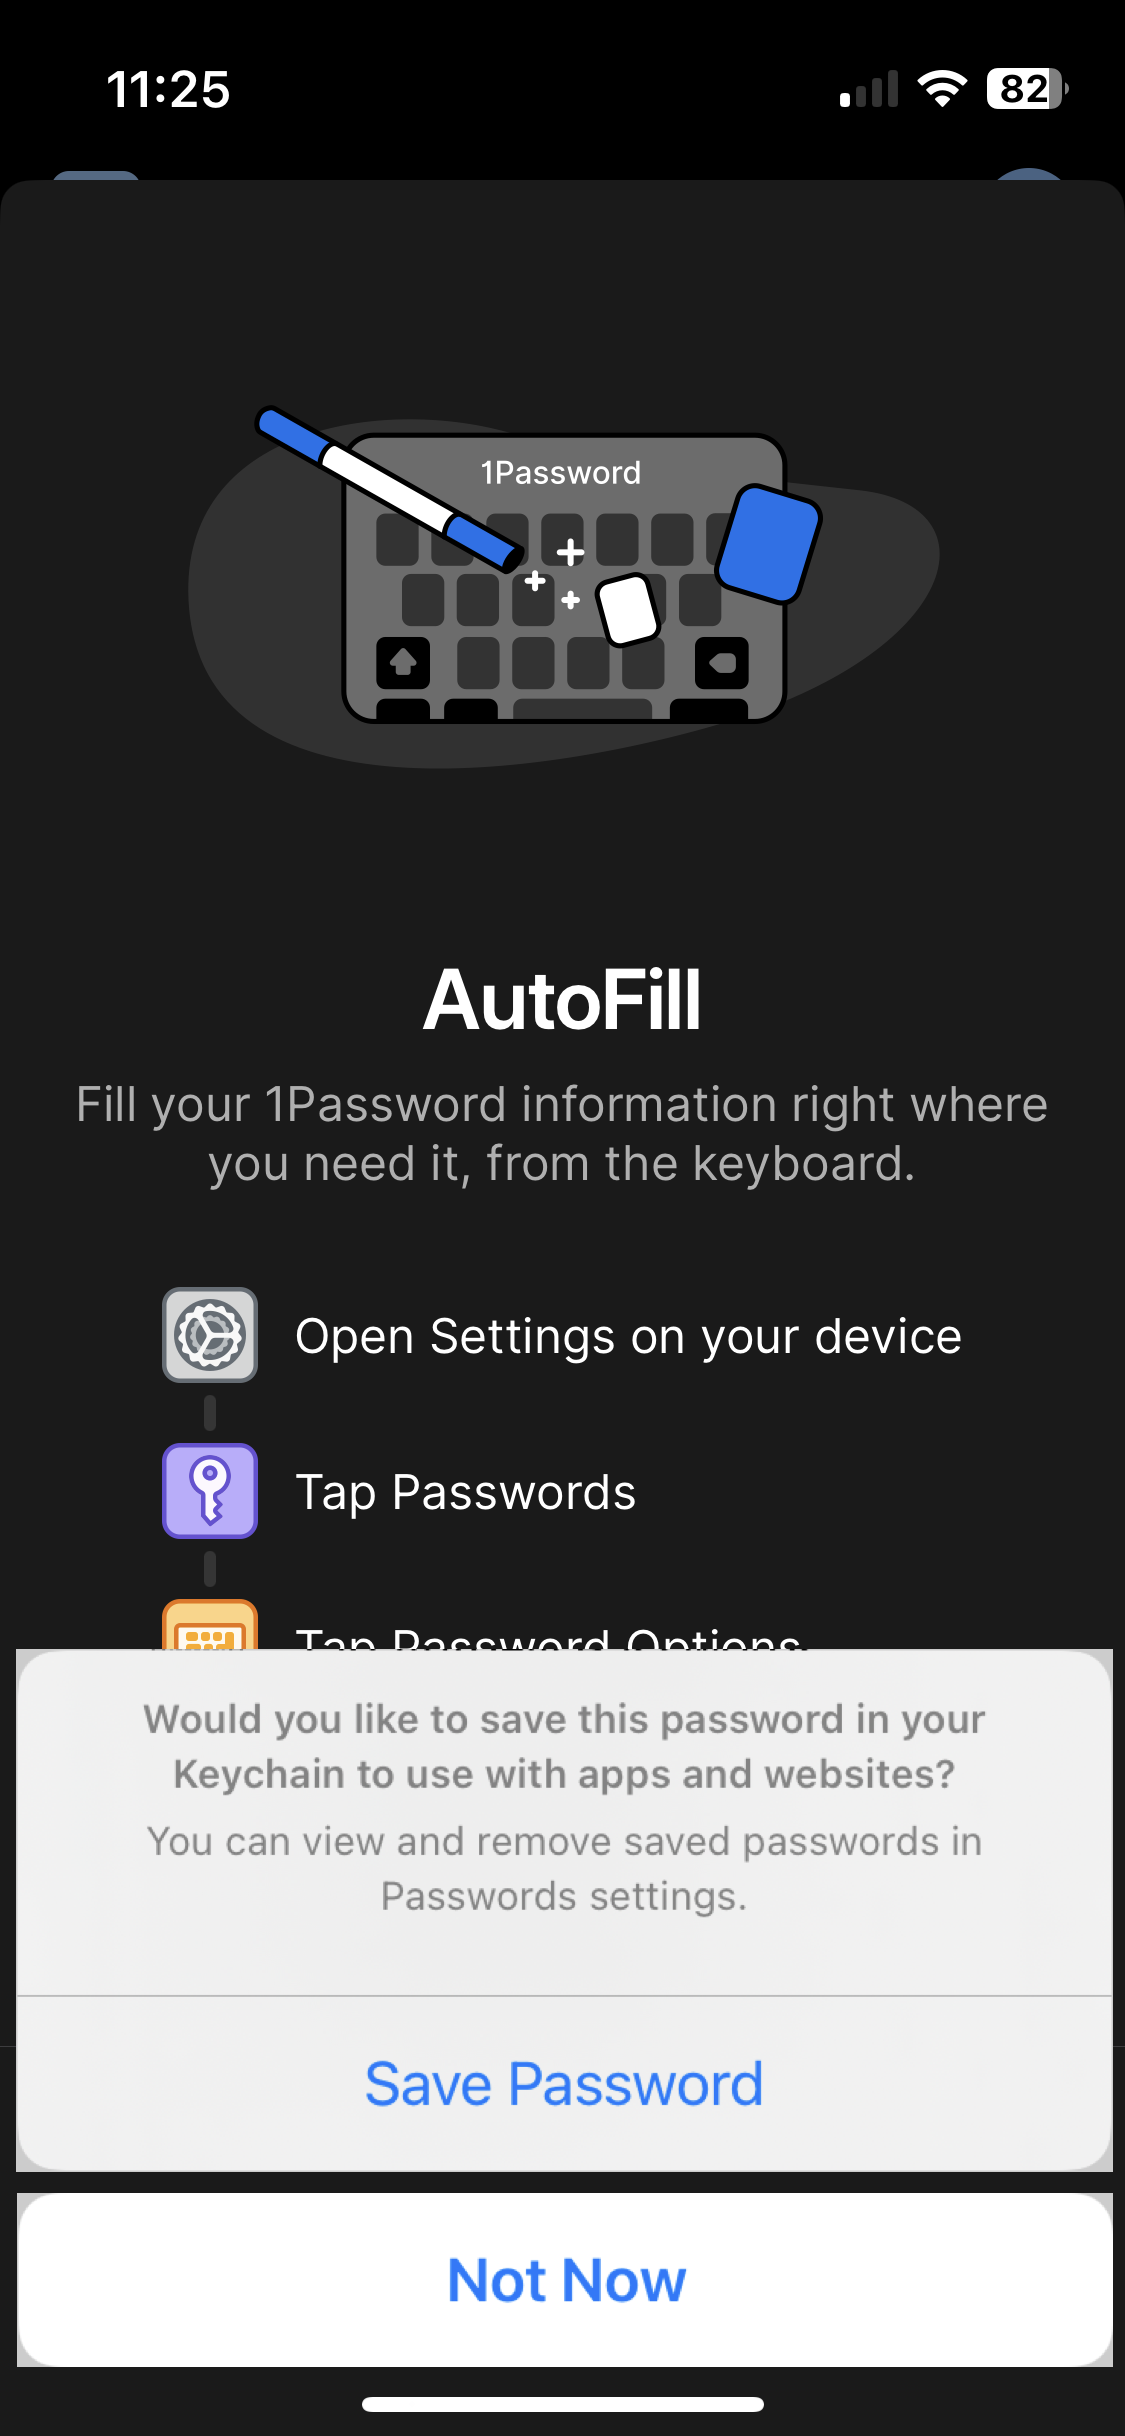
Do not save this password...
If you are prompted to save this password to your Keychain, please choose Not Now — we do not want your master password saved anywhere else. Your master password is already stored in the IT vault.
Password AutoFill? It depends...
It is recommended to turn off other password filling mechanisms, but this is not right for every situation. If you have a lot of passwords in another system (e.g. Keychain), migration is usually needed to make the transition seamlessly, so it may make sense to delay disabling existing password autofillers until you migrate to 1Password Families for personal data, even though it makes daily use one step more difficult.
In other words, if you already have a lot of passwords in another system that you use with AutoFill regularly, it might make sense to leave AutoFill on for both your other system and 1Password.
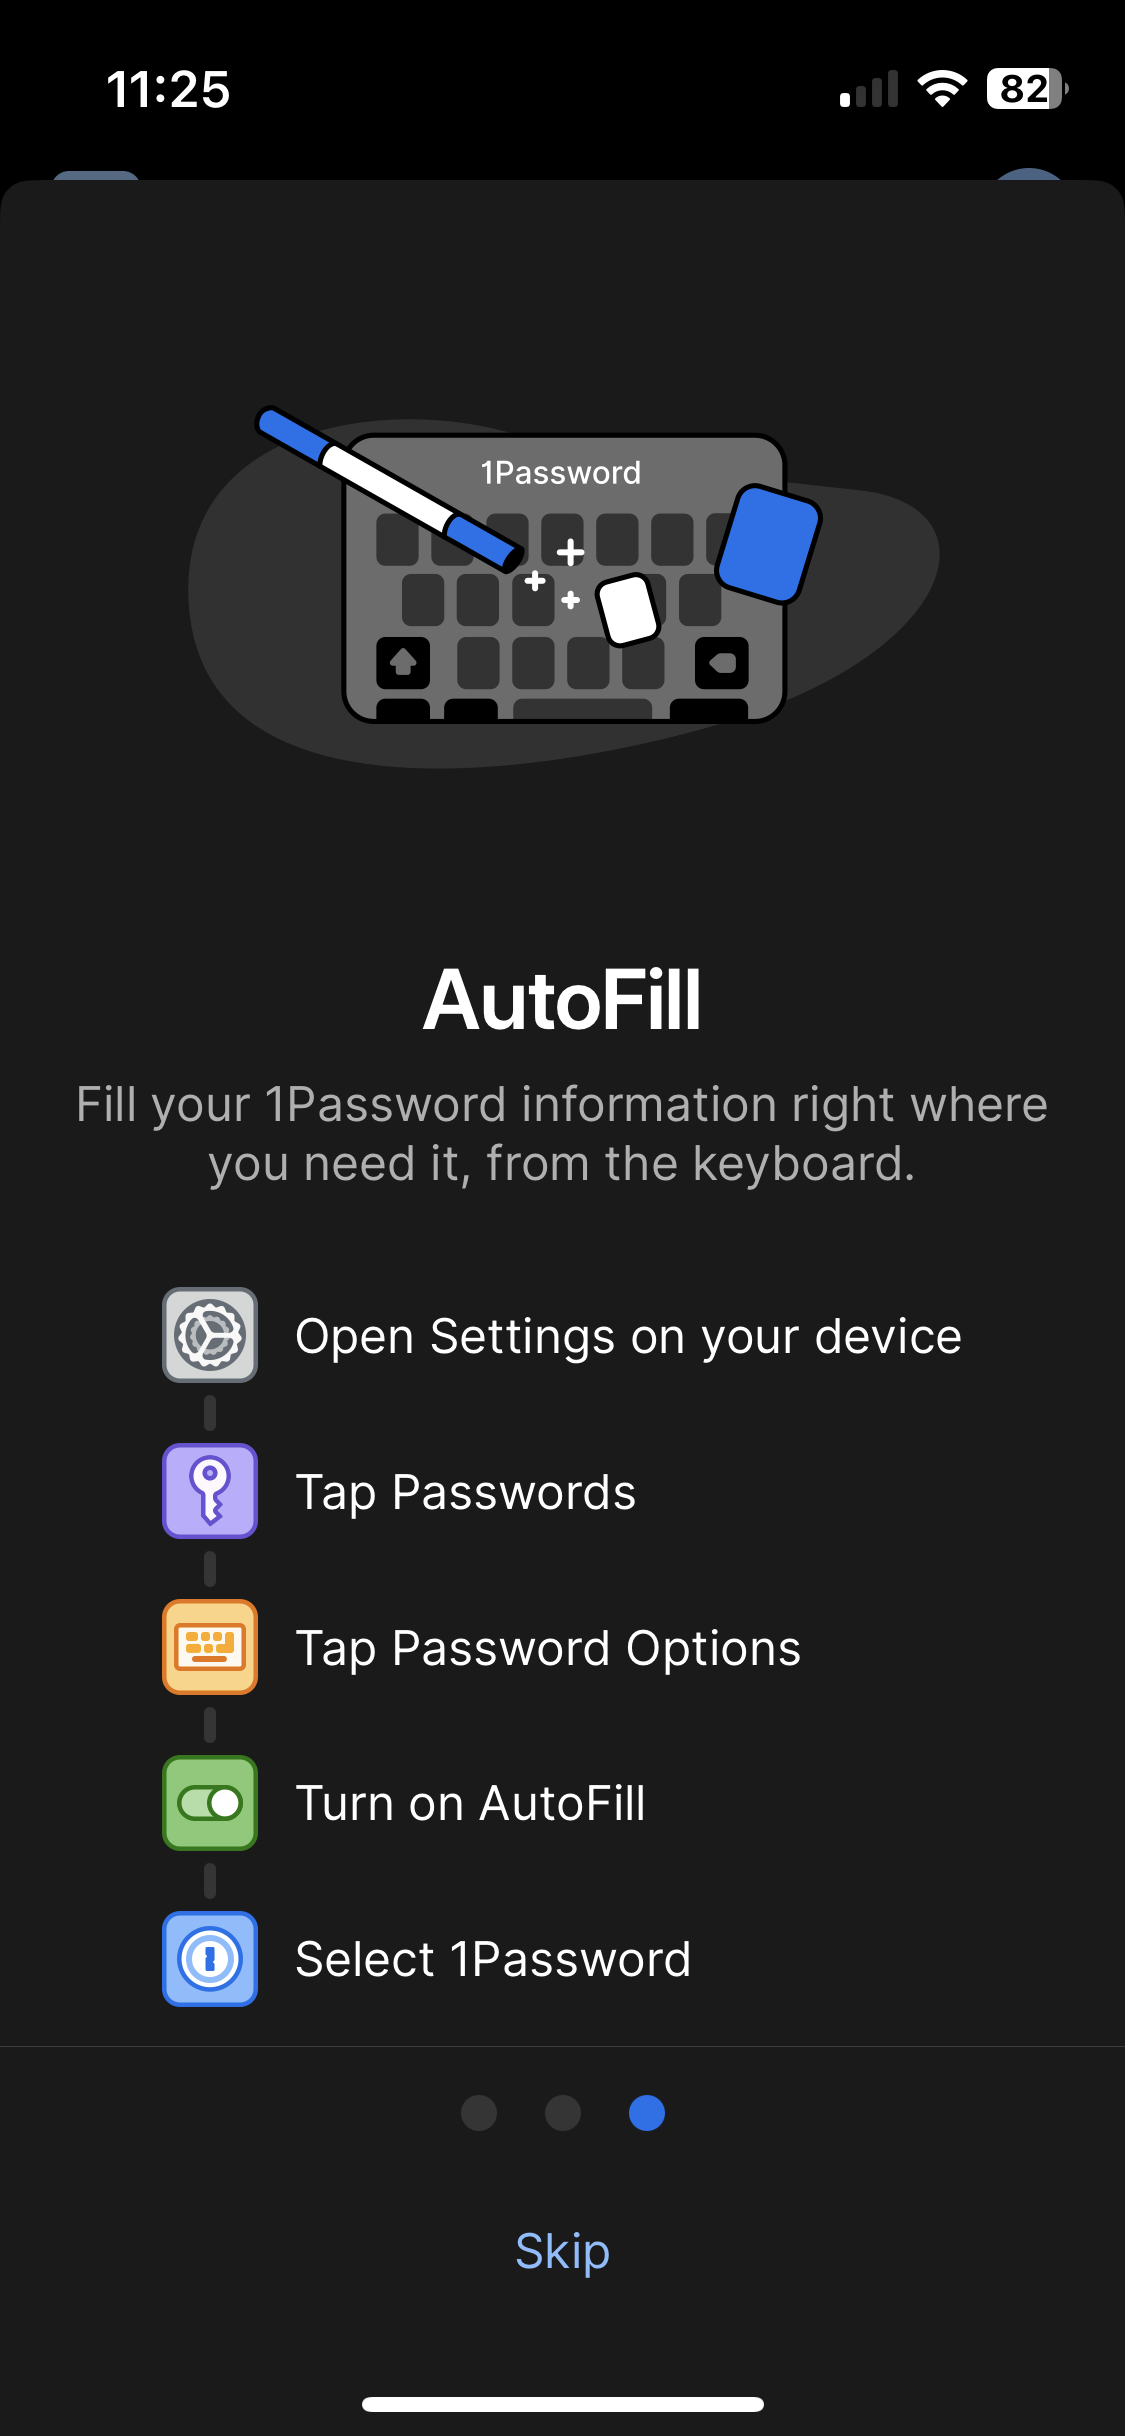
As you can see from the 1Password screen, to access your AutoFill settings, you can find them in your iPhone's ⚙️ Settings ➝ 🔑 Passwords ➝ Password Options >.
If you need more help deciding which to enable, talk to IT and they can explain it further.
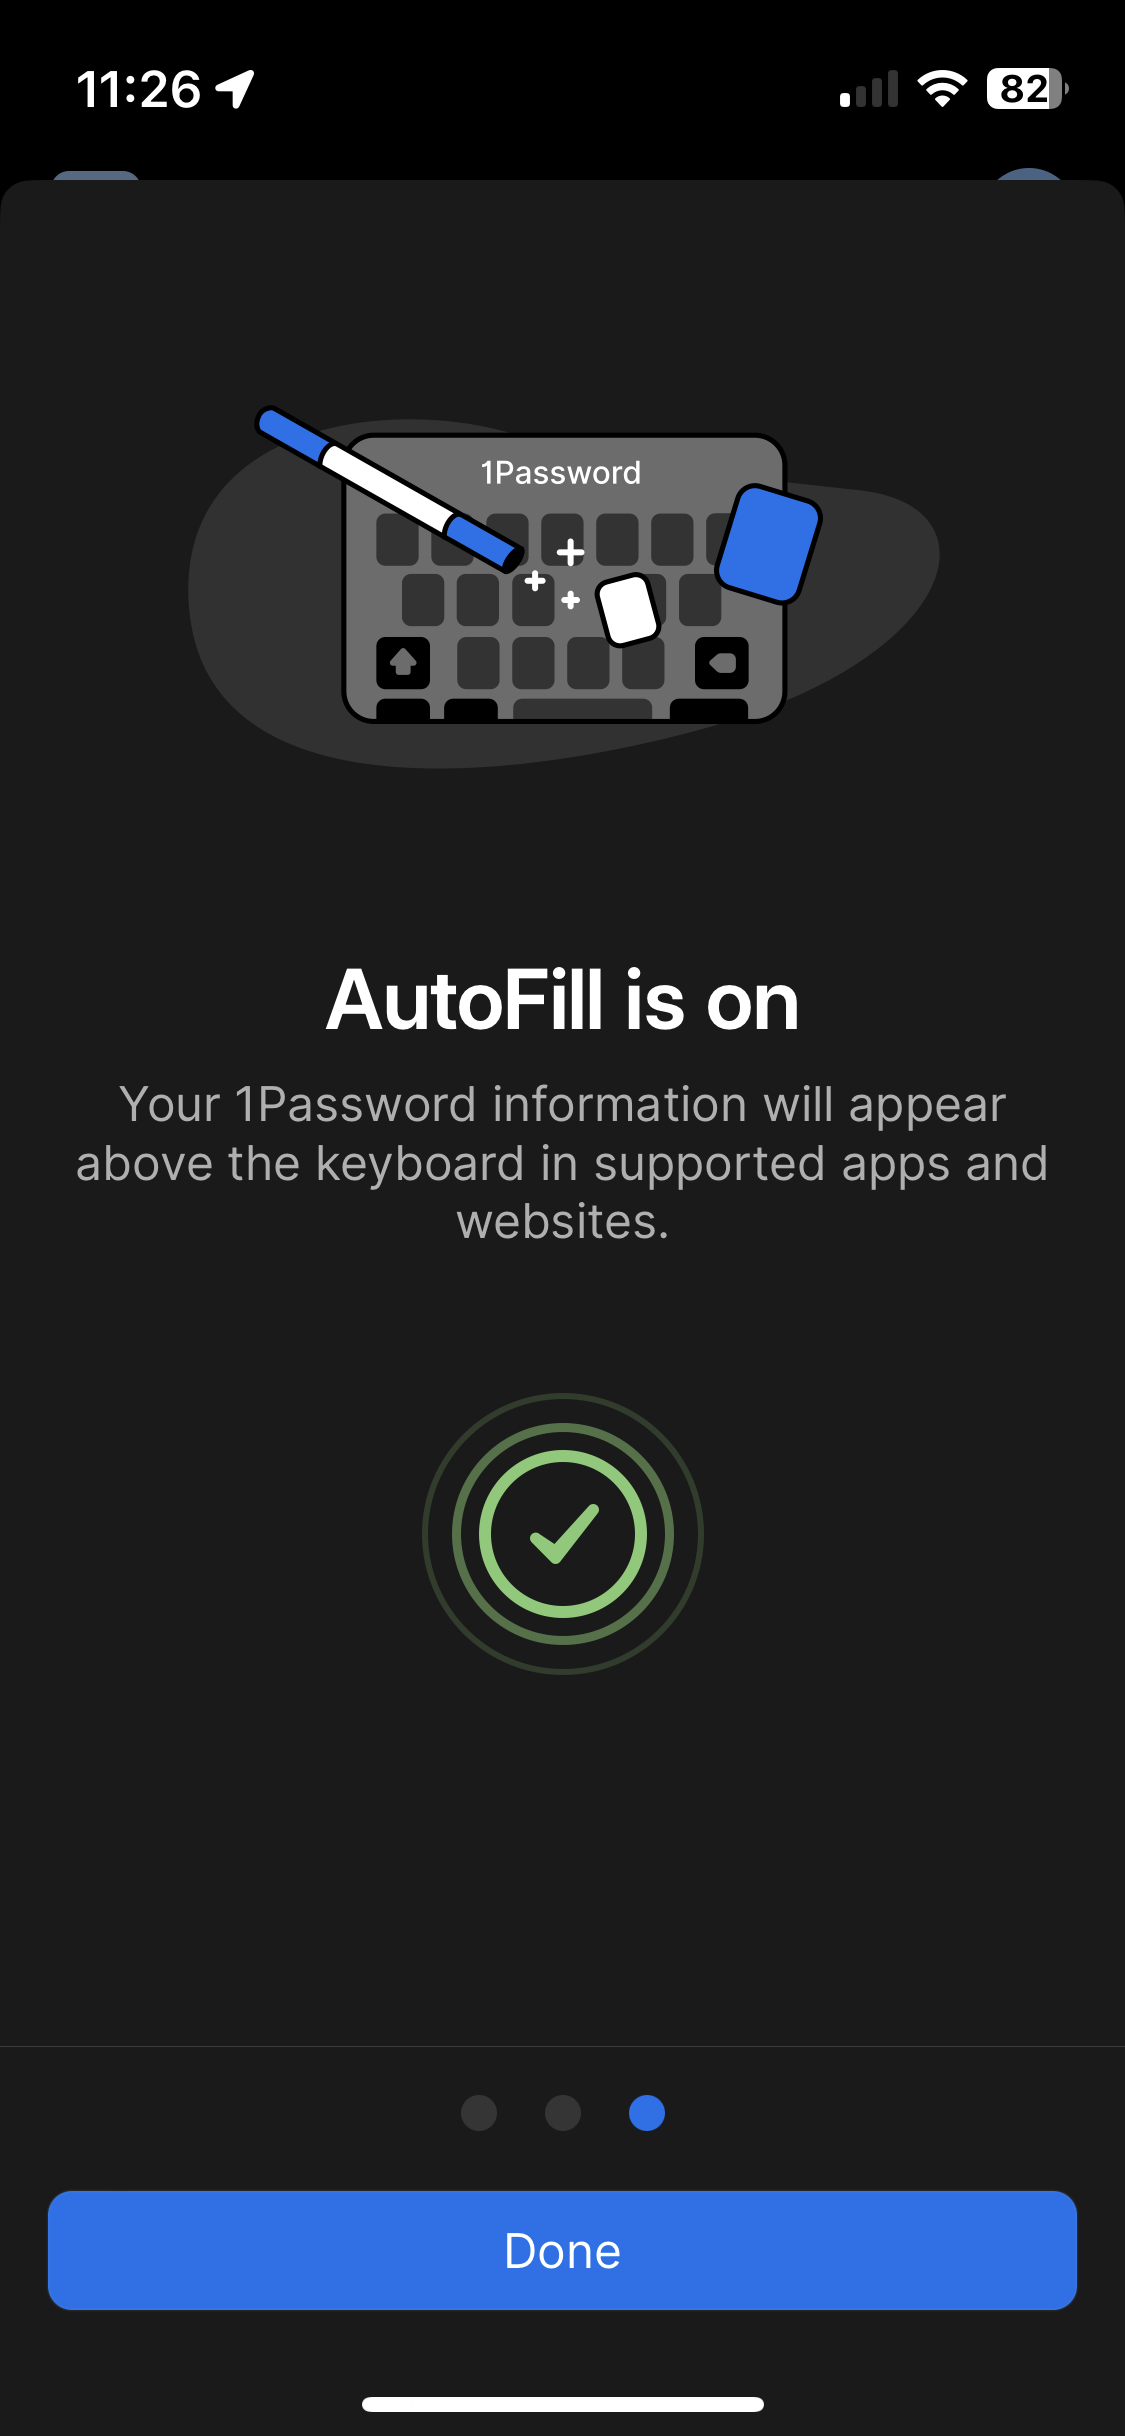
If you don't want to set up AutoFill now, hit Skip to continue. However, if you correctly enabled AutoFill for 1Password in your iPhone's settings, you should see confirmation of this back in the 1Password app. Hit Done and... you're almost done!
Step 6: A few more Settings (Required!)
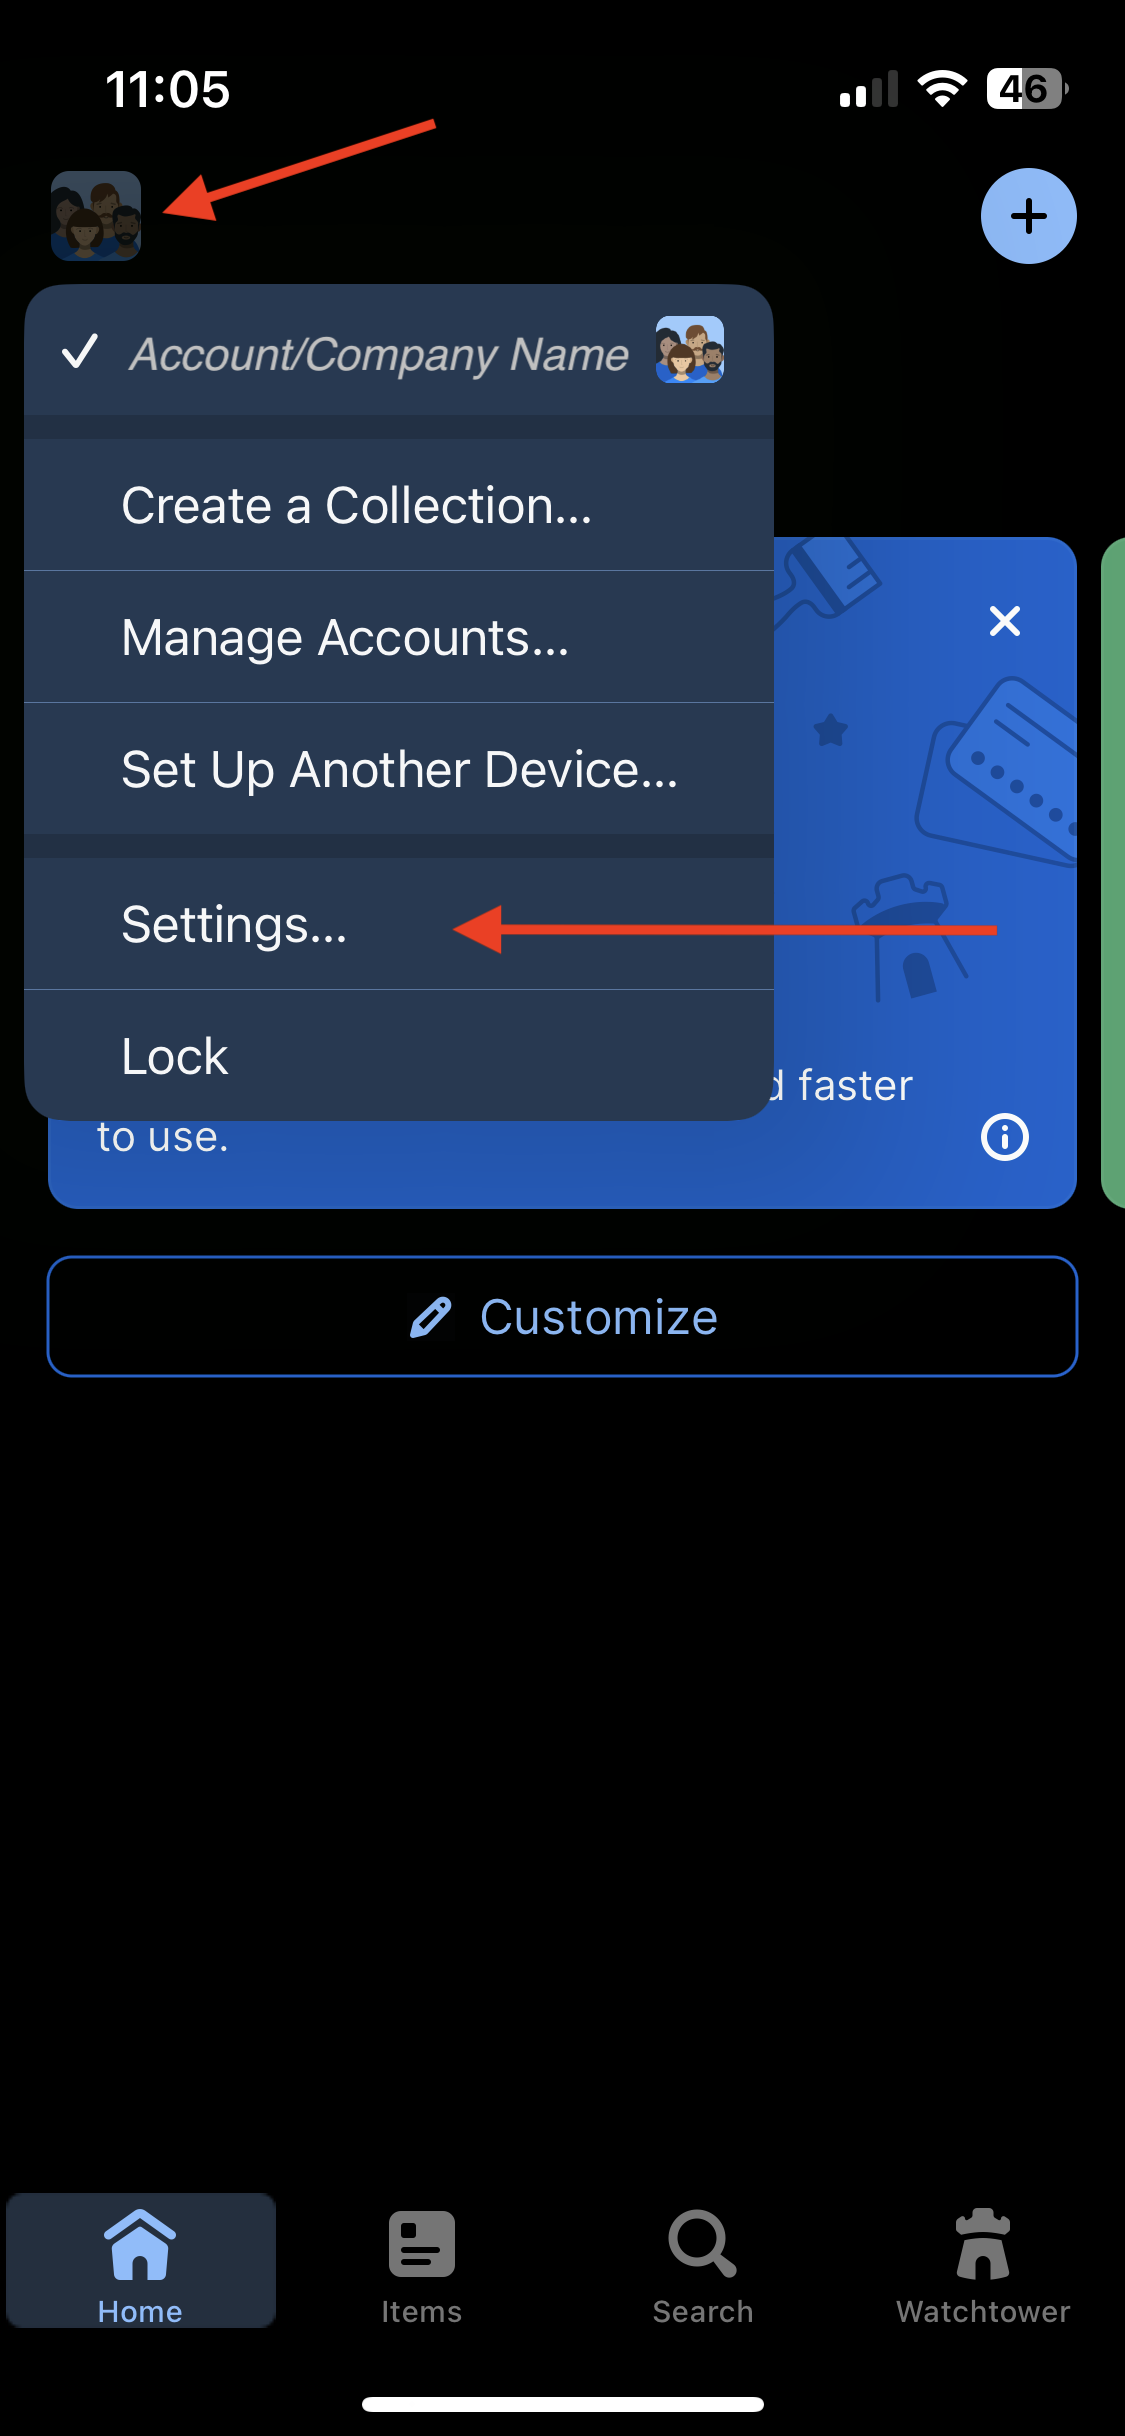
There are just a few settings we need to set before we're done. In the 1Password app, open the settings by hitting the icon in the top-left of the app and then Settings in the menu that appears. Next hit Security. (Note: the icon might have a custom look rather than a group of people.)
Verify Settings: Security and General
On the Security page, make sure the settings are as follows:
- Turn on Face ID or Touch ID (if it isn't on already)
- Set Auto-Lock to 2 minutes or less (default is 2 min)
Hit Settings to go back, and then go to General. Make sure Save new items in: is set to your named vault e.g. John Doe. It should not be set to "Employee" or "Private" or "Suggest a vault".
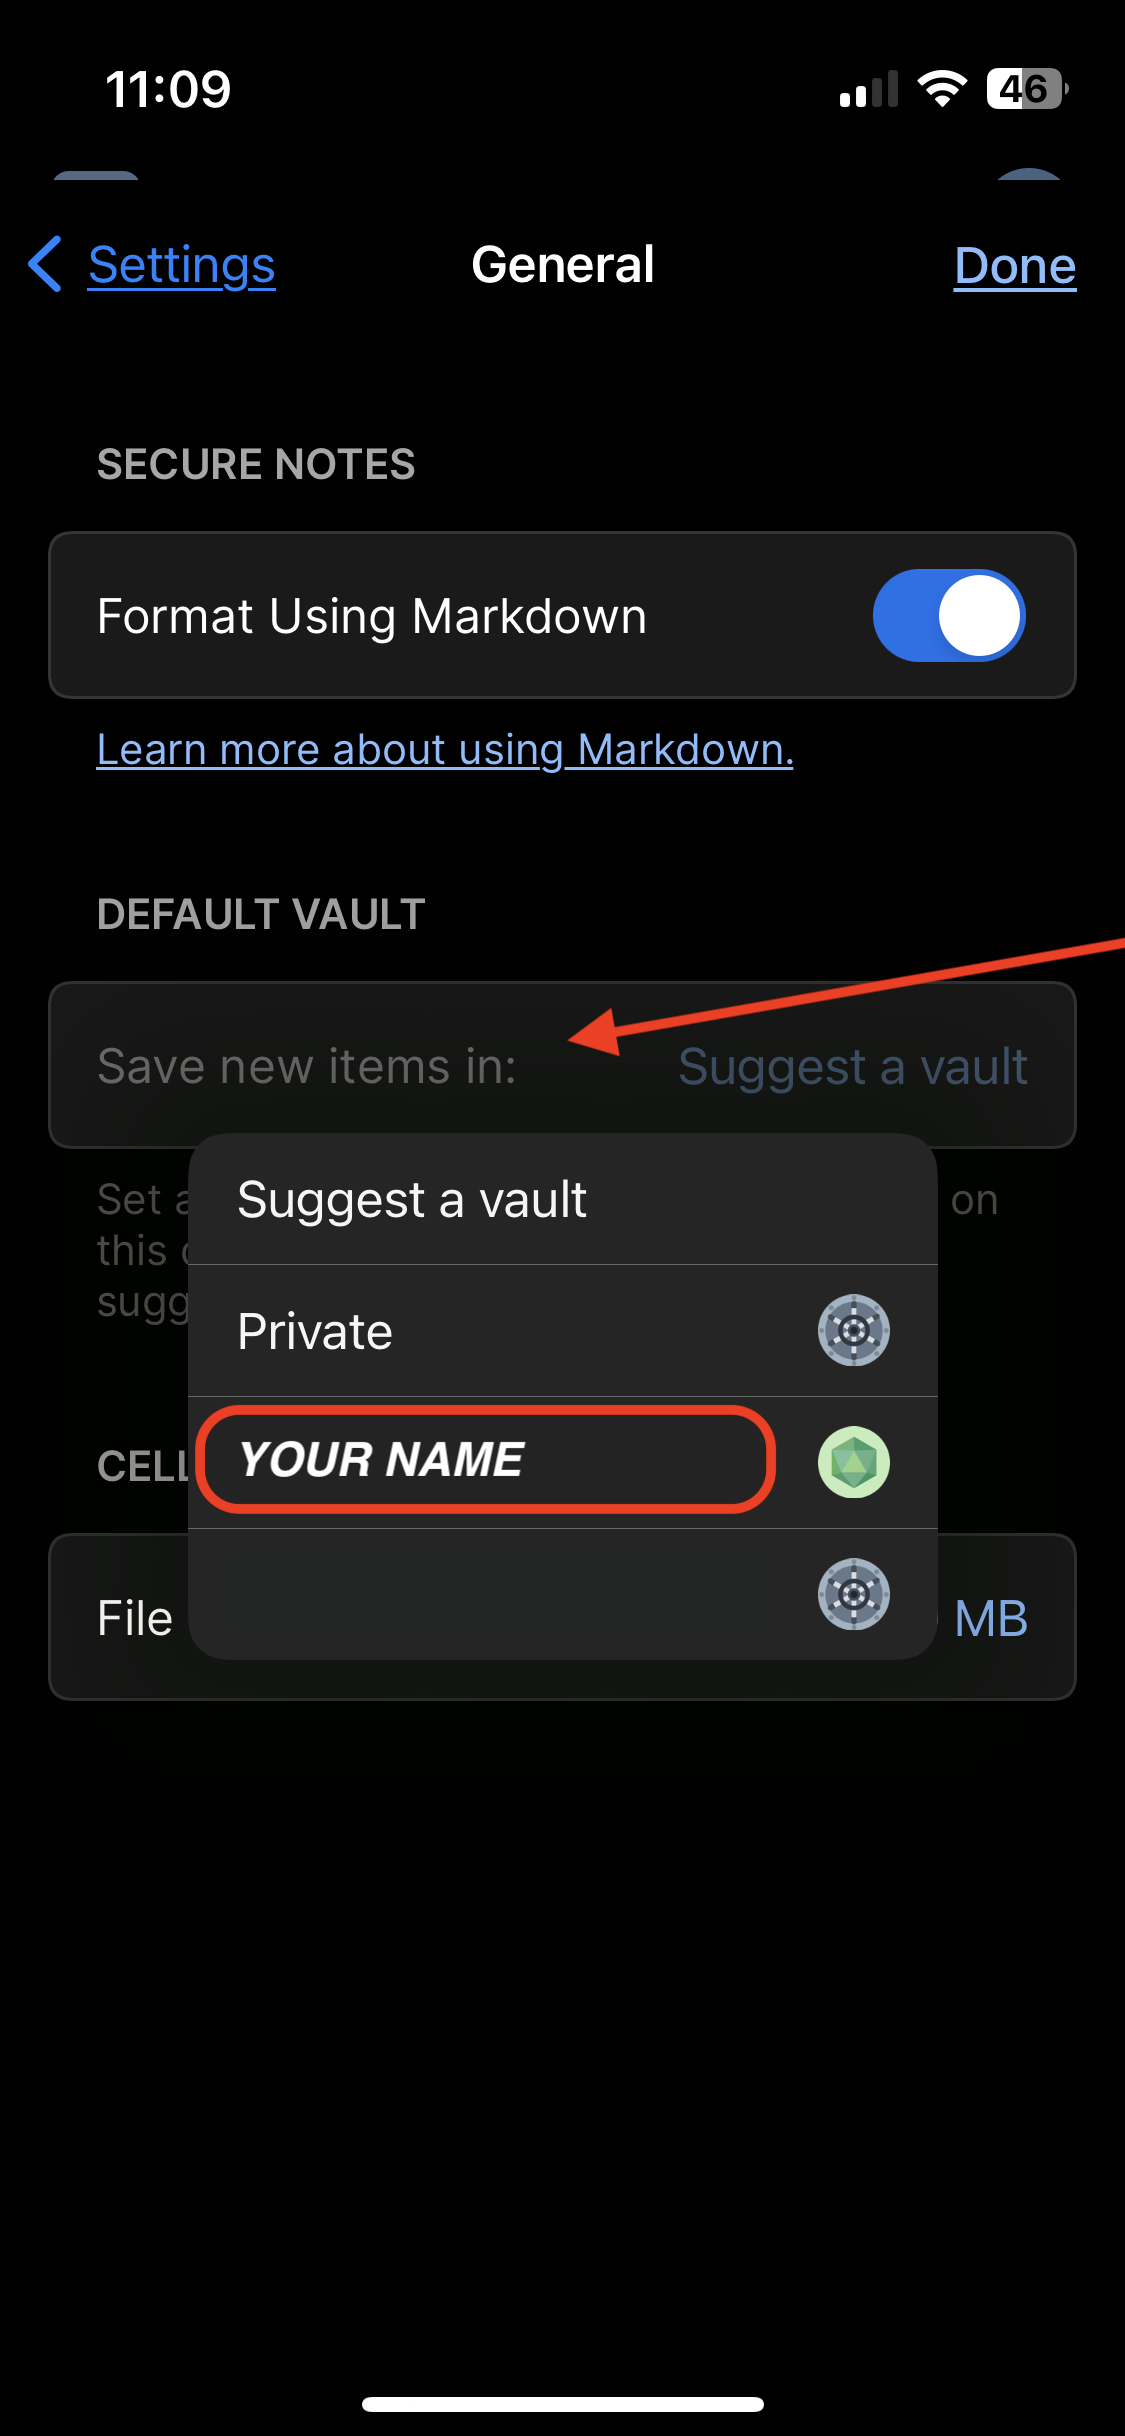
(Note: We do not use the Employee vault. All your user passwords should be stored in your named vault, i.e. the vault with your personal name. In v7 of 1Password we could turn off the Employee vault, but now we can't in v8. So we just ignore it.)
📌
As of May 1, 2024 the name of the "Private" vault has been changed to "Employee" for 1Password business accounts. This change was not made by us but by the developers of 1Password. Please continue to leave the Employee vault empty.
To reiterate: These are the standardized settings you should have...
- Security Tab
Face ID(orTouch ID) should be enabled ✅Auto-Lock on Exitshould be set to 2 minutes or less.Clear Clipboardshould be enabled. ✅Use Universal Clipboard...should be disabled. ❌Always show passwords...should be disabled. ❌- General Tab
- Default Vault
Save new items in:should be set to your named vault e.g.John Doe. It should not be set to "Employee" or "Private" or "Suggest a vault".
Done!
Pat yourself on the back, you're all done!... at least with installation.
For further reading, continue to Sections 6, 7, 8, and 9 to learn more about 1Password.