Firefox
![]()
Step 1: Visit the webpage
Click here:
https://1password.com/downloads/browser-extension/#browsers
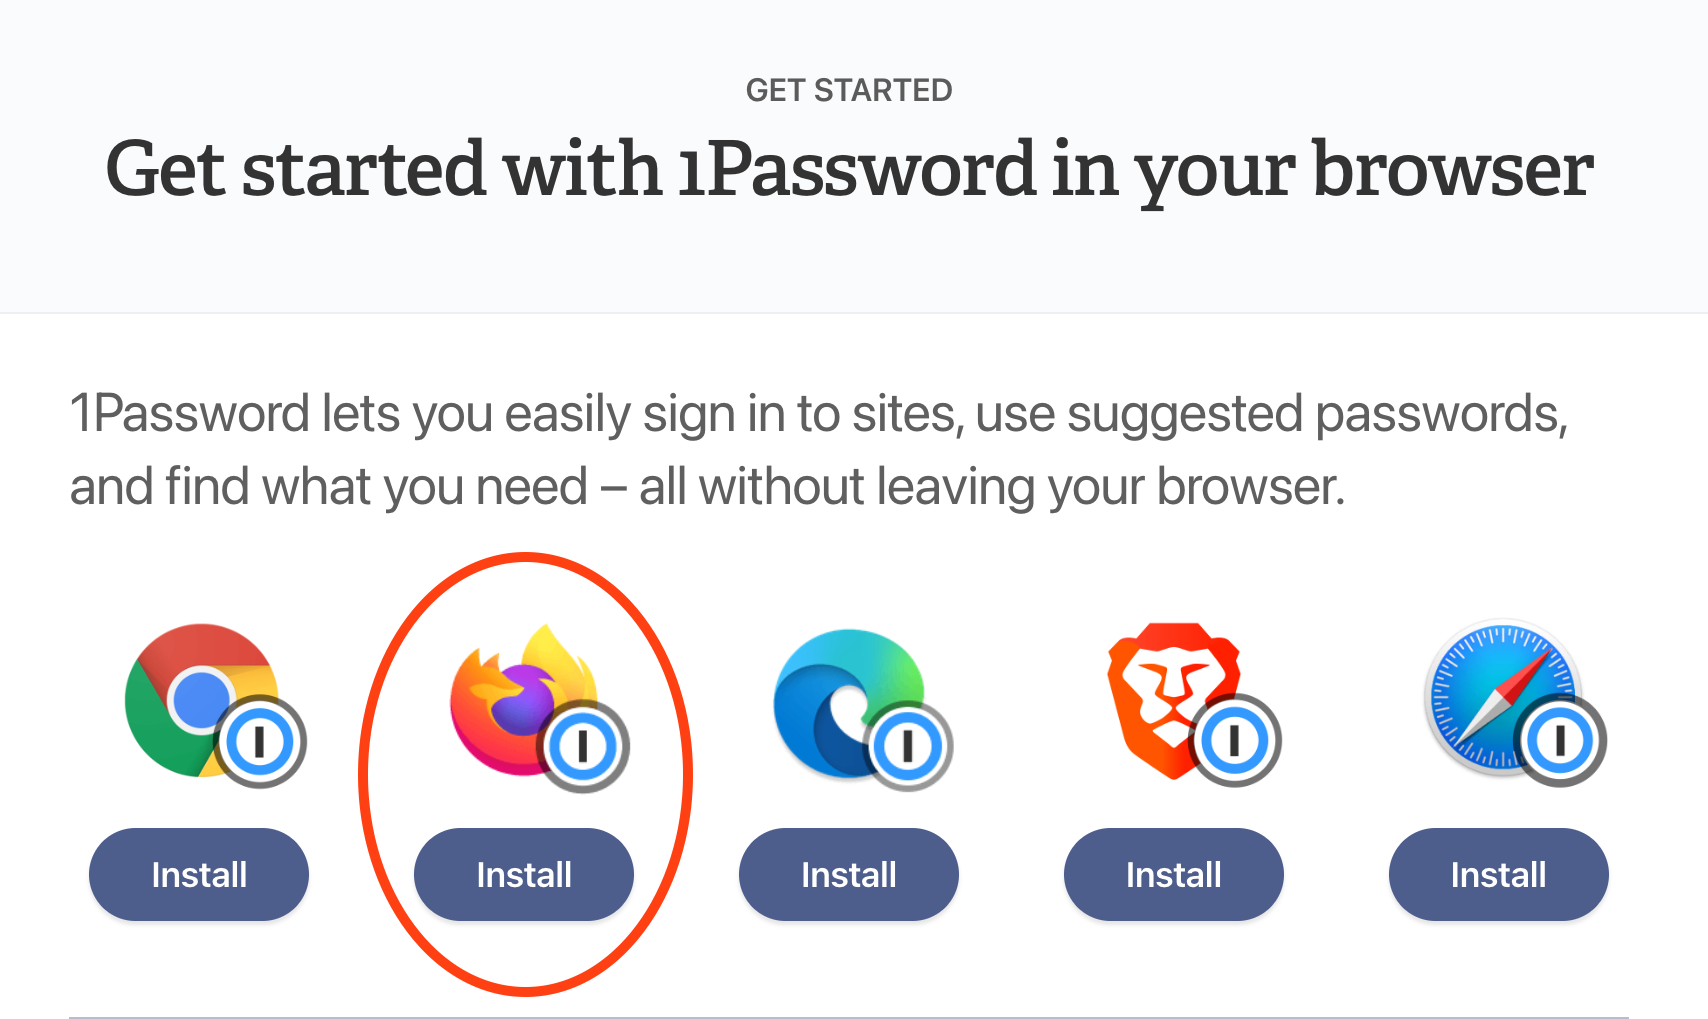
Step 2: Select Firefox
Click on the "Install" button under the icon corresponding to the web browser you are using at the moment. In this instance, Firefox.
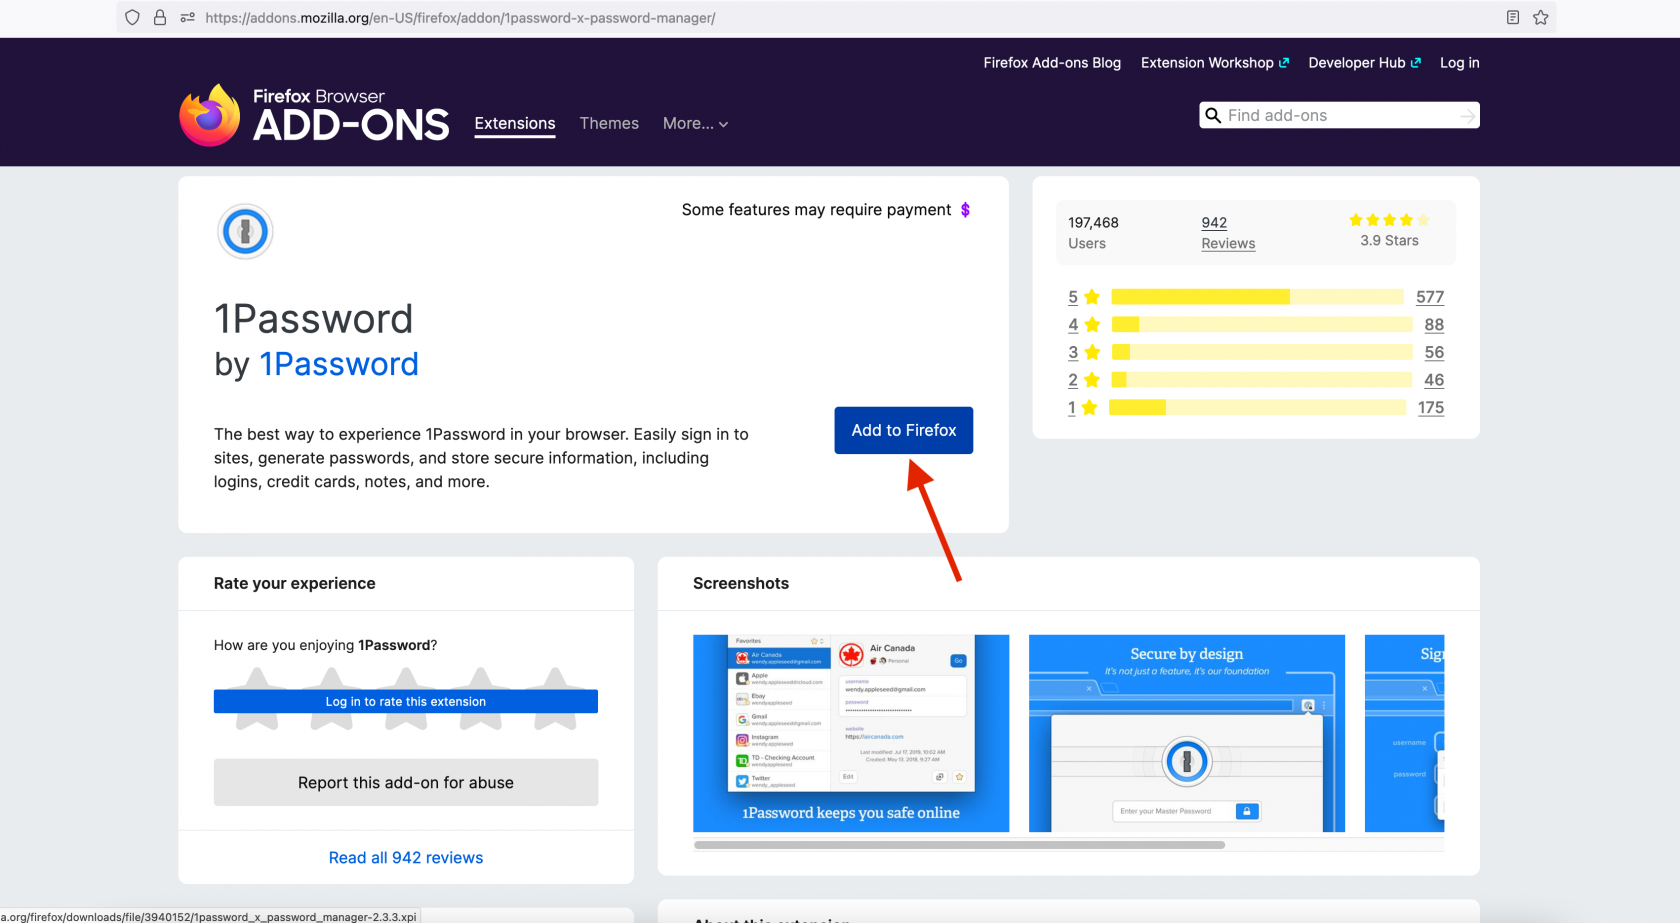
Step 3: Add the 1Password icon to your browser
Click on the "Add to Firefox" button:
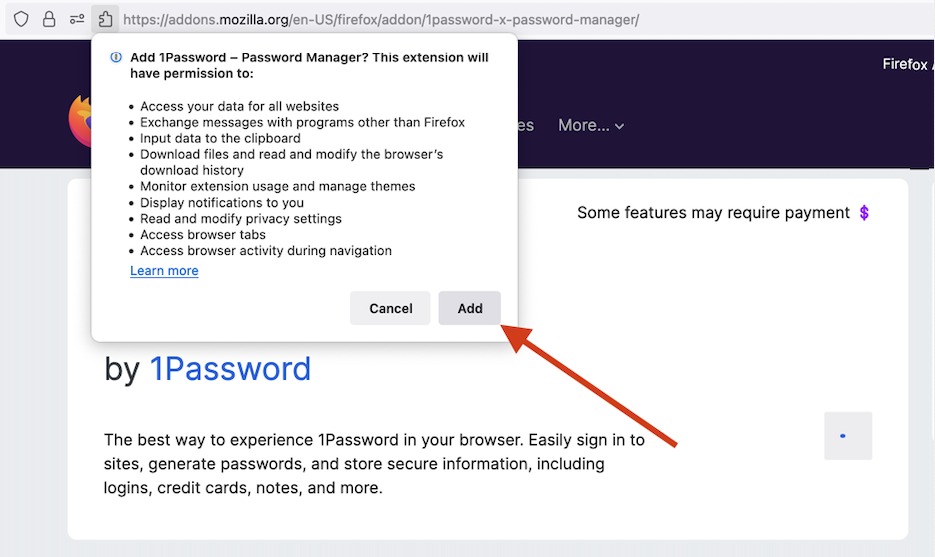
Step 4: Permissions
Click on the "Add" button on the pop-up.
📌
Note: it is both OK and recommended to allow it the same permissions in Private Windows.
Step 5: Log into 1Password
If your toolbar icon looks like this, skip to the next step: ![]()
If your toolbar icon looks like this: ![]() please click it and unlock 1Password with your password or biometric auth.
please click it and unlock 1Password with your password or biometric auth.
Step 6: Install Complete - but we're not done!
1Password should now work for autofilling login information.
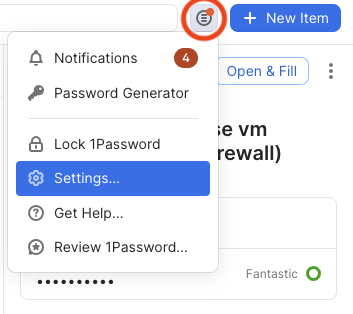
Step 7: Configure
- Click on the 1Password icon and then on the icon circled in red, then
Settings...as shown:
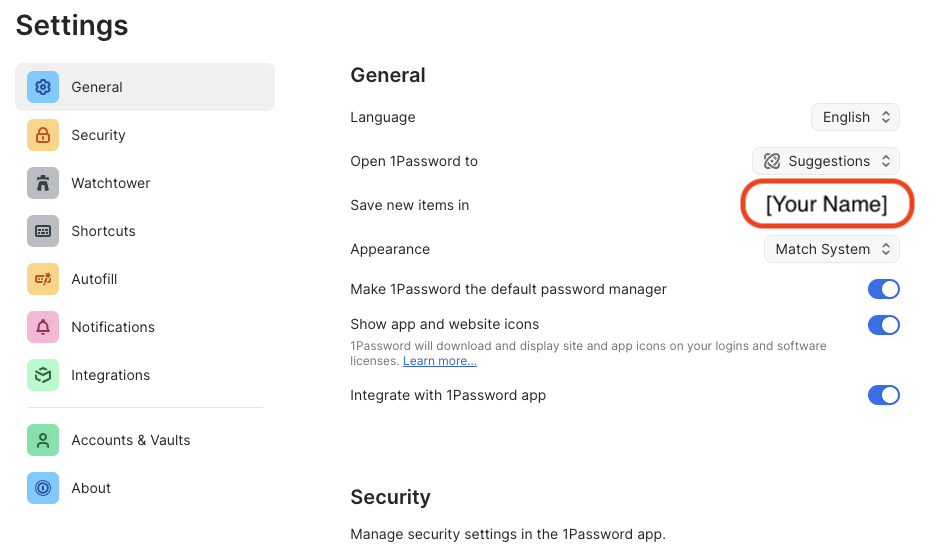
- In
General➝Save new items inplease ensure your named vault is selected! Example:
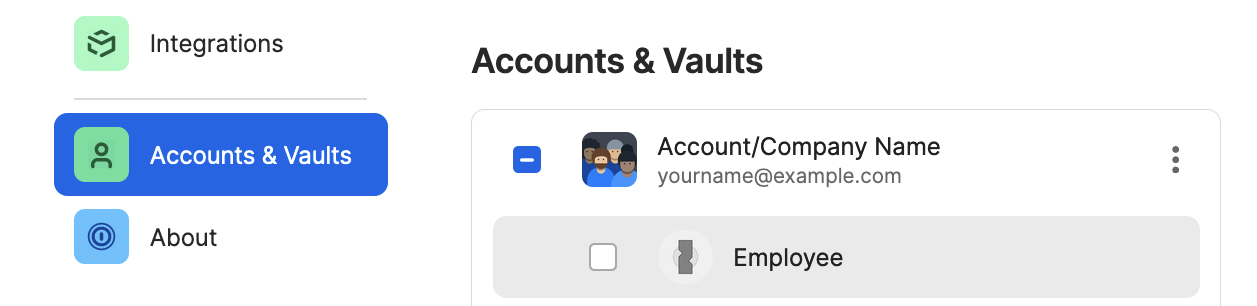
- Click on Accounts & Vaults on the left. Uncheck Employee:
📌
As of May 1, 2024 the name of the "Private" vault has been changed to "Employee" for 1Password business accounts. This change was not made by us but by the developers of 1Password. Please continue to leave the Employee vault empty.
Step 8: Proceed to Section 5
You're done!... at least with this part. Please proceed to Section 5 to install 1Password on your phone or other mobile device. Note that Section 4 is optional. If you have any questions, contact IT for help.