Section 7: Items — How to Create
Understanding Items
The standard unit of storage in 1Password is the Item. Items store the usernames, passwords, and other important information for each of the accounts you use. You can think of them like individual cards or documents that record all the information. There are large variety of categories that items can fall under. Common categories include Logins, Secure Notes, Credit Cards, Email Accounts, etc.
Most Used Item Categories
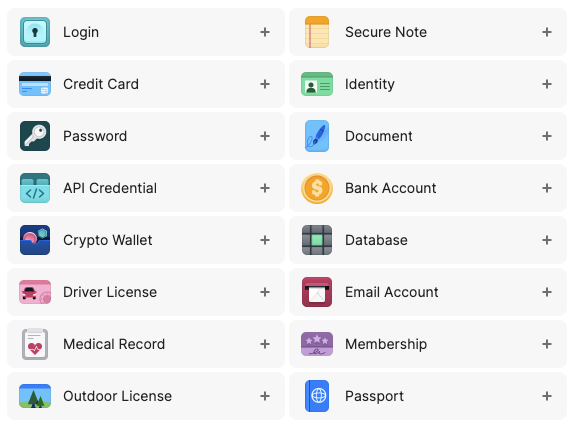
Here are a few of the most used categories along with a brief description for reference. Note that items are very customizable. However once an item is created it cannot be converted from one category to another. The category you choose determines what 1Password does with the information, and what pieces of information it expects to be entered.
Login
Login items include fields like username, password, website, and one-time password. This category is used for saving or filling logins. This is generally the widest used category. If it uses a username and password, this is the category to use. Almost all entries should be the Login type.
Secure Note
Secure Note items contain a text field, and that's pretty much it. It can be used for general information that doesn't fit into any specific category. One example might be a description of a method, directions, or a series of steps.
Password
Basically it's the same thing as a Login item. However, it assumes you won't add a username even though you can enter one. If you enter a username when creating or editing a Password item, it will be converted into a Login item. This means that generally this is for things like passcodes for door locks, security systems, devices, etc. Unless you're 100% sure Password is the right type, please use the Login type.
Credit Card
Credit Card items include fields like card number, verification number, and expiry date for your credit and debit card information.
Email Account
Email Account items include fields like username, server, port number, and authentication method. This is useful for setting up email on multiple clients and devices. Use Login instead.
Creating a New Item
Here we'll guide you through the process of creating a new item within 1Password.
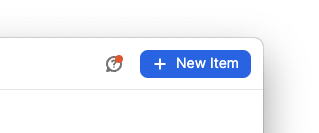
Step 1: Click the New Item button
In the top right-hand corner of the 1Password app window should be a blue button with the label + New Item. Click it to start the process of creating a new item.
Step 2: Choose an Item Category
Because the Login Item is the most commonly used item in 1Password, we'll use that as an example. While you can choose whichever item you need, the process is relatively similar for all other items. Click on a category name to continue.
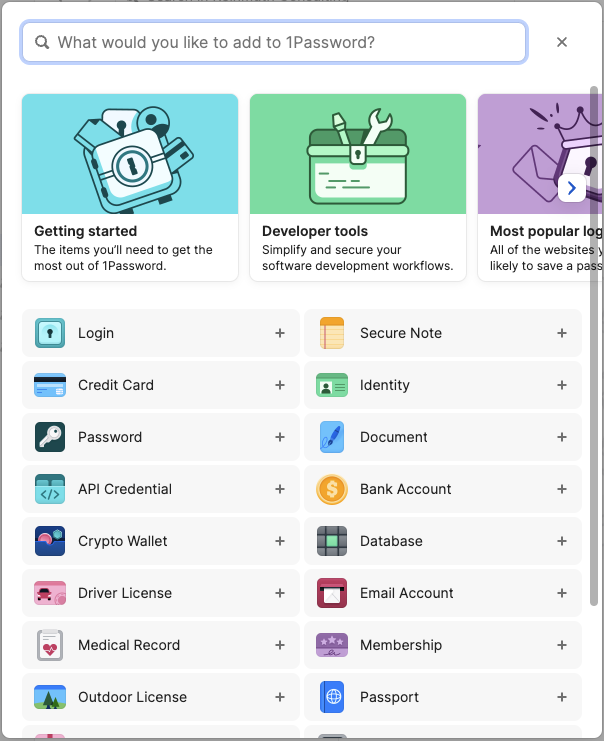
Note: each category is marked with a + sign.
Step 3: Enter and Edit Information
You will notice that for a new Login Item there are some fields with text in purple. These fields cannot be removed from the item. But if they are left blank, the field will not appear when viewed normally in the app.
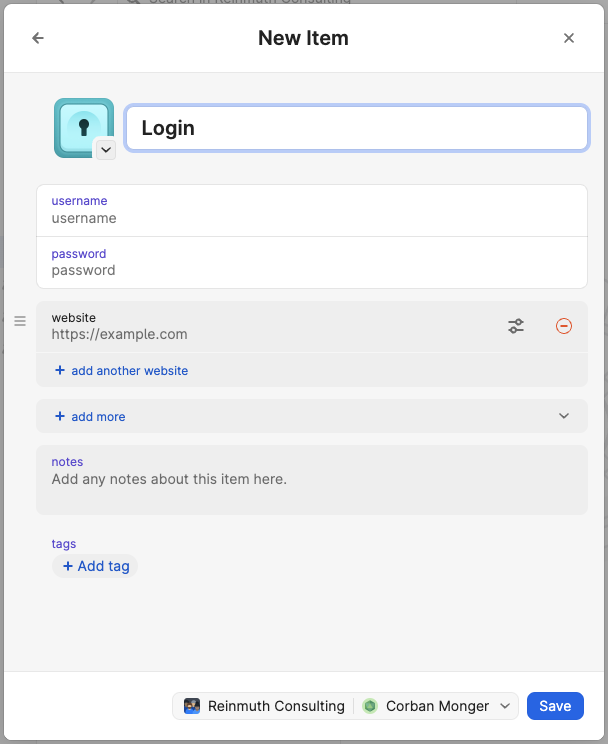
Enter the appropriate information for each field, making sure that information is correctly copied. The information must be identical to that on the website or service. If the information is not correct it is possible to be locked out of an account.
A List of Fields
Here is a list of each field as it appears in the New Item along with a description of each.
- title - The name of the Item, usually including the service or website.
- username - Usually an email address, but sometimes it's just something made up.
- password - The secret string of characters for that user.
- website - The website address which is used for "Open and fill" through the browser plugin.
- notes - Text can be added for notes, instructions, or searchable keywords.
- tags - Tags are an extra feature in 1Password that can be used for organization.
For more information about creating passwords, read Section 8: Passwords and URLs.
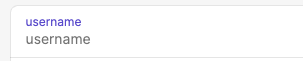
A Note about Labels ⚠️
Each field has two lines: the
labeland thedata.
The top line (in purple in this example) is the label which tells you what the data is. The bottom line contains the actual data, in this case the username itself. You can edit labels to be something other than just "username" but generally you shouldn't need to. The vast majority of the time you will only be editing the line below the label: the data.
A Note about Websites 🌐
Most Login Items you create will be for services which have a website. In order for "Open and fill" to work correctly, the website address needs to be entered into the
websitefield.
Note also that there are additional fields that can be added to an Item, one of which is the
URLfield. The URL field does not work with "Open and fill" so do not use it for that purpose. For more information, read Section 8: Passwords and URLs.
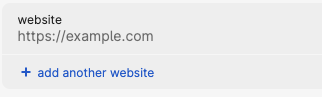
Adding more fields (+ add more)
You'll notice that there are clickable areas with the label + add more. If you click this, it will display a list of other fields that can be added to the New Item that you are currently working on. You can add as many as you like as needed. Here's a list of available fields for a Login Item:
- Security Questions
- Text
- URL
- Address
- Date
- Month/Year
- One-Time Password
- Password
- Phone
- Sign in with
- Section
- Attach a File
Security Questions
This field is unique to Login Items. Many websites and services require security questions and answers to be added when the account is created as an added layer of security. These questions are usually personal information unique to an individual. However, information like this is not always secure or secret. Which is why we recommend using the random word generator to create more secure answers.
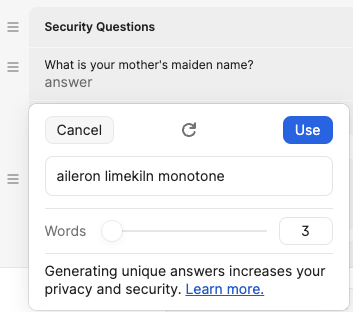
Similar to the password generator, when you click in the second line of the field, you see a card that allows you to generate new random words. Click Use to place the newly created words into the field. You can also customize the question in the field label to match that which is chosen on the service or website. Make sure when you copy the answers to the website that they are identical. Not copying them correctly can result in being locked out of an account.
Add as many Security Question fields as is needed with the + add another question button.
Removing a Field
Sometimes you don't need a field you created. In that case they can be removed by clicking the red button on the right end of a field. It looks like a dash inside a circle.

Step 4: Save
Before saving, make sure that the Vault selected, next to the Save button, is your Named Vault. It should not be set to Employee.

Once you are finished entering information, and you're confident the information is entered correctly, click the Save button.
Tip ✨
It can sometimes be easier to simply add the title, username, and website, then save and edit the item. If you make errors, don't worry. You can edit the Item later.
📌
As of May 1, 2024 the name of the "Private" vault has been changed to "Employee" for 1Password business accounts. This change was not made by us but by the developers of 1Password. Please continue to leave the Employee vault empty.
Editing Items
To edit an item, select the item in the list to view its contents, then click the Edit button in the top right-hand corner of the window.