Recording a Take in OBS
Step 1. Open OBS from the Dock
From the Dock, launch the OBS app. The icon looks like the following:
Step 2. Start a Recording by pressing the "Start Recording" button
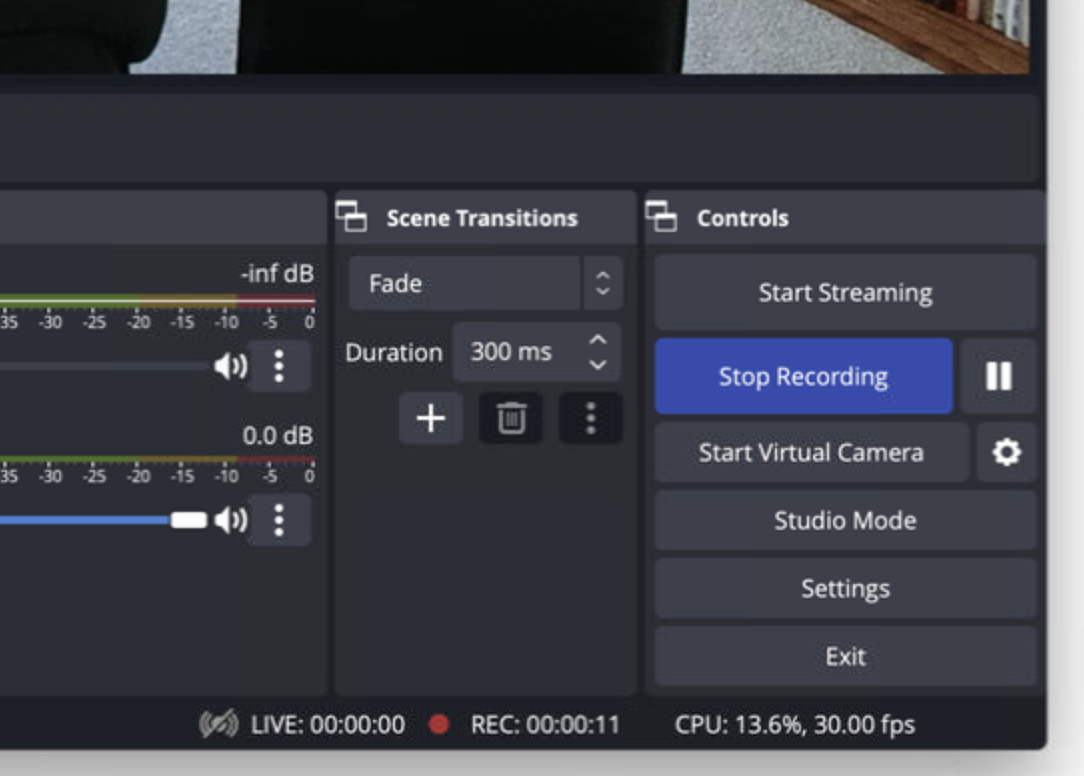
Press the "Start Recording" button on the right side of the app.
 Do not click the "Start Streaming" button!
The "Start Recording" button will turn blue and now read "Stop Recording." There is also an indicator at the bottom of the app to show you are recording along with the time elapsed.
Switch to Firefox to start the teleprompter. Read your script through the teleprompter glass. Use the controls in the Firefox window to control the Teleprompter text.
Step 3. Finish the Recording
When you're finished, switch to OBS and click the blue "Stop Recording" and a new .MP4 file should be completedcreated onand placed into a folder within Dropbox. The folder is named "Micro Modules" but if the Zoomfolder iMac'sname desktop.is changed, the .MP4 video files may not be placed into that folder until a setting in OBS has been corrected to match it.
If you’d like to record another video, simply click the "Start Recording" in the OBS app again. Don't forget to stop the recording when finished!


