App Setup Method 2: Scan QR Code (requires mobile device)
![]()
Sign in and Configure the 1Password App with Your Mobile Device
For this section you will need your mobile device (iPhone, Android, etc) with the 1Password app installed and already signed in. If you've never signed into the 1Password app on your mobile device, you will not be able to proceed with this method of Mac/Windows app setup.
If you're not sure what to do, contact IT and they can help.
You will also need the Mac/Windows 1Password app installed and open. Installation is covered in Section 2.1.
Step 1: Click Sign In to Show the QR Code
For this step you will need your Account Details from Step 1:
If you don't know your secret key or password, contact IT and they can help.
HitClick Sign In to begin the process of adding your account to the app.
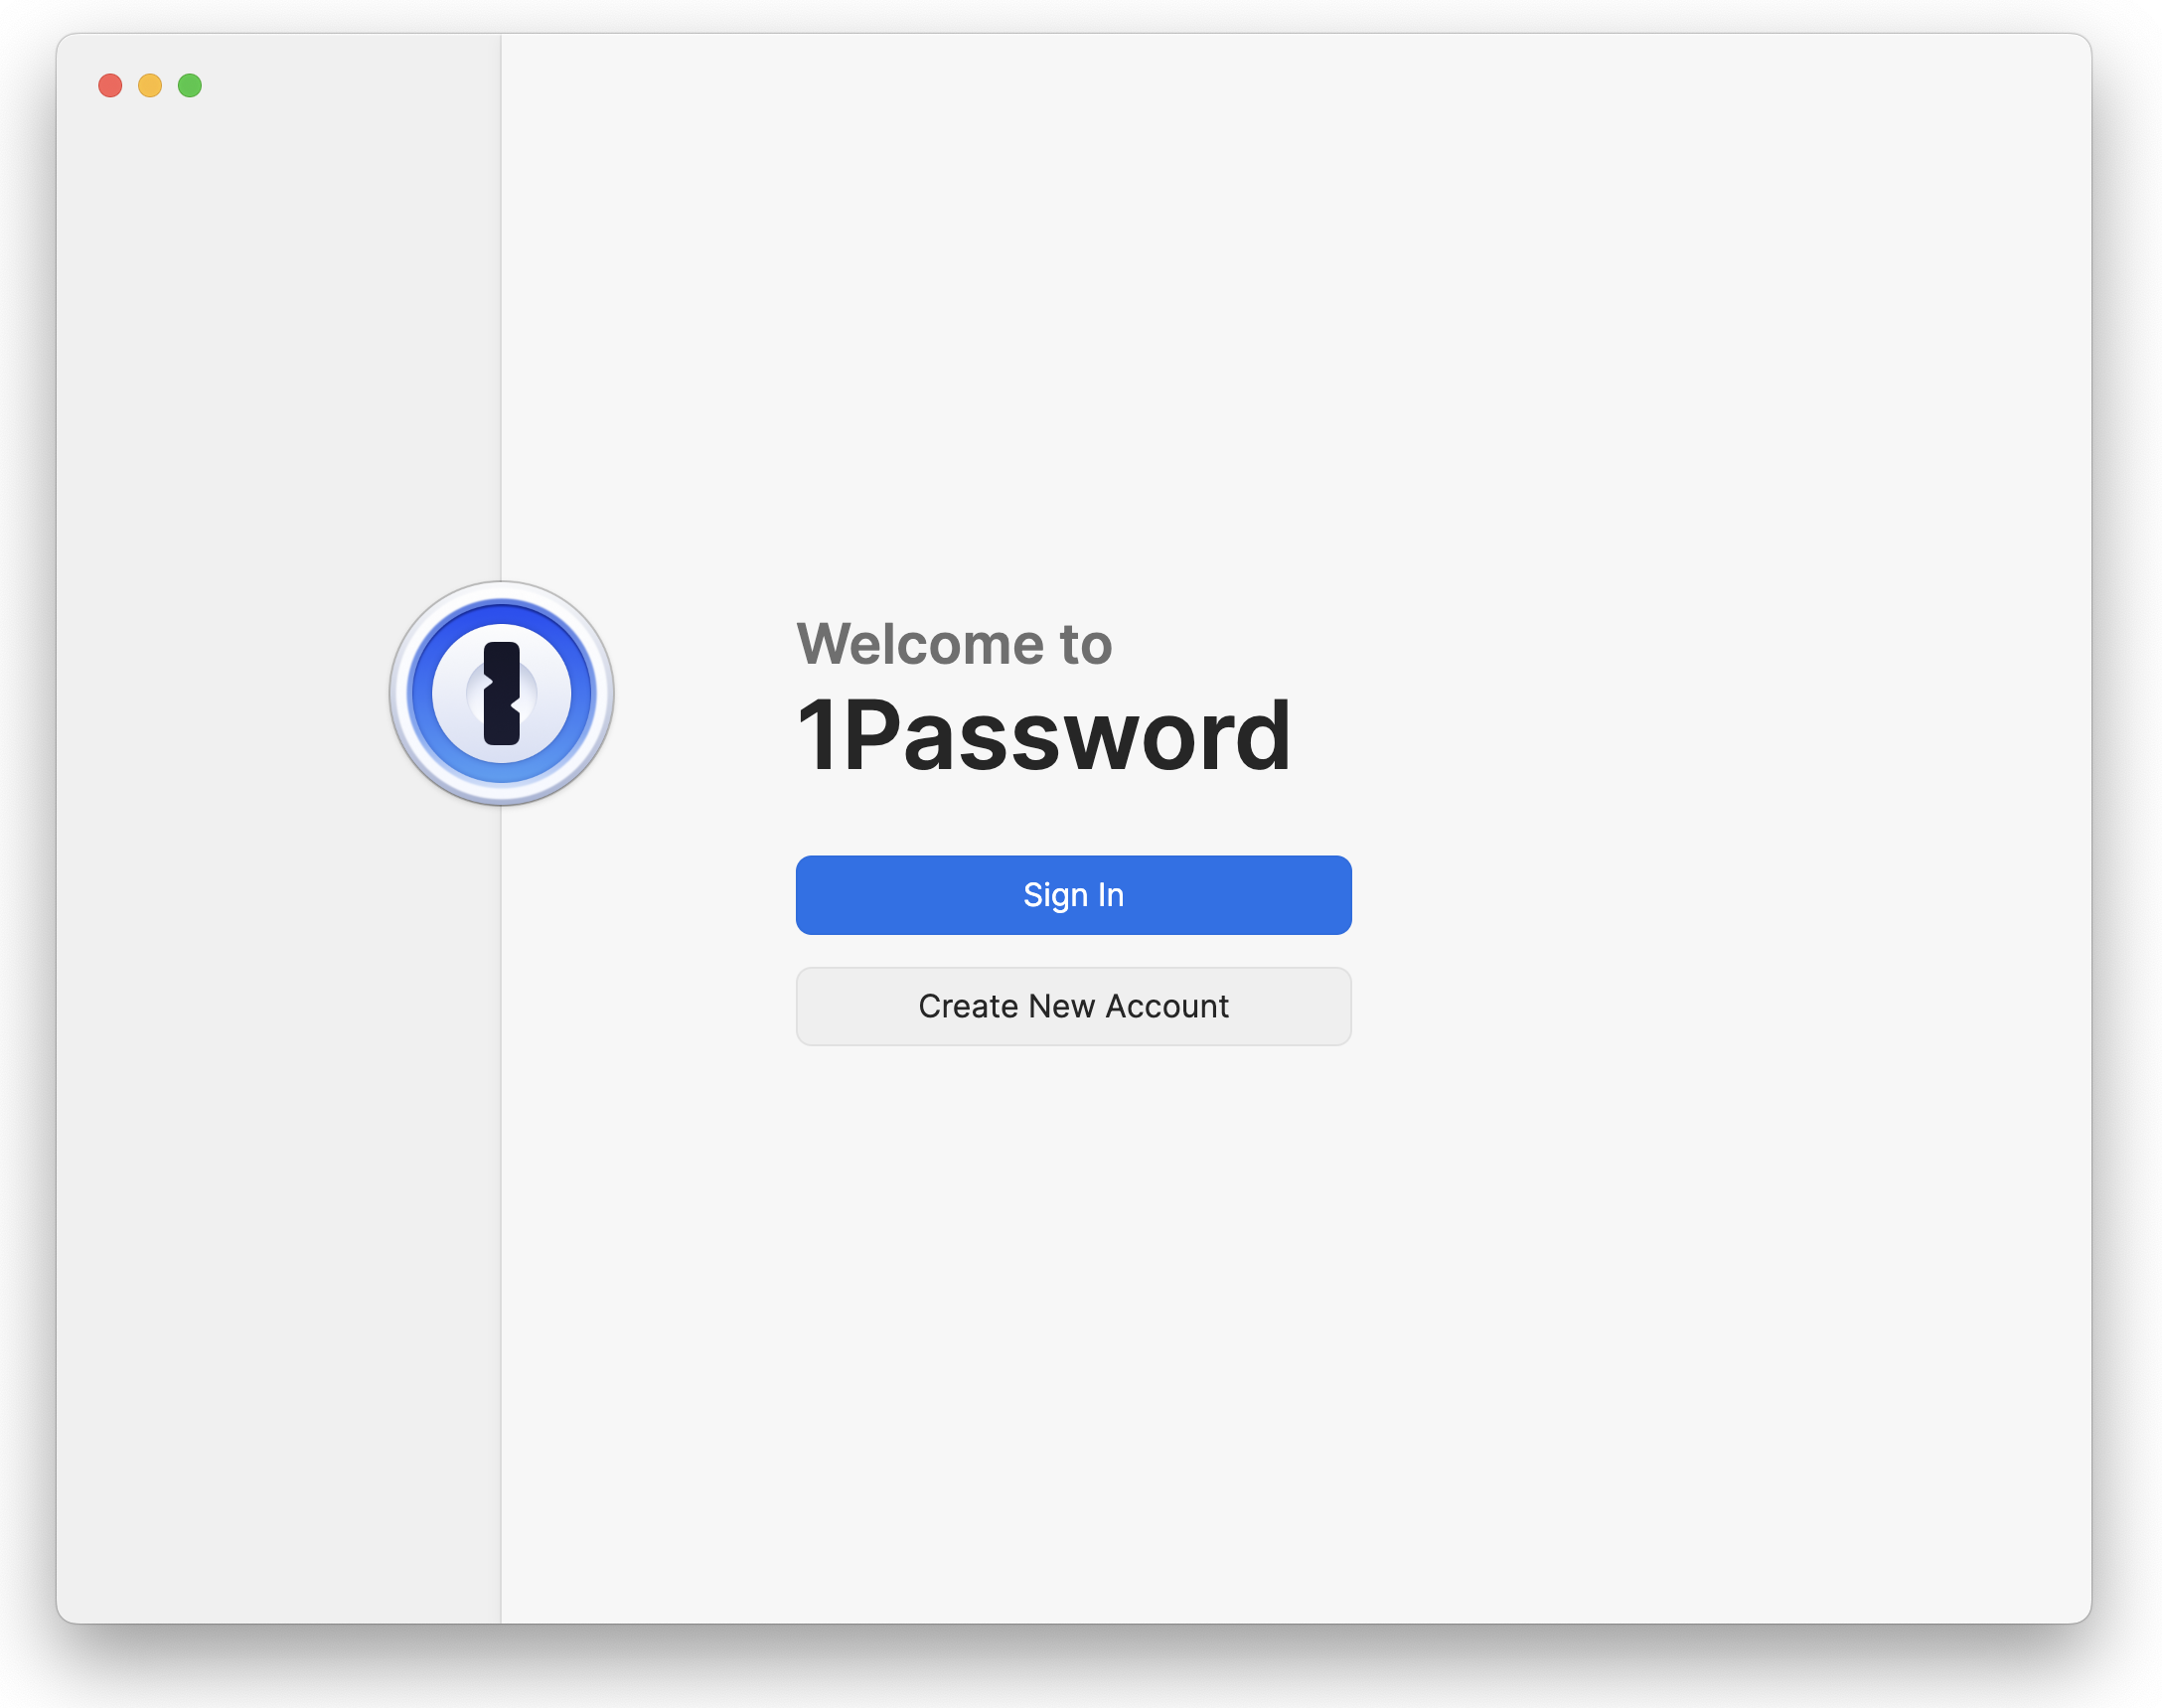
WhenThe promptedSign In prompt will appear. On the left side there is a QR code that you will need to scan with optionsyour tomobile sign in, choose Enter account details.device.

In
Step 2: Scan the nextQR prompt,code enterwith Your Mobile Device
Open the four1Password Accountapp Details ofon your 1Passwordmobile account.
The Sign-In Address isTap the same for everyone, but your email, Secret Key, and Password are unique to your account.
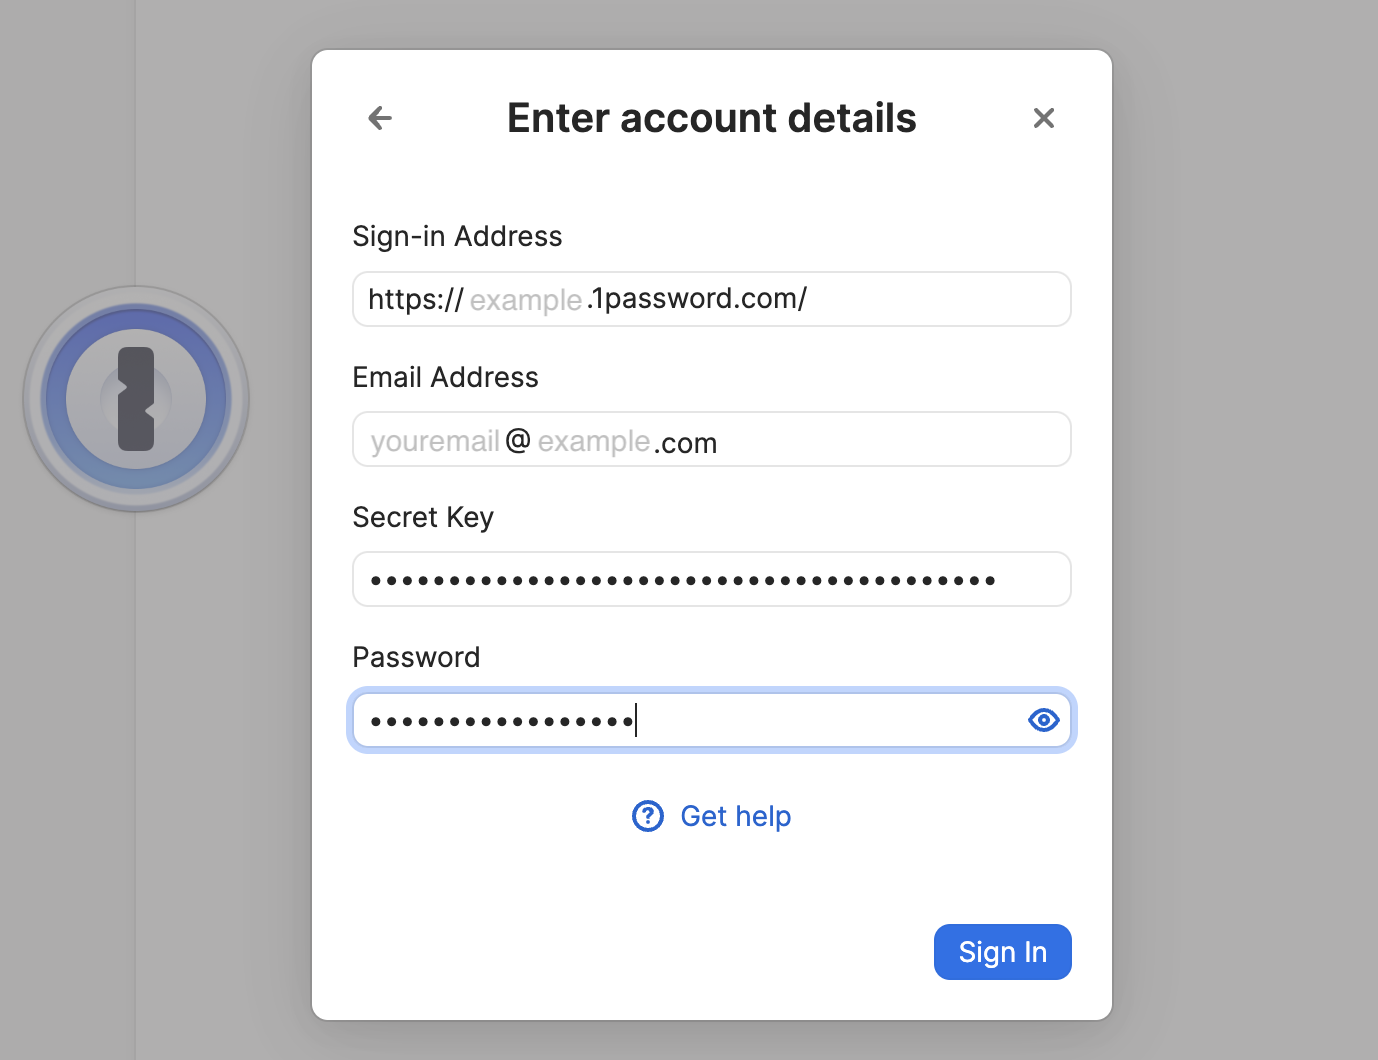
Remember: Please do not write down (or print) either the Password or the Secret Key. The password is your "one" password, your master password, and your memorization of it is critical. The Secret Key is kept safe by the IT staff if you need iticon in the future.top left to bring up the menu. Tap the option for Scan QR Code... and then manuver your mobile device's camera to capture the QR code displayed in the Mac/Windows 1Password app.
Step 4: Configure
Activate app by clicking on its window or the app icon in the Dock.
Head up to the 1Password menu ➝ Settings.
Click on the Security tab, configure as follows:
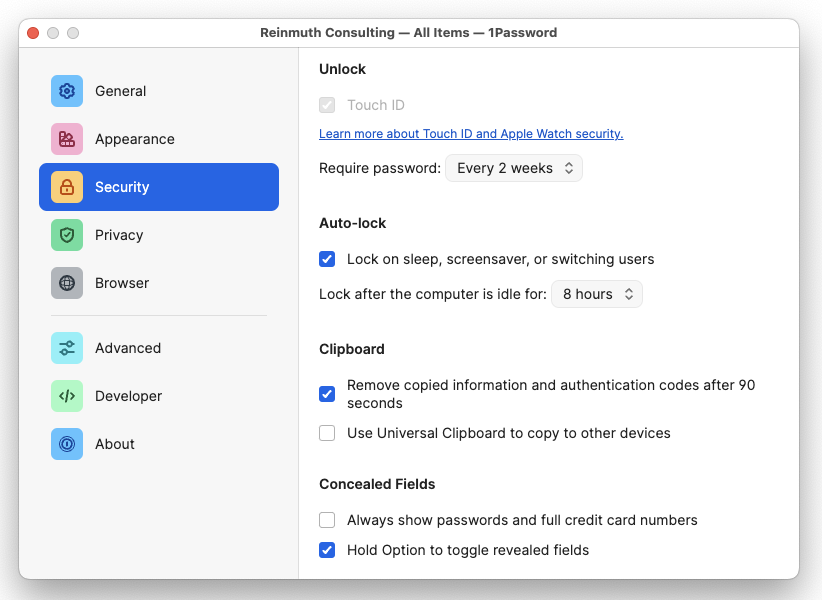
Feel free to lock this down further, these are the minimums. For Example, setting "Lock after the computer is idle" to 4 hours, rather than just 8 hours.
In the General tab, under the Default Vault heading, change the Save new items in: setting from "Suggest a vault" or "Employee" or "Private" to your named vault e.g. John Doe.
To be clear: Default Vault should be the user, not Employee.
📌
As of May 1, 2024 the name of the "Private" vault has been changed to "Employee" for 1Password business accounts. This change was not made by us but by the developers of 1Password. Please continue to leave the Employee vault empty.
To reiterate: These are the standardized settings you should have..
- Security Tab
- Touch ID should be enabled for Mac (if available) ✅
- Auto-Lock:
- Check ✅
Lock on sleep...- Set
Lock after the computer is idle...to 8 hours. You may set a more strict time such as 4 hours.- Clipboard:
- Check ✅
Remove copied information...- Uncheck 🔲
Use Universal Clipboard...- Concealed Fields:
- Uncheck 🔲
Always show passwords...- Check ✅
Hold Option to toggle revealed fields- General Tab
- Default Vault
Save new items in:should be set to your named vault e.g.John Doe. It should not be set to "Employee" or "Private" or "Suggest a vault".
Close the Settings window after you have finished with both the General and Security settings.
Step 5: Proceed to Section 3!
You're done!... at least with this part. Continue to Section 3 to install the browser plugin/extension of your choice. If you have any questions, contact IT for help.