Safari
![]()
Step 1: Open the Self-Service app
Find the Self-Service app on your Dock and click to run the app. If the app is not located on your Dock, you can find it in the Applications folder using Finder. You can also quickly launch the app from Spotlight by using Command + Spacebar (⌘+ ).
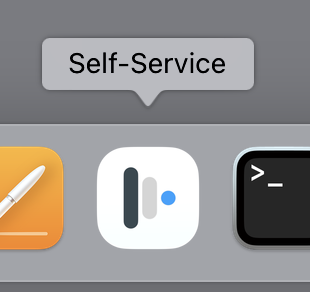
Once the Self-Service app is running, click the Your Apps tab. 1Password for Safari should appear at the top. If it's not there, scroll until you find it or search by name.

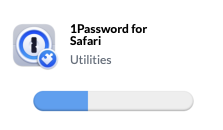
Step 2: Install Now
Click the Install Now button under the app heading called 1Password for Safari and wait for the process to complete.
Step 3: Verify the extension is installed and enabled
Head up to the Safari menu ➝ Settings...
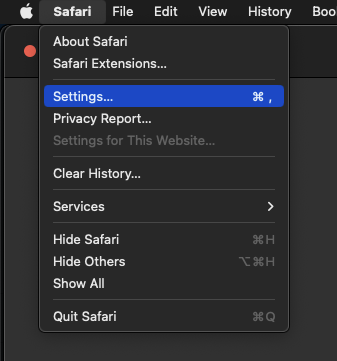
In the Settings window, go to the Extensions tab.
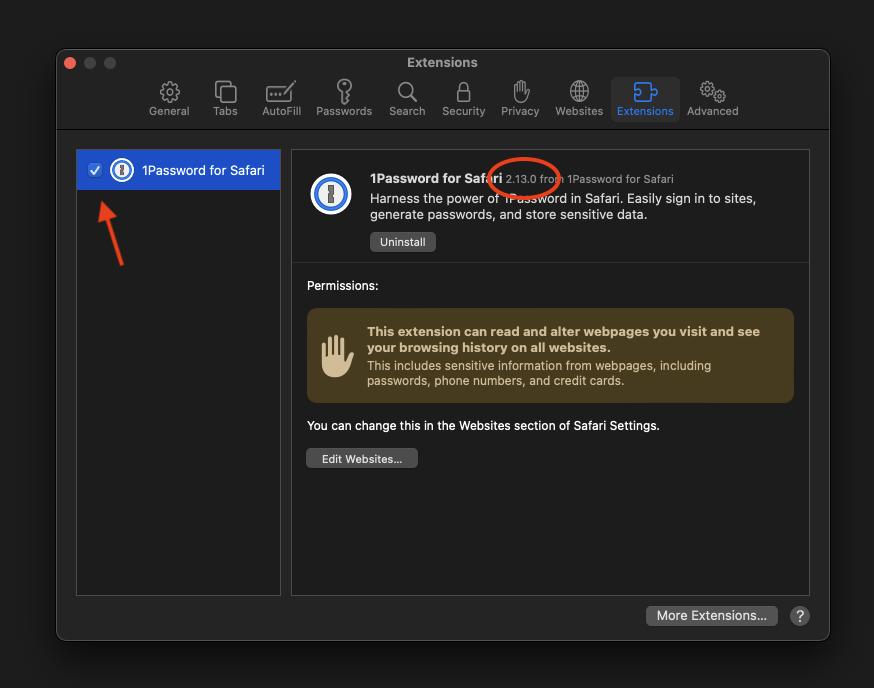
Verify that the 1Password extension has been installed:
- Make sure the check box next to "1Password for Safari" is checked. ✅
If the checkbox is unchecked, when checked for the first time you may be asked :
"Are you sure..."
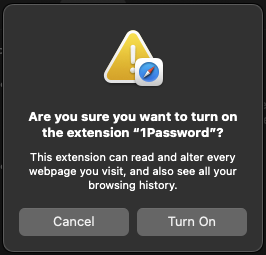
Hit Turn On to activate the extension.
- Also, make sure the version number is
2.12.0or higher. - Finally, look at the top of an open Safari window. You should see the 1Password browser button now next to your search bar.

If the extension does not show up in the extensions list or the button does not show up either, try restarting Safari. If it still does not show up, contact IT for help.
Step 4: Log into 1Password
Click the 1Password browser button icon.
- If your toolbar icon looks like this:
 skip to Step 6.
 - If your toolbar icon looks like this:
 please click it and use your password (or TouchID!) to unlock - autofilling will not work until you unlock 1Password.
Step 5: Configure
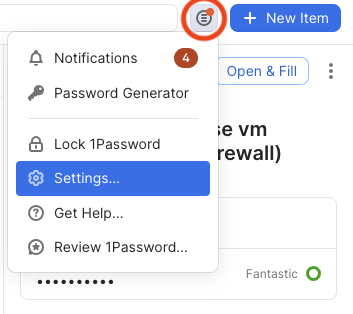
In the Safari browser, click on the 1Password icon next to the address bar and then click on the "menu" icon (circled in red below), then Settings... as shown:
There are two tabs you will need to change settings in:
- Autofill & save
- Accounts & vaults
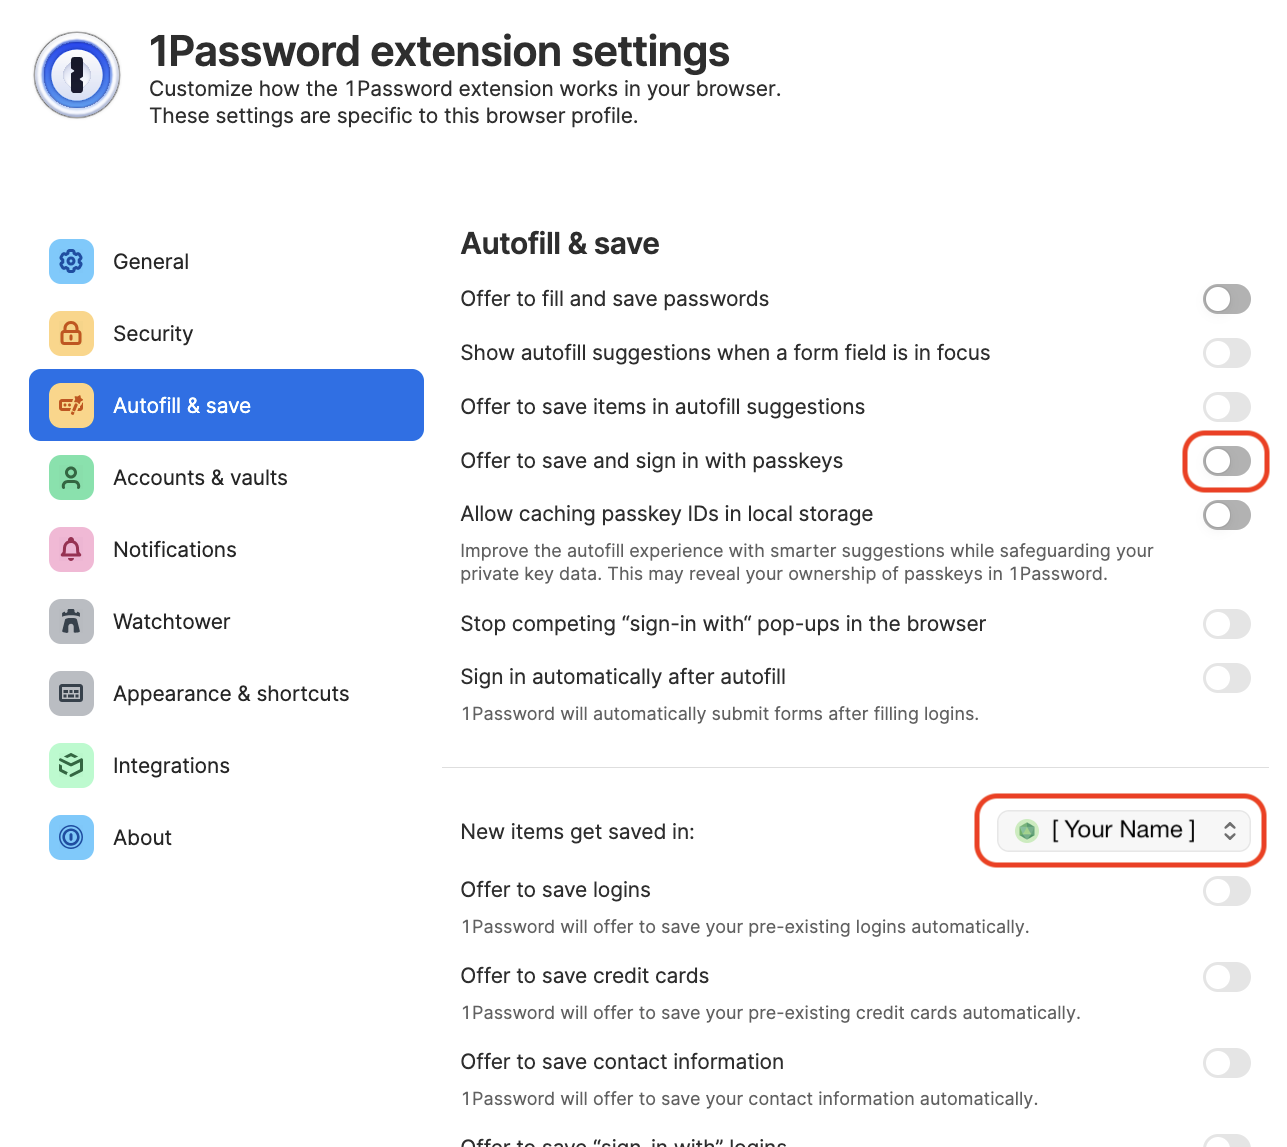
Autofill & save
Click on the Autofill & save tab, and then disable "Offer to save and sign in with passkeys" because we currently do not use passkeys.
Make sure the vault selected next to "New items get saved in:" is set to your named vault e.g. John Doe. It should not be set to "Employee" or "Private" or anything else.
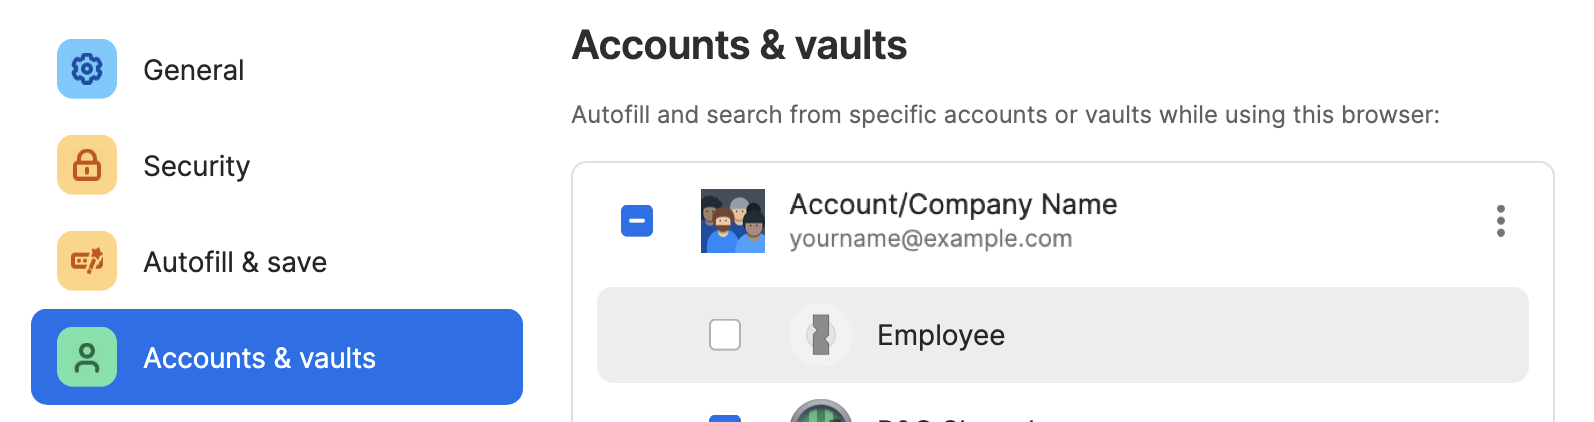
Accounts & vaults
Click on the Accounts & Vaults tab on the left. Uncheck Employee:
📌
As of May 1, 2024 the name of the "Private" vault has been changed to "Employee" for 1Password business accounts. This change was not made by us but by the developers of 1Password. Please continue to leave the Employee vault empty.
Step 6: Proceed to Section 5
You're done!... at least with this part. Please proceed to Section 5 to install 1Password on your phone or other mobile device. Note that Section 4 is optional. If you have any questions, contact IT for help.
No comments to display
No comments to display